As AI capabilities rapidly expand across the Microsoft Power Platform, many organisations are looking for ways to build custom GPT-powered chat experiences directly inside Power Apps. With Encodian Flowr’s AI – Run Prompt (Text) action, you can easily connect Power Apps to Azure OpenAI models and create conversational chatbots with memory, tone control, and dynamic responses.
In this tutorial, we’ll show you how to build a complete GPT chatbot solution using:
You’ll learn how to:
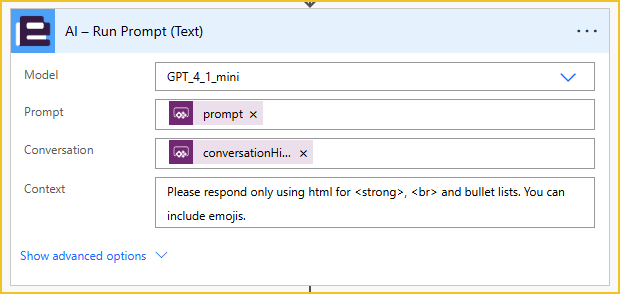
Encodian’s AI – Run Prompt (Text) action lets you choose from several Azure OpenAI models, including:
You can control:
For this tutorial, we’ll use GPT 4.1 Mini, and request HTML output to ensure compatibility with Power Apps (which supports HTML via the HTML Text control).
Before building the Power App UI, we need the flow that receives a prompt, sends it to the AI model, and returns a response.
A button inside your app will trigger the flow.
It will accept two inputs:
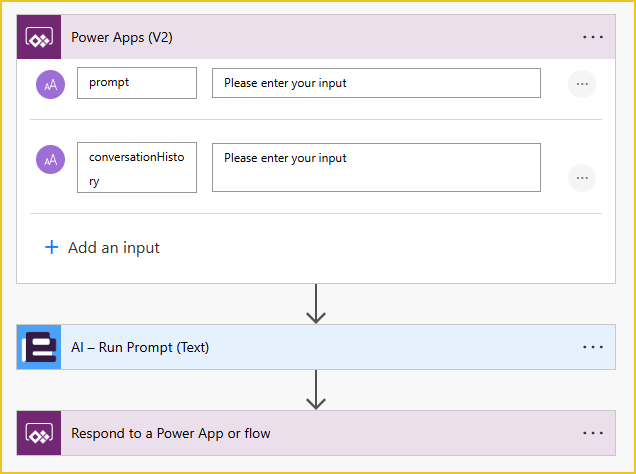
Example configuration for using the AI – Run Prompt (Text) action:
Requesting HTML output overrides this model’s default Markdown output, which Canvas Apps have no built-in way to display. However, it can display HTML text using the ‘HTML text’ control. So this ensures the response is ready to be rendered in Power Apps without any formatting conversions. The request to include emojis is simply to make the chat more fun and human-like.
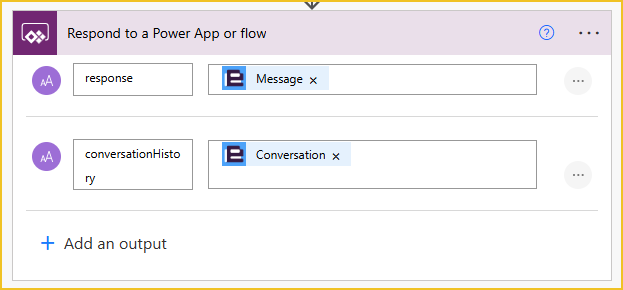
The last step in the flow is to respond to the Power App. Return both:
This allows the app to persist and rebuild the chat thread, allowing the user to have a conversation with the GPT model and see previous responses from the app.
The Power App is a single-screen app built with containers. As you can see, I have already started the conversation in the app:
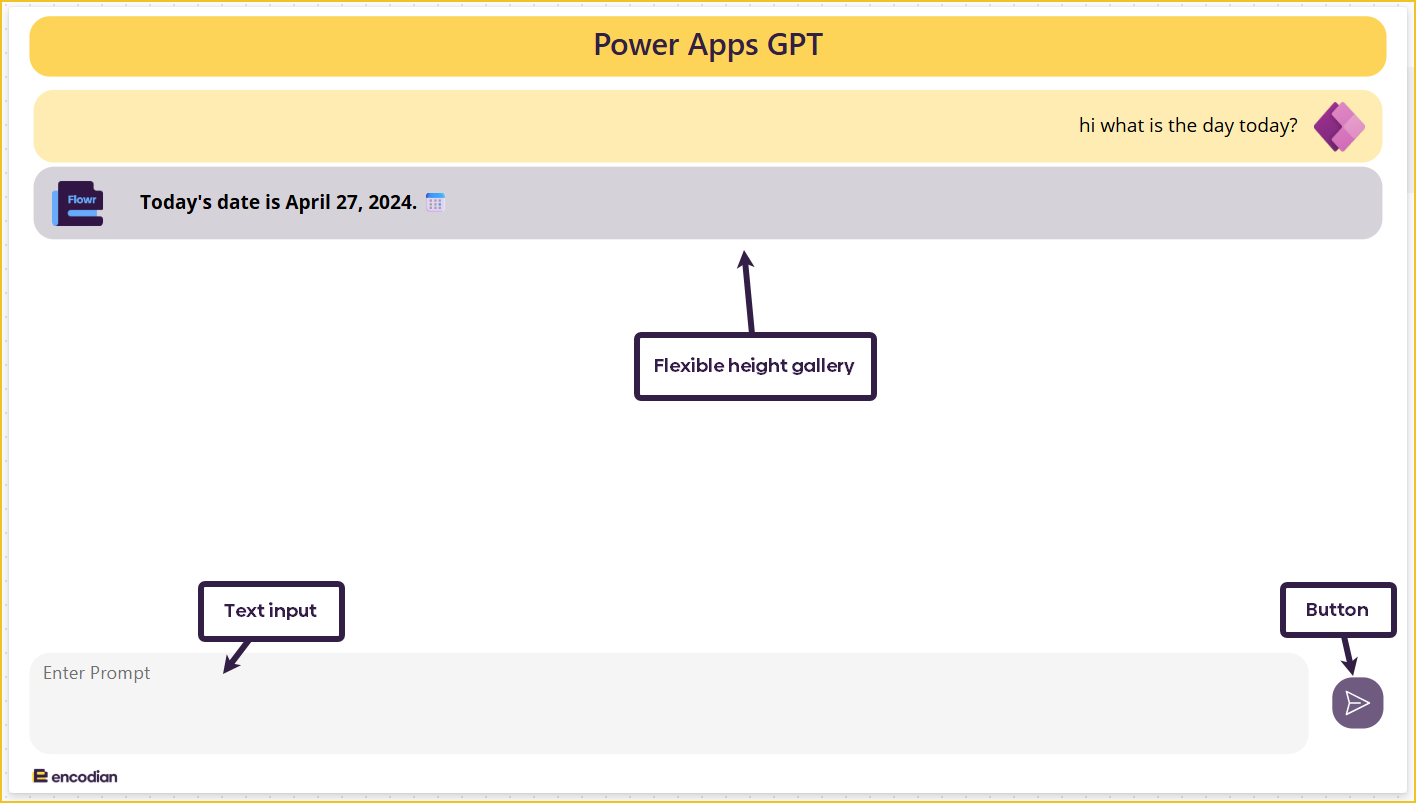
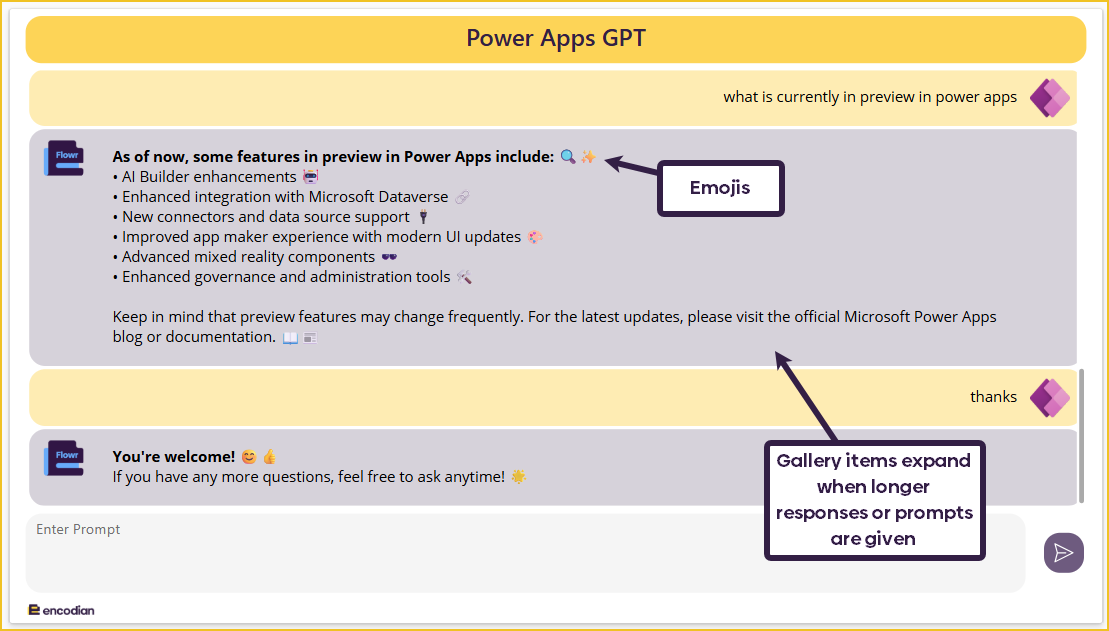
The app has been designed to look like a chatbot conversation, so the user can enter their message/prompt in the text input box at the bottom of the screen and press the send button to trigger the backend Power Automate flow.
I set the conversation history response from the Power Automate in a collection called colConversation. We will cover the formula later, but let’s start with the collection:
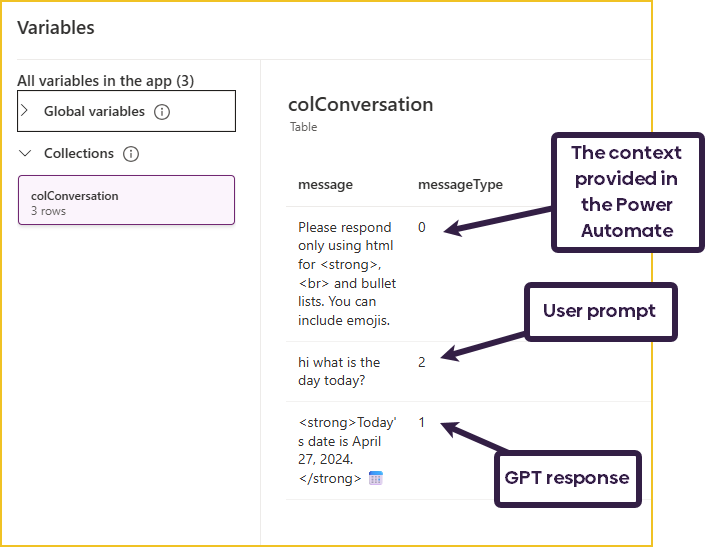
Each message in colConversation has a messageType:
As we are only interested in messageType 1 and 2, the Item’s property of the gallery needs to filter out messageType 0:
Filter( colConversation, messageType <> 0)
A flexible height gallery automatically adjusts each item’s height based on the length of the message. It uses an HTML text control (messageTxt) with auto-height enabled, and the gallery’s TemplateSize is set using that control’s height. The formula for the TemplateSize is:
messageTxt.Height + 40
In the conversation window, an HTML text control (messageTxt) renders messages aligned left or right based on messageType (left for AI, right for users):
If(
    ThisItem.messageType = 2,
    "<div style='text-align:right;'>" & ThisItem.message & "</div>",
    "<div style='text-align:left;'>" & ThisItem.message & "</div>"
)
The latest response will always be the selected item in the gallery. The following formula is used in the gallery’s Default property:
Last(colConversation)
The conversation bubble colour is actually a container inside the gallery. The messageType determines the Fill property:
If(ThisItem.messageType = 1, RGBA(51, 31, 69, 0.2), RGBA(255, 237, 176, 1))
Two images are used in the gallery: the Power Apps logo and the Flowr logo. These two images always exist in the gallery, but the messageType determines their visibility.
The formula for this is:
Flowr logo - If(ThisItem.messageType = 1, true, false)
Power Apps logo - If(ThisItem.messageType = 2, true, false)
The last received response is always the highlighted message in the conversation window. This means the user doesn’t have to scroll down every time to see the new response. This is managed in the gallery’s Default property:
Last(colConversation)
The Send button triggers the entire chat cycle.
The OnSelect property of the send button has multiple formulas:
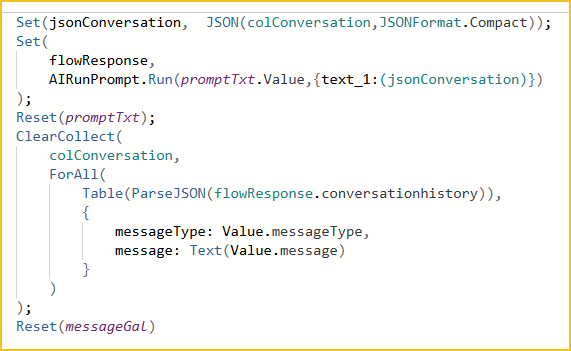
We must set a variable called jsonConversation. The value is colConversation converted to JSON format. We need to convert this collection so we can send the current conversation history to Power Automate. If it is the first message, this value will be blank.
Set(jsonConversation, JSON(colConversation,JSONFormat.Compact))
We must run the Power Automate and set the responses in a variable called flowResponse. The two inputs are:
Set(
    flowResponse,
    AIRunPrompt.Run(promptTxt.Value,{text_1:(jsonConversation)})
)
Once the Power Automate has run, the prompt text can be removed so it is ready for the following prompt.
Reset(promptTxt)
Now, we need to re-collect colConversation to update the conversation history to contain the newest prompt and response. Because conversationHistory was returned from Power Automate, we need to format it correctly so we can loop through the data. To do this, we can use the Table and ParseJSON action:
ClearCollect(
    colConversation,
    ForAll(
        Table(ParseJSON(flowResponse.conversationhistory)),
        {
            messageType: Value.messageType,
            message: Text(Value.message)
        }
    )
)
Lastly, we must reset the gallery to ensure the data has been updated:
Reset(messageGal)
And you now have a fully functioning GPT chatbot in Power Apps!
Your chatbot now supports:
GPT 4.1, GPT 4.1 Mini and 04 Mini (Azure OpenAI).
Yes, use the Context parameter in the AI – Run Prompt (Text) action.
Yes, pass the JSON conversation history into the flow and back.
We hope this guide helps you build your own GPT-powered chatbot using Power Apps and Encodian Flowr.
👉 Start your free 30-day trial of Encodian Flowr and begin building AI-driven apps today.
Learn more about Flowr →
If you need a hand with anything, visit our support portal, raise a ticket or email our team.
We welcome all comments and feedback.
CEO

