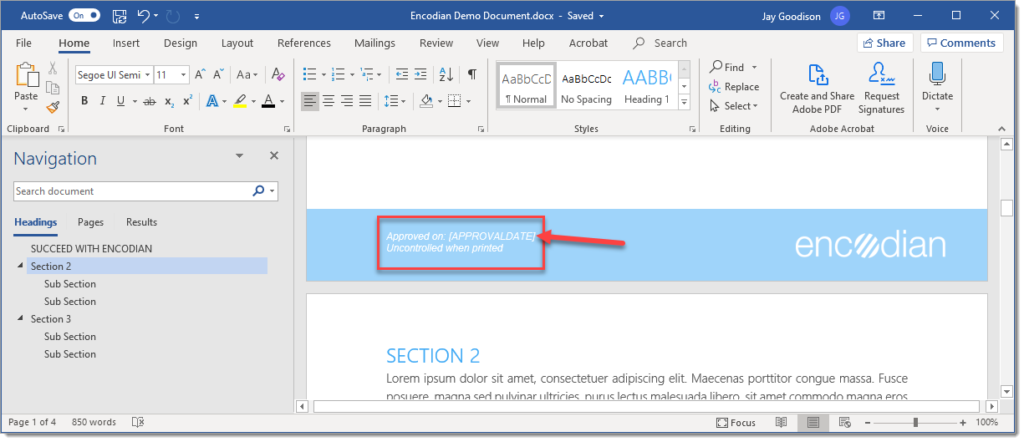
Many organisations include a document approval sheet either at the start or end of the document. Using this approach requires the user to manually update the approval table, which is challenging to manage, especially when using an automated approval process to generate an approved version of the document, i.e. you can’t change it once it’s approved! And you can’t complete the approval table (dates, comments) until the approval process is complete.
This Flow will demonstrate how to dynamically generate the approval sheet from Flow approval data and add it to an approved document rendition (PDF).
1. Navigate to the SharePoint document library, which will store and manage the documents sent for approval.
2. Click ‘Flow’, and click ‘Create a Flow.’

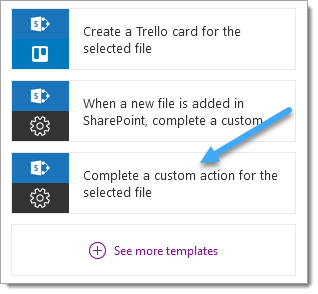
3. Click ‘Show more.’
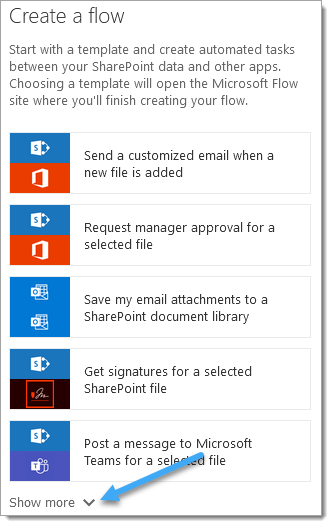
4. Select the ‘Complete a custom action for the selected file.’
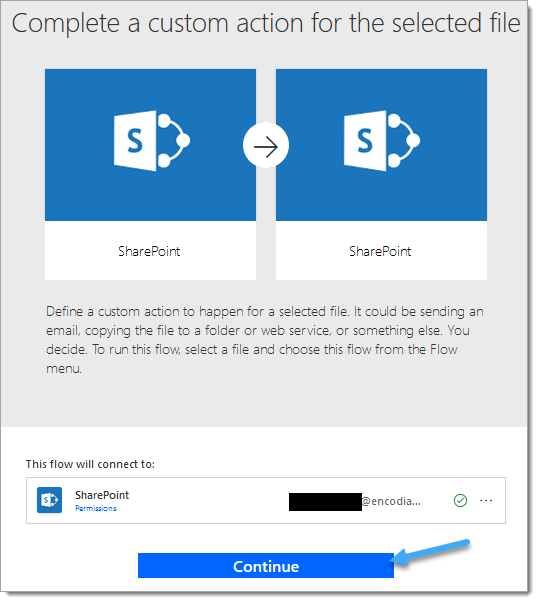
5. Click ‘Continue.’
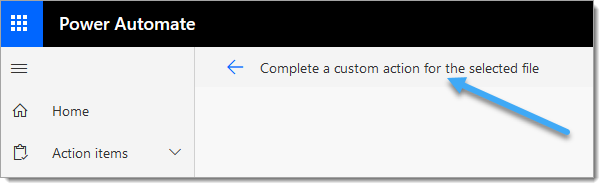
6. Select the default name of the Flow text and change it to ‘Submit for Approval.’
7. Add a SharePoint ‘Get File Content’ action to the Flow
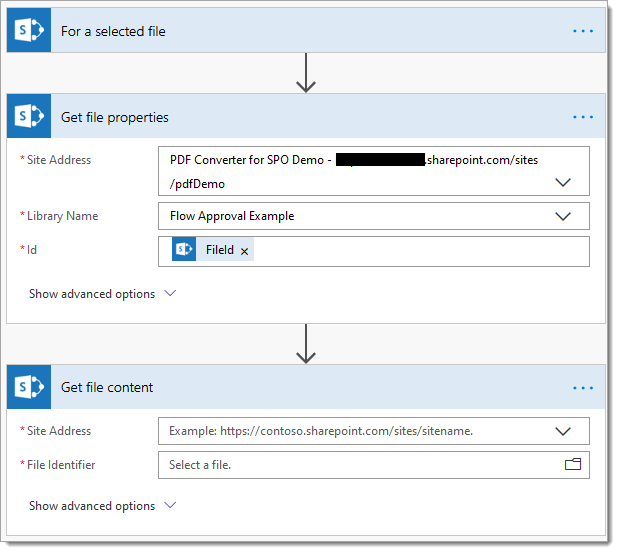
8. Configure the ‘Get File Content’ action as follows:
8.a – Site Address: This must be set as per the ‘Site Address’ value set in the ‘Get File Properties’ action
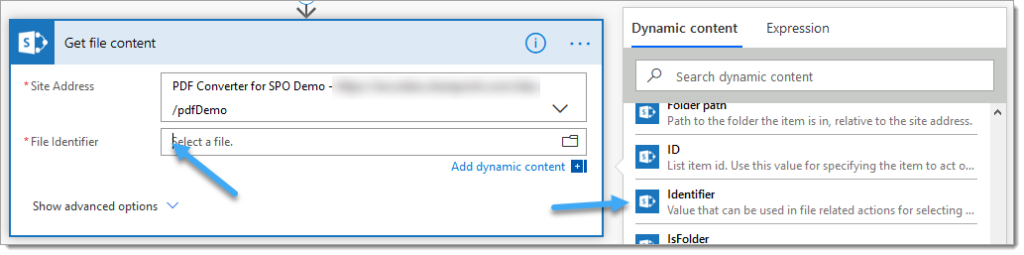
8.b – File Identifier: Select the ‘Identifier’ property returned by the Get File Properties’ action
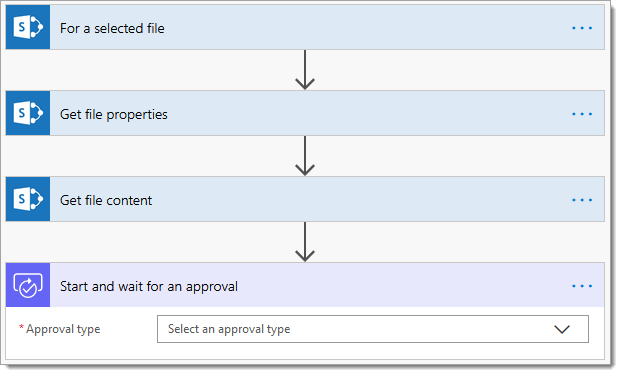
9. Add a ‘Start and wait for an approval’ action to the Flow
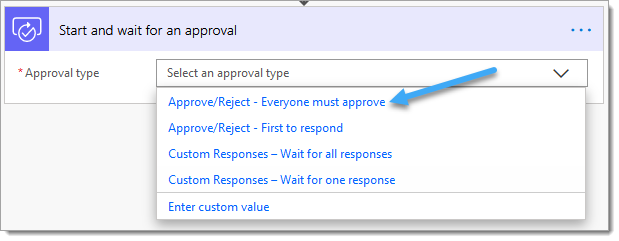
10. Select the required approval type – this demo uses the ‘Approve/Reject – Everyone must approve’ approval type
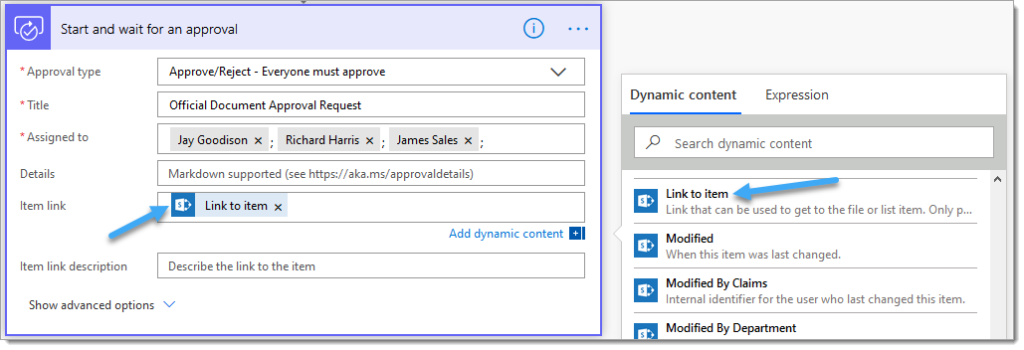
11. Complete the ‘Start and wait for an approval’ action configuration as follows:
11.a – Title: Set to ‘Official Document Approval Request’ or similar
11.b – Assigned To Enter the users who will be asked to approve the document
11.c – Details: Enter additional detail if needed using markdown
11.d – Item link: Select the ‘Link to Item’ property returned by the ‘Get file properties’ action
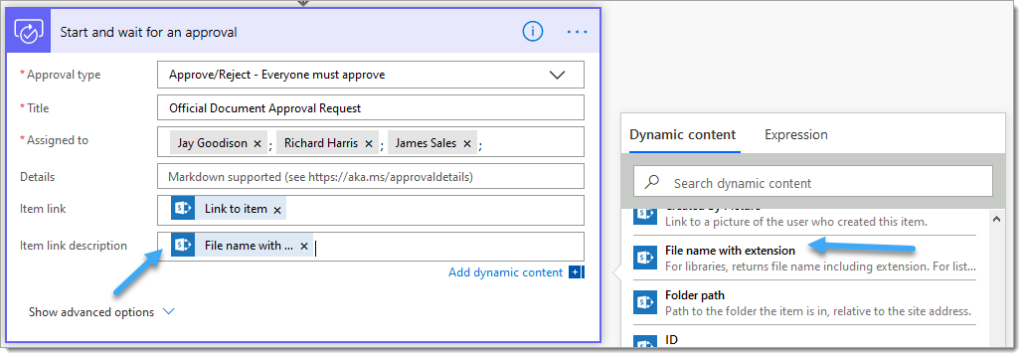
11.e – Item link description: Select the ‘File name with extension’ property returned by the ‘Get file properties’ action
The Flow approval process is now complete. The next stage is to create the official rendition of the document, obtain the approval data and build the approval sheet that we will insert into the approved PDF document.
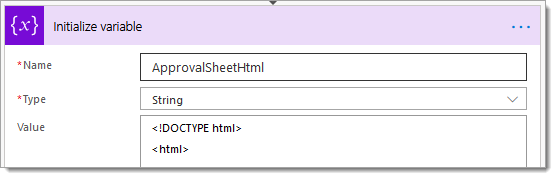
12. Add a ‘Initialize variable’ action
12.a – Name: Set to ‘ApprovalSheetHtml’
12.b – Type: Select ‘String’
12.c – Value: Copy and paste the contents of the ‘ApprovalsheetHtml-InitialValue.html’ file
13. Add a ‘Condition’ action
13.a – Choose a value: Select the ‘Outcome’ property returned by the ‘Start and wait for an approval’ action
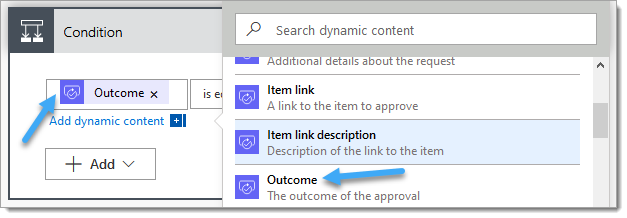
13.b – Equation: Set to ‘does not contain.’
13.c – Choose a value: Enter ‘Reject’

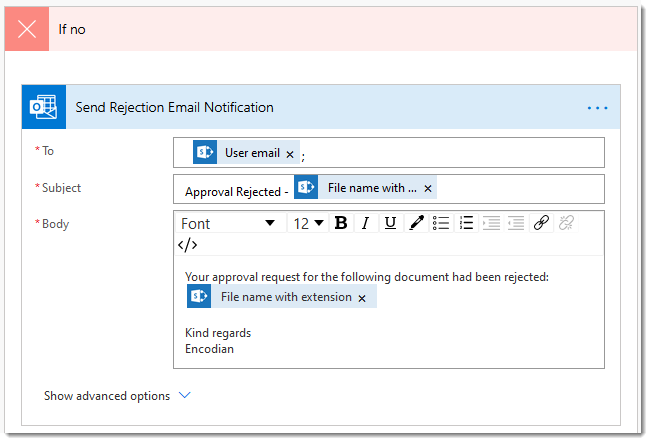
Inside the ‘If No’ branch, add some relevant handling to inform the requesting user the approval has been rejected (see example below):
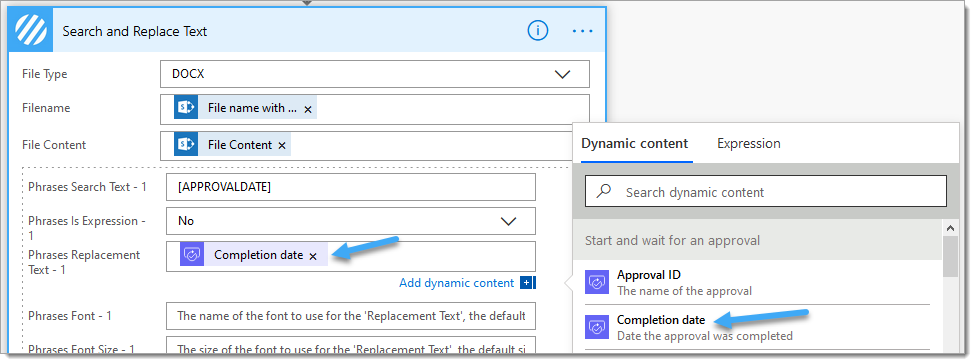
14. Add the ‘File – Search and Replace Text’ Encodian action
14.a – File Type: Select ‘DOCX’
14.b – Filename: Select the ‘File name with extension’ property returned by the ‘Get file properties’ action

14.c – File Content: Select the ‘File Content’ property returned by the ‘Get file content’ action

14.d – Phrases Search Test – 1: Enter [APPROVALDATE]
14.e – Phrases Is Expression – 1: Select ‘No’
14.f – Phrases Replacement Text – 1: Select the ‘Completion Date’ property returned by the ‘Start and wait for an approval’ action
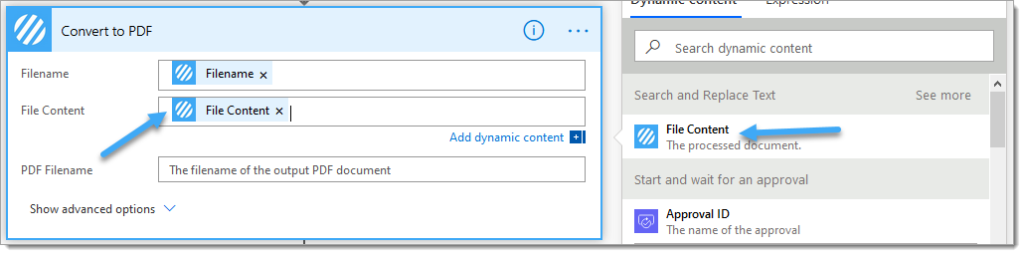
15. Add the ‘Convert – File to PDF’ (previously Convert to PDF) Encodian action
15.a – Filename: Select the ‘Filename’ property returned by the ‘Search and Replace Text’ action
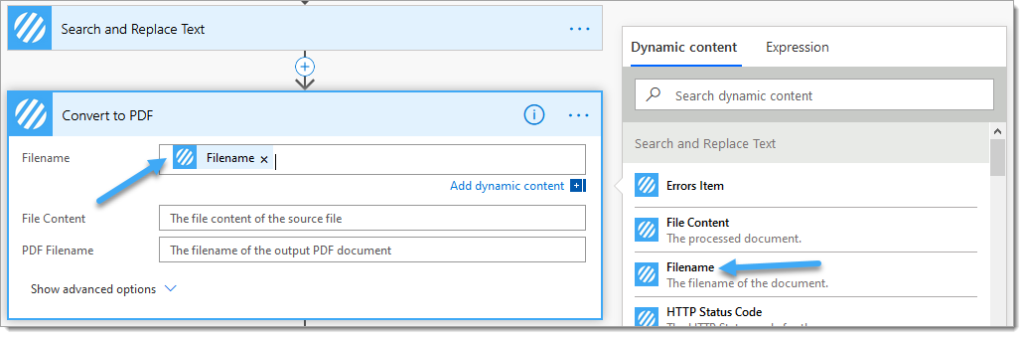
15.b – File Content: Select the ‘File Content’ property returned by the ‘File – Search and Replace Text’ action
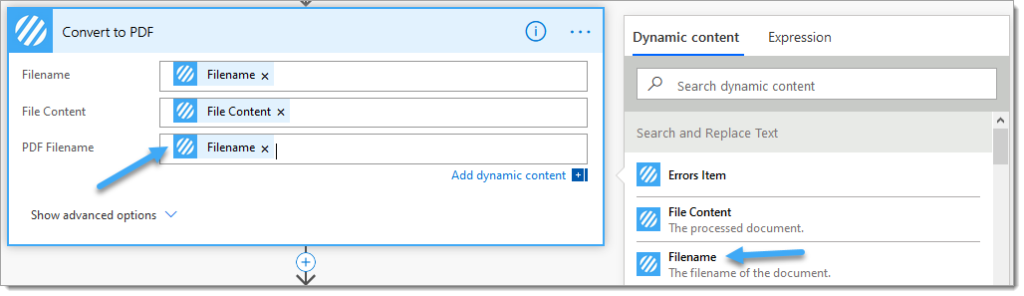
15.c – PDF Filename: Select the ‘Filename’ property returned by the ‘File – Search and Replace Text’ action. The Encodian action will automatically ensure that the output filename has a PDF extension.
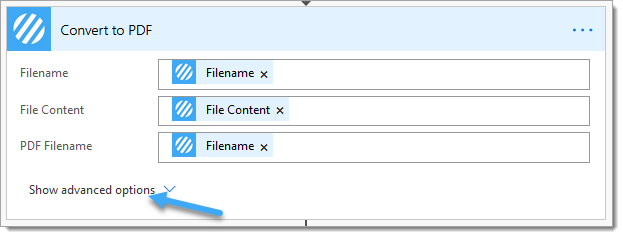
15.d – Click ‘Show advanced options’
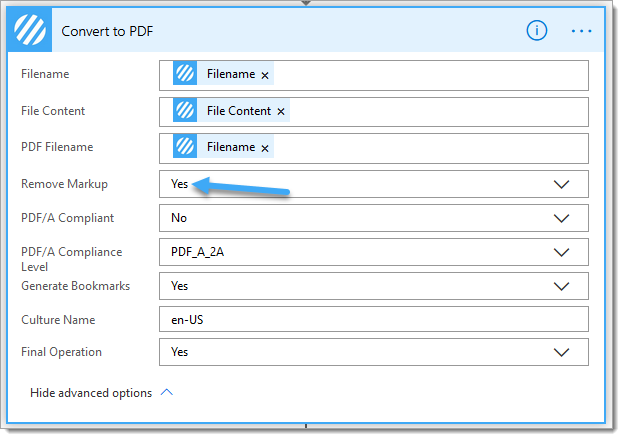
15.e – Remove Markup: Select ‘Yes’. This ensures that any comments / tracked changes are removed from the resultant PDF document
We have several options/approaches which would work; if the document already contains an ‘Overview/Title Page’, we could:
However, we advise our customers not to include an ‘Overview/Title Page’ or ‘Approval Sheets’ in the actual documents as these can easily be added dynamically when needed, providing enhanced control and options for adding these types of pages in a document. This is what we’ll now do…
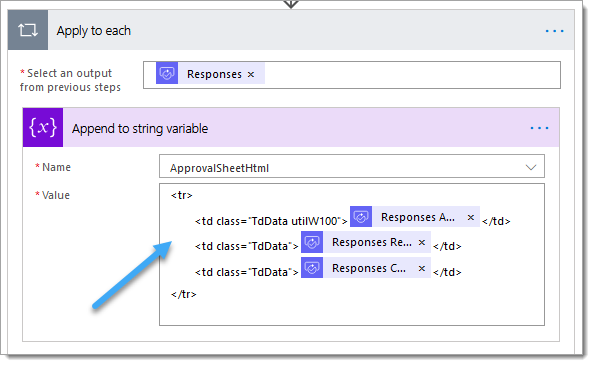
16. Add an ‘Append to string variable’ action
16.a – Name: Select the ‘ApprovalSheetHtml’ variable
16.b – Value: Select the ‘Responses Approver email’ property returned by the ‘Start and wait for an approval’ action

16.c – Value: Enter the following text
<tr>
	<td class="TdData utilW100">@{items('Apply_to_each')?['responder']?['displayName']}</td>
	<td class="TdData">@{items('Apply_to_each')?['responseDate']}</td>
	<td class="TdData">@{items('Apply_to_each')?['comments']}</td>
</tr>
17. Underneath the ‘Apply to each’ loop, add an ‘Append to string variable’ action
17.a – Name: Select the ‘ApprovalSheetHtml’ variable
17. b – Value: Enter the following text
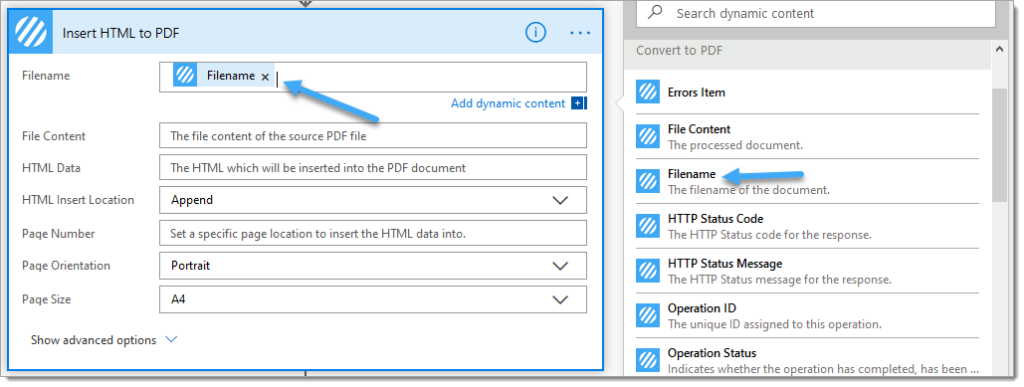
</table></div></div></body></html>18. Add an ‘Insert HTML to PDF’ action
These screenshots of the PDF – Insert HTML (previously Insert HTML to PDF) action show some configuration options(Page Number, Page Size, Page Orientation), which are currently under deployment and may not reach your region for another 2 to 3 weeks.
18. a – Filename: Select the ‘Filename’ property returned by the ‘Convert – File to PDF’ (previously Convert to PDF) action
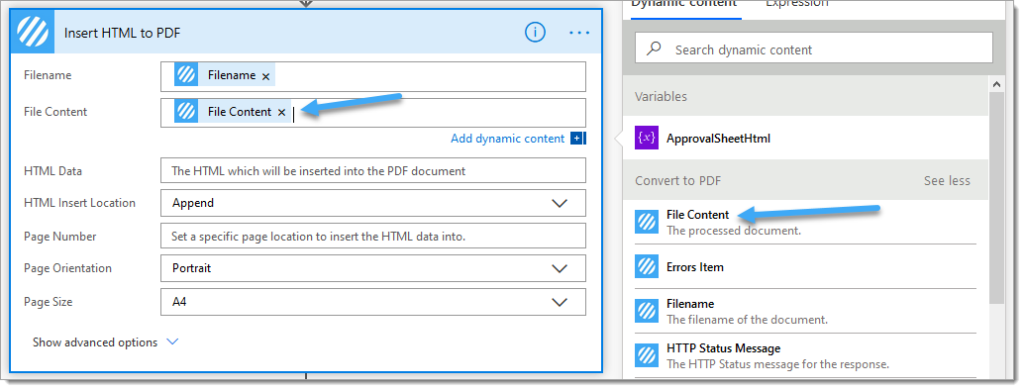
18. b – File Content: Select the ‘File Content’ property returned by the ‘Convert – File to PDF’ (previously Convert to PDF) action
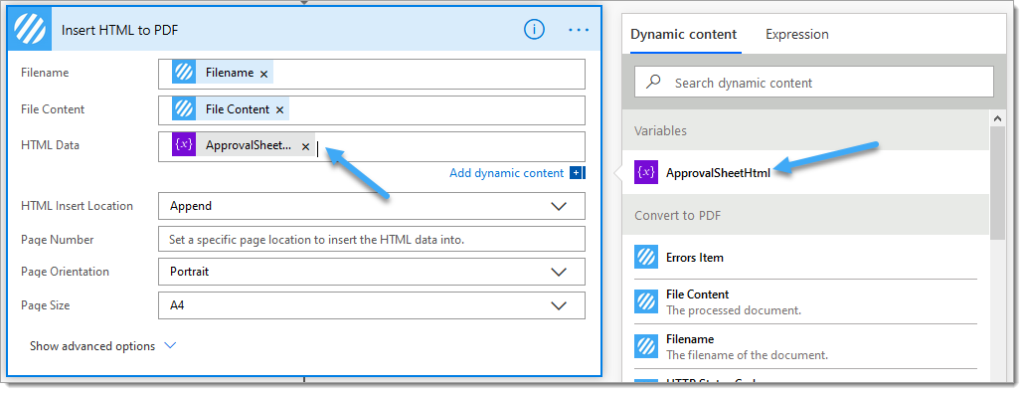
18.c – HTML Data: Select the ‘ApprovalSheetHtml’ variable
18.d – HTML Insert Location: Select ‘Prepend’
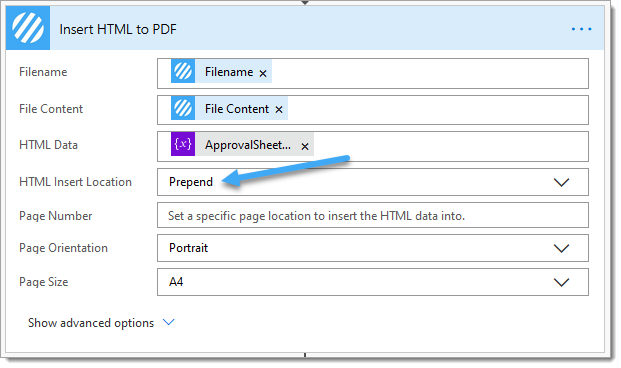
If you cannot see the ‘HTML Insert Location’, your region has not yet received the pending updates. Click ‘Show advanced options‘ to update the ‘HTML Insert Location’ option
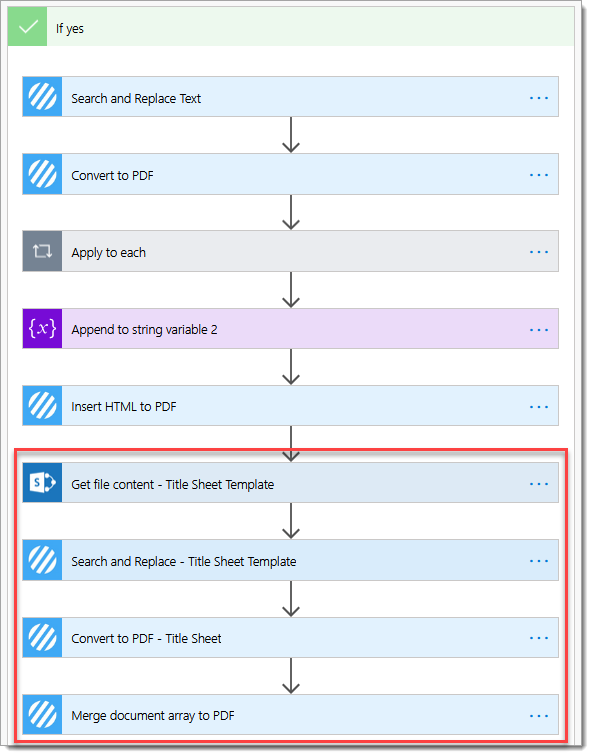
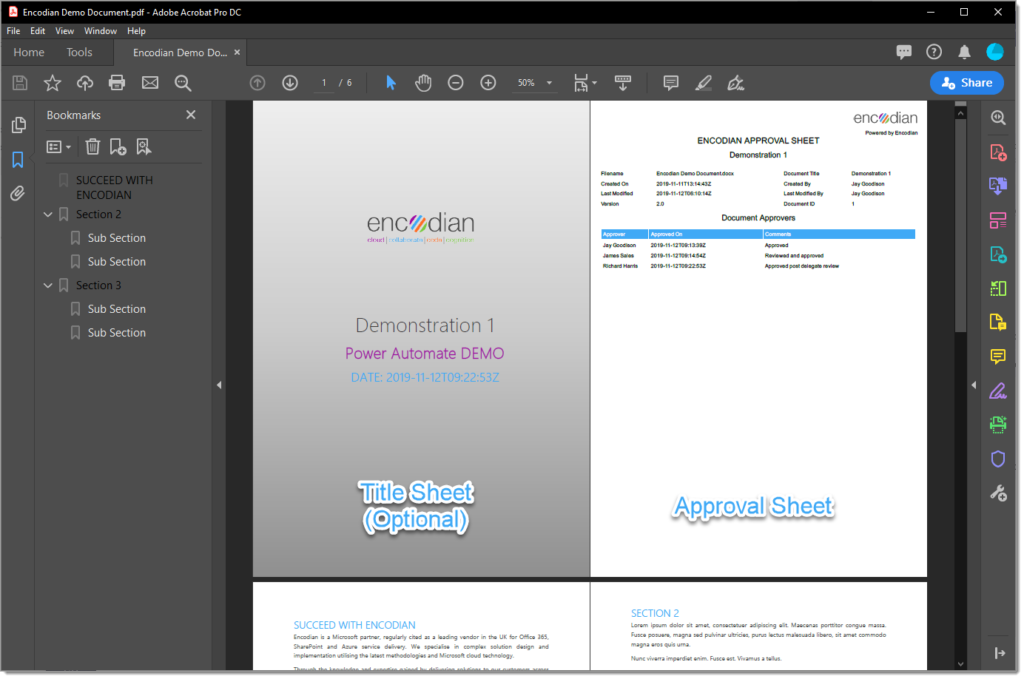
The document has now added the approval sheet containing document information and approval details. You may now wish to add a document title sheet dynamically.
This is already a lengthy post, so we’ve just included a basic example for dynamically creating a document title sheet as a taster!
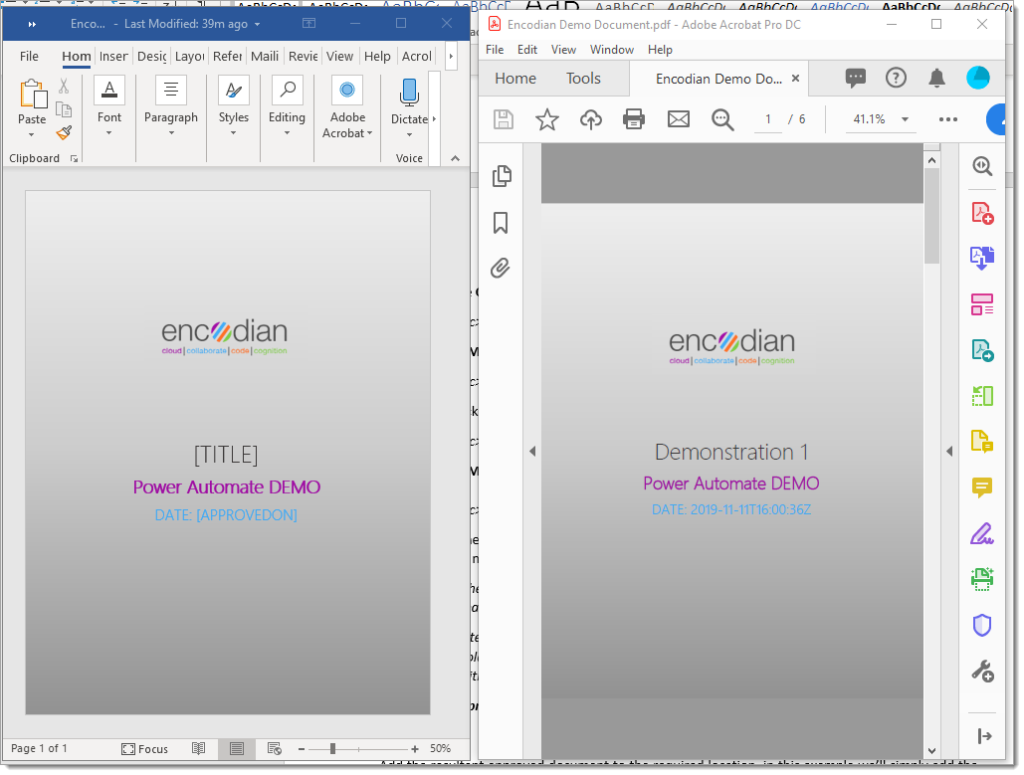
A Word template is retrieved from SharePoint. The Encodian ‘File – Search and Replace’ action is used to replace the placeholder text with the document title and approval date. A PDF rendition is then created and merged with the actual PDF document, which already contains the approval sheet.
Add the resulting approved document to the required location. In this example, we’ll add the file to the originating location.
19. Add a ‘Create File’ SharePoint action
19.a – Site Address: This must be set as per the ‘Site Address’ value set in the ‘Get File Properties’ action
19.b – Folder Path: Select the ‘Folder Path’ property returned by the ‘Get file properties’ action
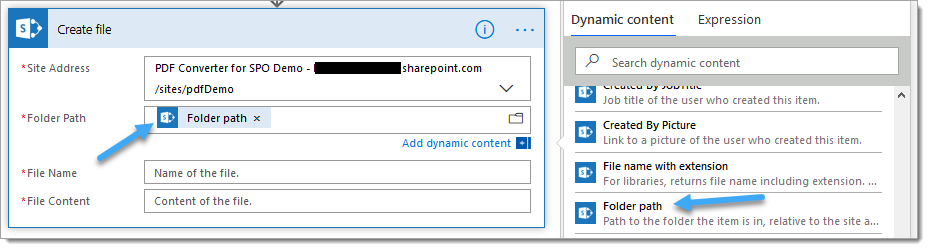
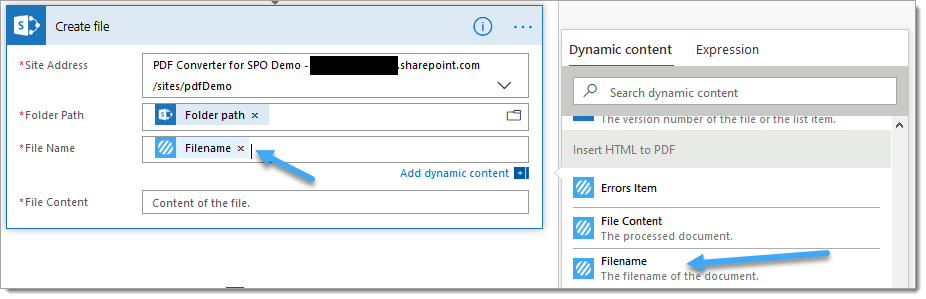
19.c – Filename: Select the ‘Filename’ property returned by the ‘PDF – Insert HTML’ (previously Insert HTML to PDF) action
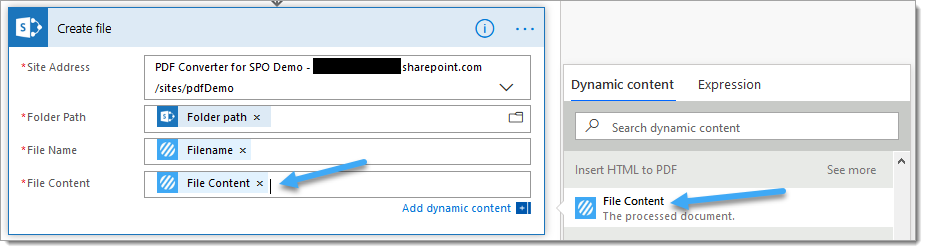
19.d – File Content: Select the ‘File Content’ property returned by the ‘PDF – Insert HTML’ (previously Insert HTML to PDF) action
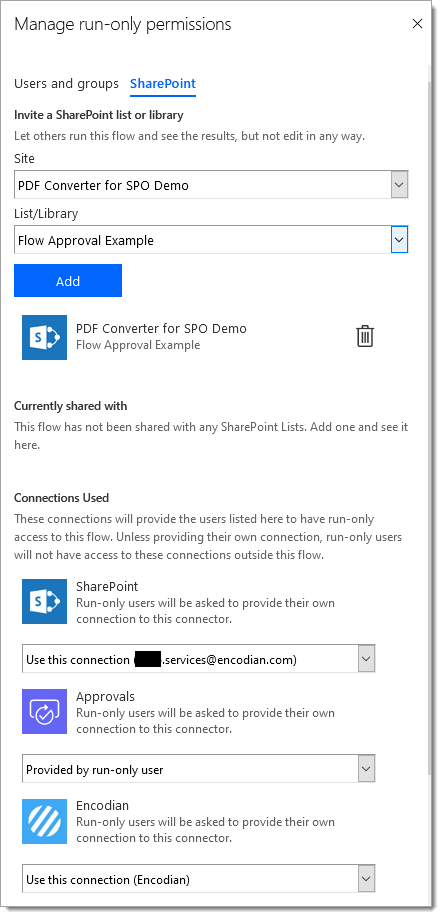
Before you test, we advise reviewing the following blog post, which outlines how to share your Flow with users correctly to ensure connections are shared with the correct configuration to negate the need for users to enter unnecessary connector authentication information such as API Keys:
The ‘run only users’ configuration for this demonstration flow has been set to the following configuration:
20. Go to SharePoint and start the Flow
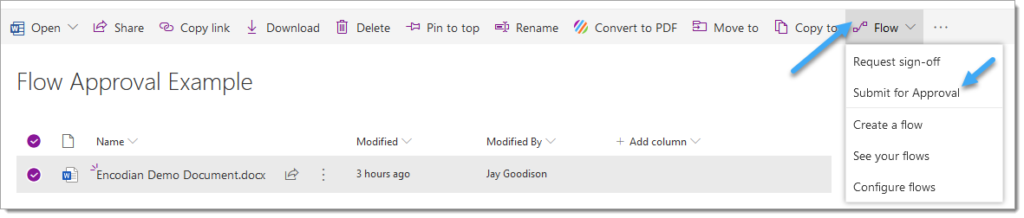
21. Click ‘Continue.’
22. Complete the approval requests (Approve!)
23. The approved PDF file with the embedded approval sheet should have been created
Although this post has focused on creating and manipulating a PDF document, this could also be achieved with a Word document (Docx) using the ‘Convert – HTML to Word’ and ‘Word – Merge’ (previously Merge Word Documents) actions to replace their PDF equivalents.
We hope you’ve found this guide useful, and as ever, please share any feedback or comments. All are welcome!
UPDATE: We’re excited to announce some significant updates to Flowr for Power Automate! As of October 2024, we’ve improved by updating action names and splitting Flowr’s central Power Automate connector into nine specialized connectors. These changes will make your workflow faster, smoother, and more efficient. The new action names are more precise and intuitive, saving you time, while the focused connectors enhance performance and flexibility. This update also helps future-proof the platform for even more powerful features. Check out our updated action names blog.
Managing Director

