We’ve recently released a few new actions for the ‘Encodian connector for Power Automate‘ and this post focusses on the QR Code – Create (previously Create QR Code) action.
QR codes are typically used to store an encoded URL or short string value within an image which can be read natively by most smartphone cameras, for further information check out Wikipedia.
This post outlines two ways of creating a QR code and embedding within a document;
For this example we’ll add a QR Code to PDF when document when is it updated and its metdata meets a defined criteria. The QR Code will encode a URL value taken from the URL metadata field associated with the document. Skip steps 1 > 5 if you simply want to review how to generate the QR code and add to an existing document using a watermark action.
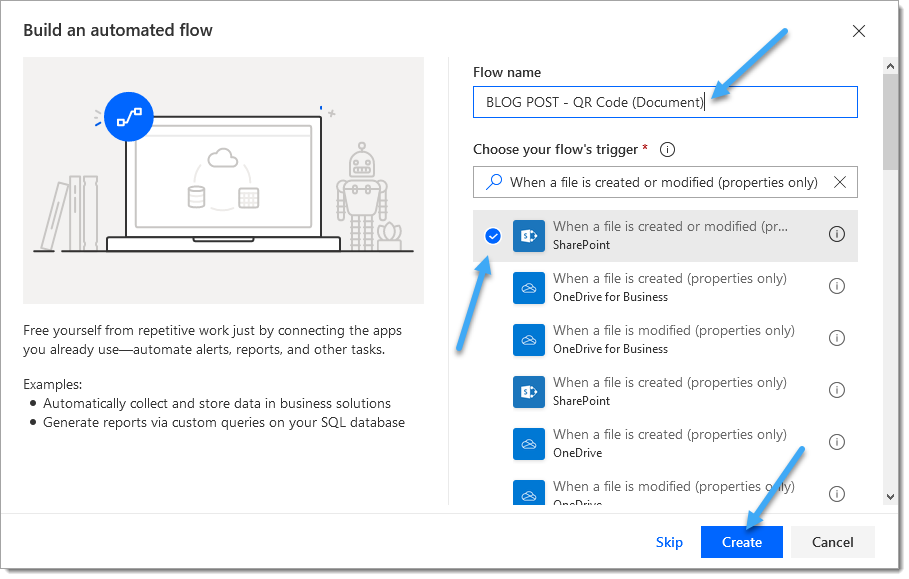
1. Create a new Flow using the ‘Automated — from blank‘ option
2. Enter a name for the Flow, select the ‘When a file is created or modified (properties only)‘ SharePoint trigger action and click ‘Create‘
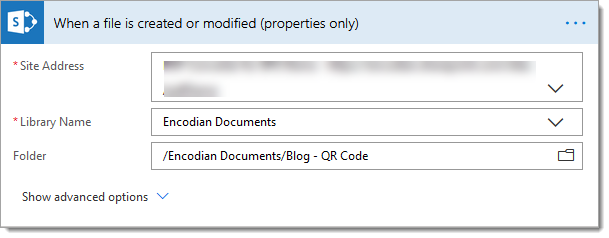
3. Configure the SharePoint trigger action:
3.a. Site Address: Enter the location of the target SharePoint site
3.b. Library Name: Select the target SharePoint document library
3.c. Folder: (Optional) Select the target SharePoint folder
4. Next, let’s add the following trigger conditions to the trigger action to ensure the Flow is only triggered for PDF documents where the ‘URL’ metadata field contains a value and where a QR code has not already been added.
4.a. On the SharePoint trigger action, click ‘…‘ and then ‘Settings‘
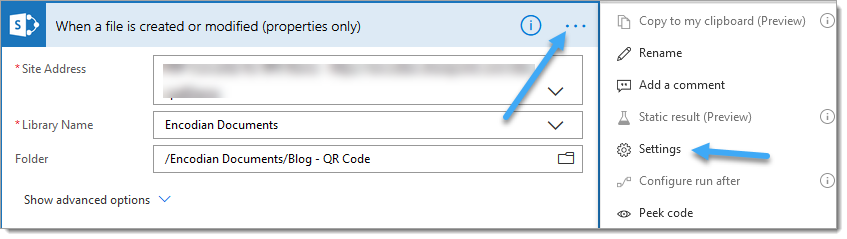
4.b. Underneath ‘Trigger Conditions‘, add the following conditions:
This Flow will overwrite the same document which the trigger is raised from, therefor we need to add a mechanism to stop the Flow continually re-triggering itself. I have added a ‘QR Code Added’ metadata column to the SharePoint library which will be set within the Flow, the trigger conditions below will prevent event recursion by filtering any events where the ‘QR Code Added’ value is true.

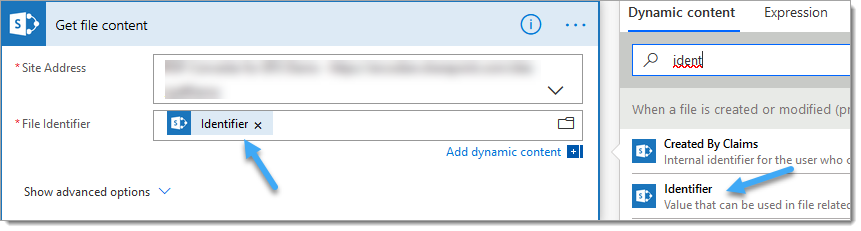
5. Add a ‘Get file content‘ SharePoint action
5.a. Site Address: As per step 3.a
5.b. File Identifier: Select the ‘Identifier‘ property from the SharePoint trigger action
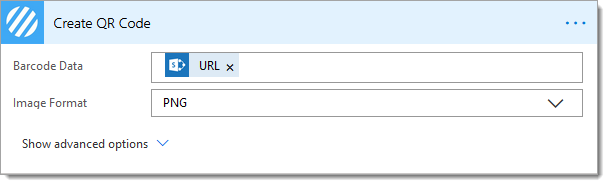
6. Add a QR Code – Create (previously Create QR Code) Encodian action
6.a. Barcode Data: Select the ‘URL’ property from the SharePoint trigger action
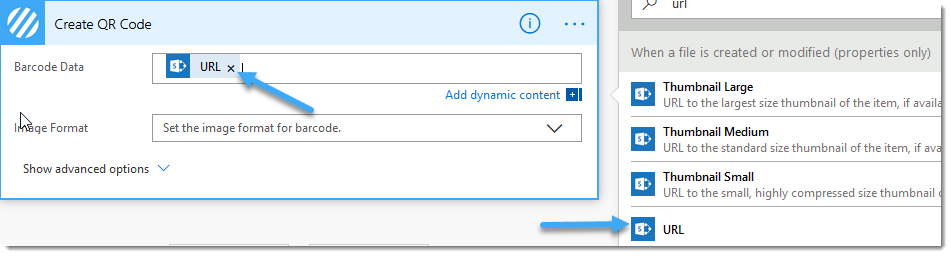
6.b. Image Format: Select ‘PNG‘
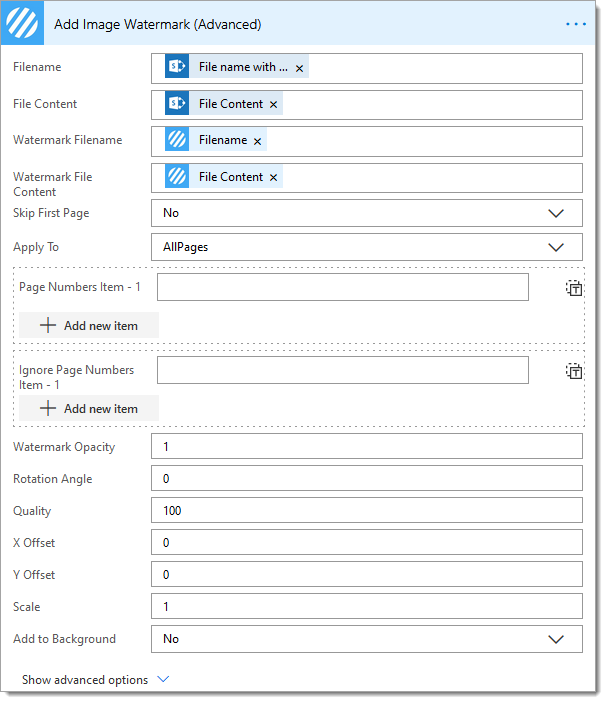
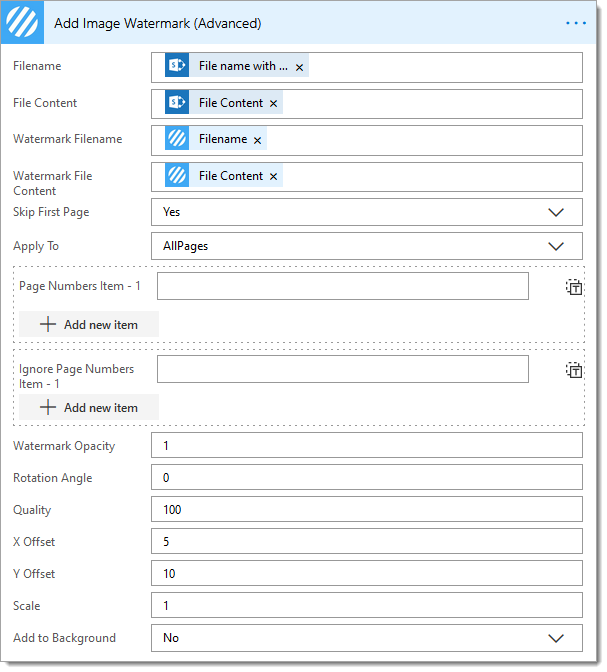
7. Add the Image – Add Image Watermark Encodian action
7.a. Filename: Select the ‘File name with Extension’ property from the SharePoint trigger action
7.b. File Content: Select the ‘File Content’ property from the SharePoint ‘Get file content‘ action
7.c. Watermark Filename: Select the ‘Filename’ property from the ‘Create QR Code‘ Encodian action
7.d. Watermark File Content: elect the ‘File Content’ property from the ‘Create QR Code‘ Encodian action
7.e. Watermark Opacity: Set to ‘1‘
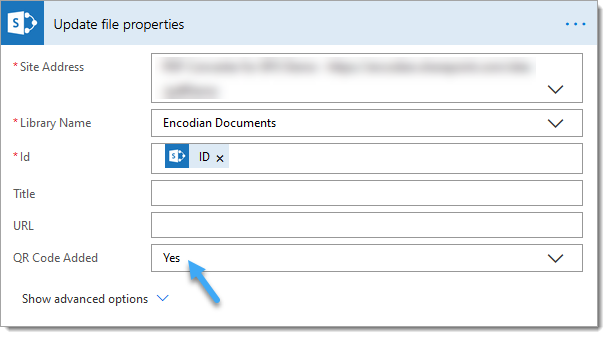
7. Add an ‘Update file properties‘ SharePoint action
7.a. Site Address: As per step 3.a
7 .b. Library Name: As per step 3.b
7.c. Id: Select the ‘ID‘ property from the SharePoint trigger action
7.d. QR Code Added: Select ‘Yes.‘
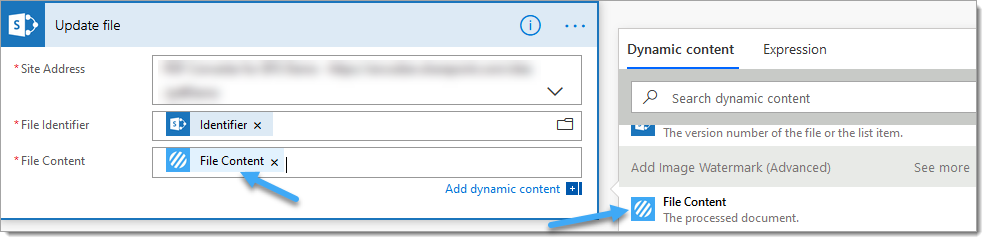
8. Add an ‘Update file‘ SharePoint action
8.a. Site Address: As per step 3. a
8.b. File Identifier: Select the ‘Identifier‘ property from the SharePoint trigger action
8. c. File Content: Select the ‘File Content‘ property from the Image – Add Image Watermark action.
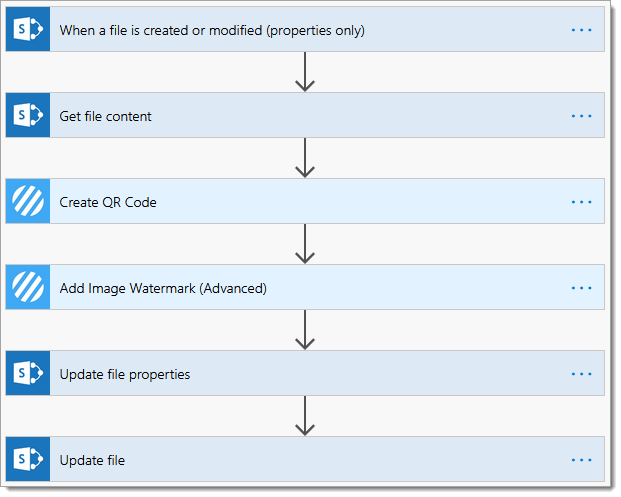
9. The completed flow should follow this construct:
Test the flow by adding a PDF document to the target library, ensuring relevant metadata fields are set to provide the trigger actions to operate correctly.
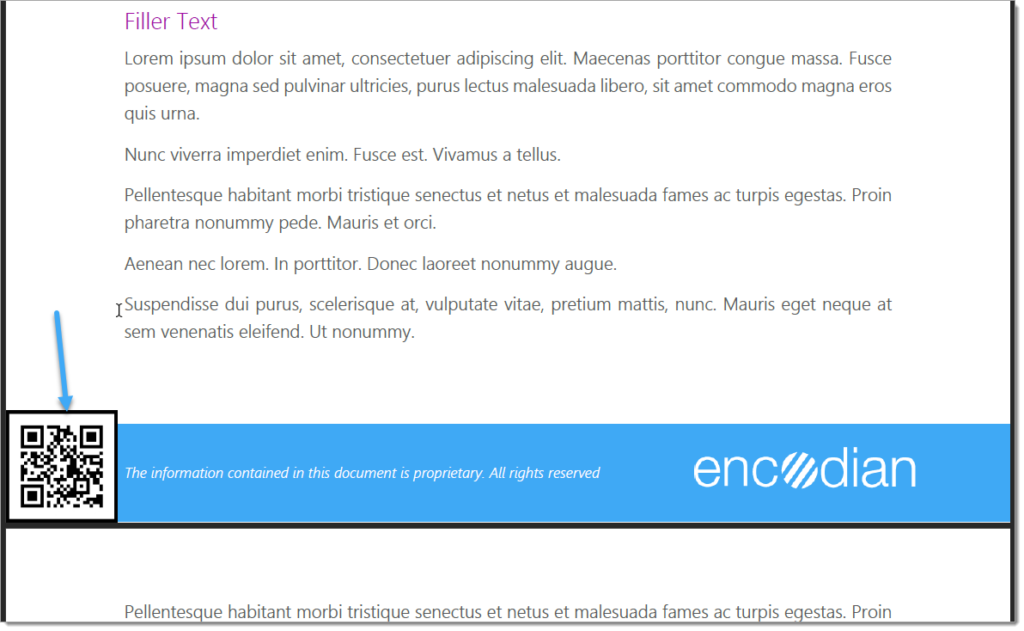
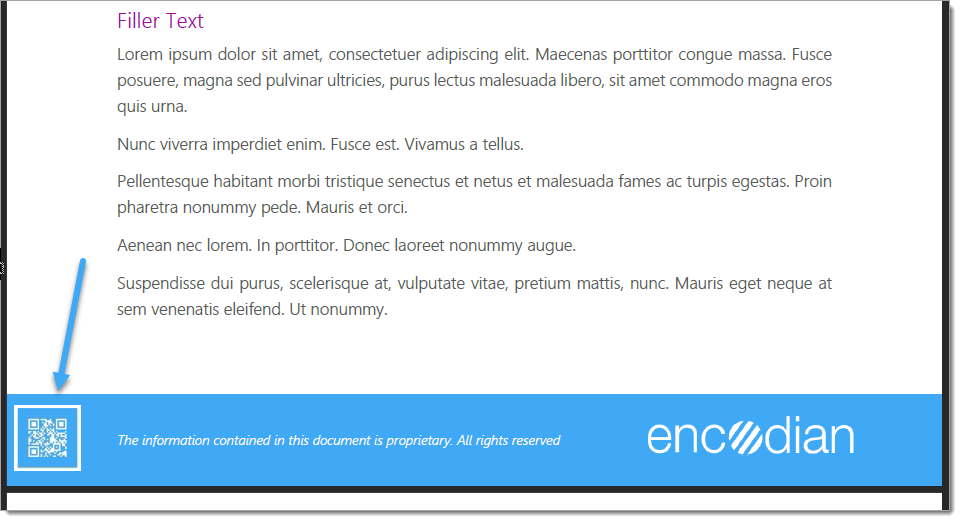
The QR code should have been added to the document:
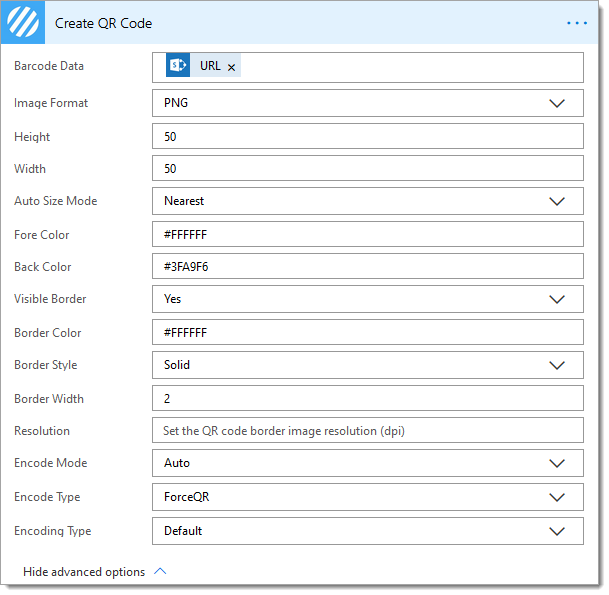
10. (Optional) Apply additional configuration to the QR Code – Create (previously Create QR Code) action to alter the colours and size of the QR code image:
11. (Optional) Apply additional configuration to the Image – Add Image Watermark action to place the QR code image in a specific location(s) within the document.
The revised configuration example:
Given this post is already quite long! We’ll provide a simple example for embedding a QR Code into HTML, which could either be sent in an email or converted to a PDF or Word document. This example converts HTML into a Microsoft Word document using the Encodian ‘Convert – HTML to Word‘ action.
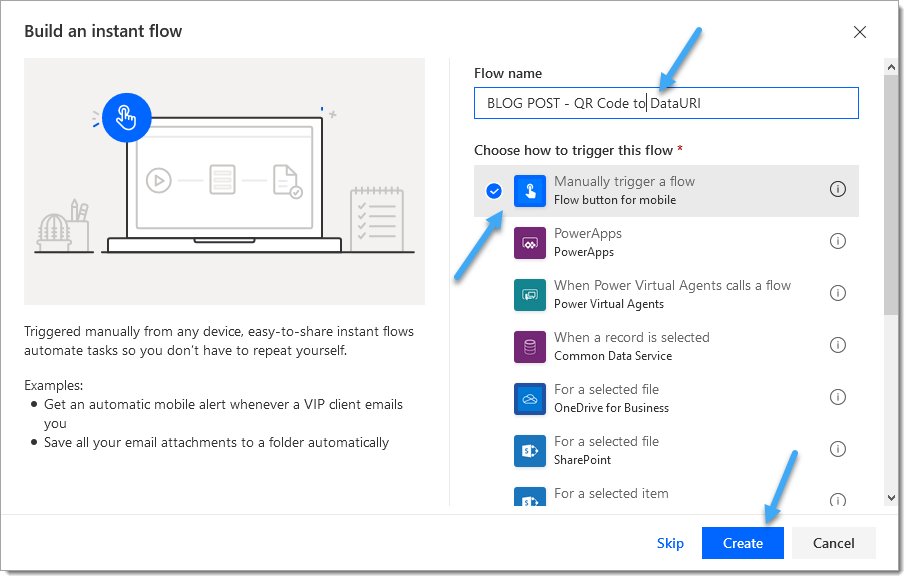
1. Create a new Flow using the ‘Instant — from blank‘ option
2. Enter a name for the Flow, select the ‘Manually trigger a flow‘ trigger action and click ‘Create.‘
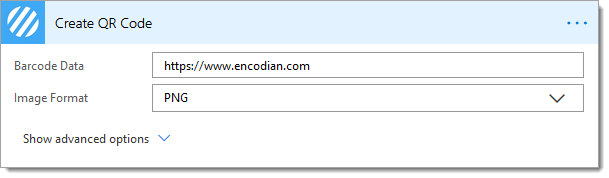
3. Add a QR Code – Create (previously Create QR Code) Encodian action
3.a. Barcode Data: Enter a value
3.b. Image Format: Select ‘PNG‘
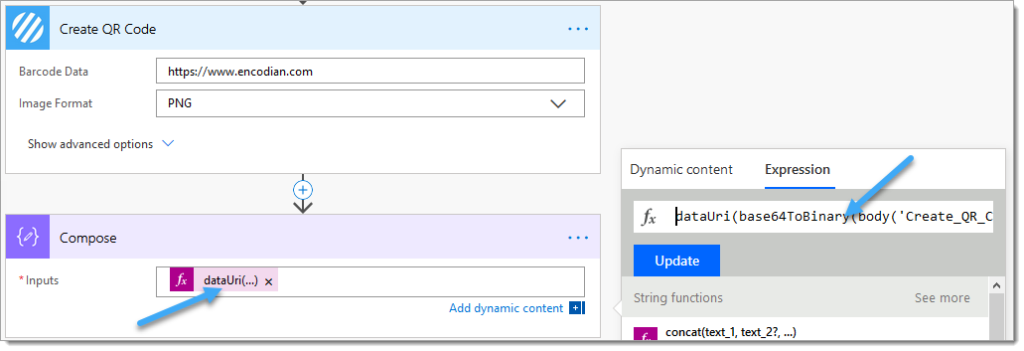
To embed the image into HTML, we need to convert the ‘File Content‘ property (the QR code image in Base64 format) into a DataURI.
4. Add a ‘Compose‘ action
4.b. Inputs: Enter the following expression
dataUri(base64ToBinary(body('Create_QR_Code')?['FileContent']))
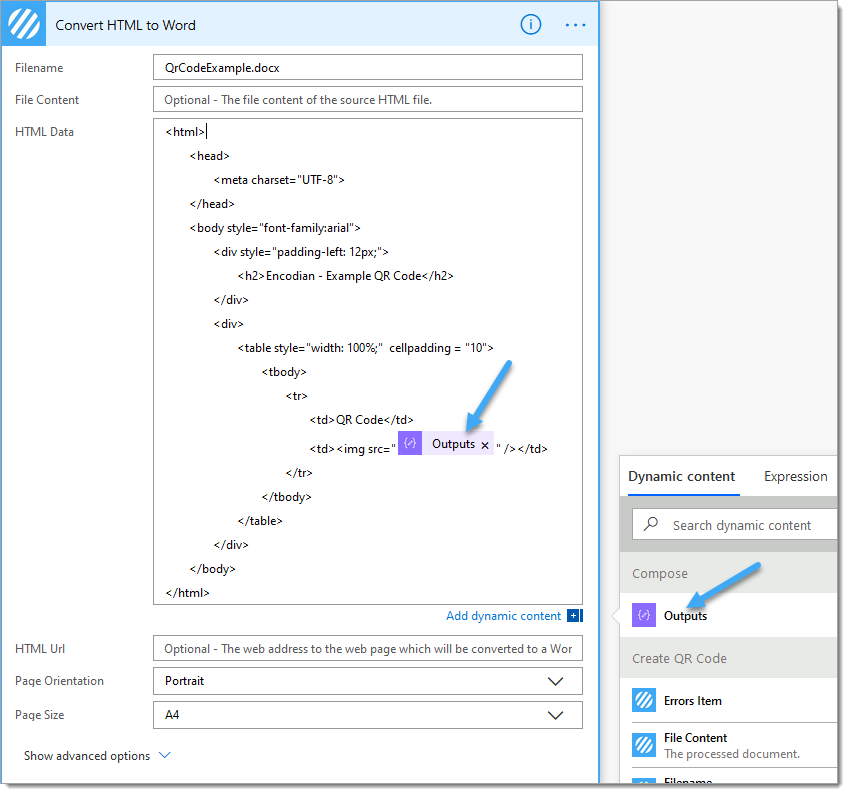
5. Add a ‘Convert – HTML to Word‘ Encodian action
5. a Filename: Provide a name for the new Microsoft Word file
5. b. HTML Data: Enter the HTML Data to convert to Microsoft Word format
5. c. Select the ‘Outputs‘ property from the Compose action and add it within the ‘src‘ property of the target HTML IMG tag.
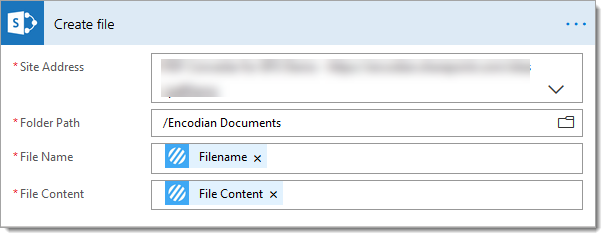
6. Add a ‘Create file‘ SharePoint action
6.a. Site Address: Enter the target SharePoint site URL
6. b Folder Path: Select the target SharePoint library path
6.c. File Name: Select the ‘Filename‘ property from the Encodian ‘Convert – HTML to Word‘ action
6.d. File Content: Select the ‘File Content‘ property from the Encodian ‘Convert – HTML to Word‘ action
7. The completed flow should follow this construct:
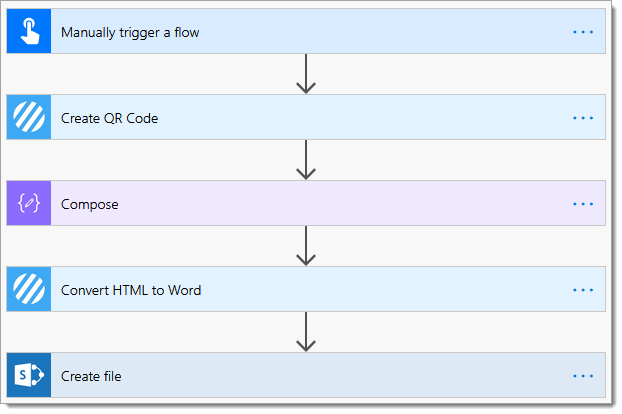
Execute the Flow and check that the file has been created with the QR code embedded:
The QR Code – Create (previously Create QR Code)action returns an image; therefore, you can use any of the capabilities Flow to work with the QR code.
We hope you’ve found this guide useful, and as ever, please share any feedback or comments – all are welcome!
UPDATE: We’re excited to announce some significant updates to Flowr for Power Automate! As of October 2024, we’ve improved by updating action names and splitting Flowr’s central Power Automate connector into nine specialized connectors. These changes will make your workflow faster, smoother, and more efficient. The new action names are more precise and intuitive, saving you time, while the focused connectors enhance performance and flexibility. This update also helps future-proof the platform for even more powerful features. Check out our updated action names blog.
Managing Director

