We’re really excited to release another new Power Automate action for the Encodian Power Automate Connector! The Archive (ZIP) – Create (previously Add to Archive (ZIP)) action enables you to add one or more files to an archive package (.zip file), very cool!
Please follow this guide, which details how to retrieve a collection of documents from a SharePoint library, add them to an archive package (ZIP file), and then upload the new archive file to SharePoint.
Not forgetting! Once you have created the ZIP file you can do whatever you need to do with the archive file using the power of Microsoft Power Automate!
1. Create a new Flow using the ‘Automated — from blank‘ option
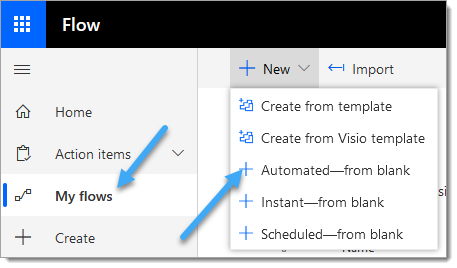
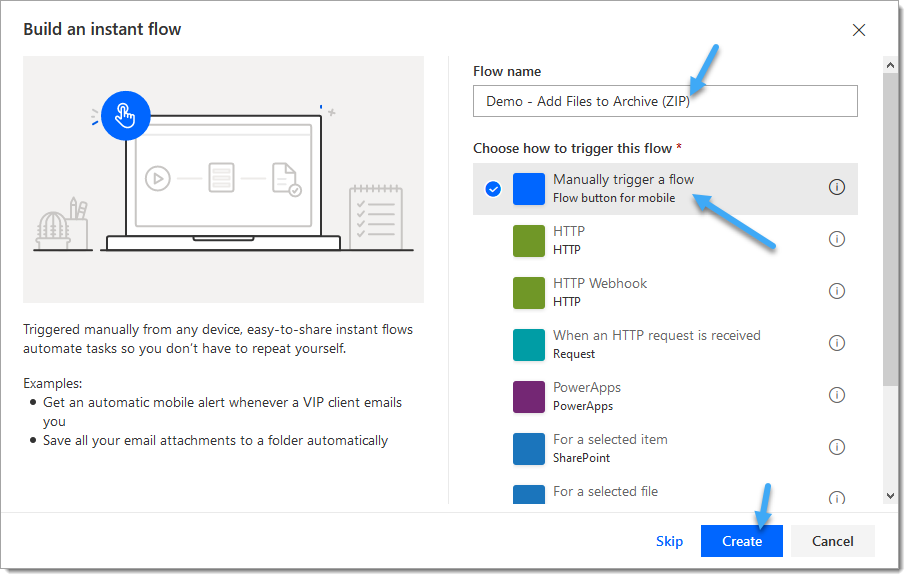
2. Enter a name for the Flow, select the ‘Automated — from blank‘ SharePoint trigger action and click ‘Create‘
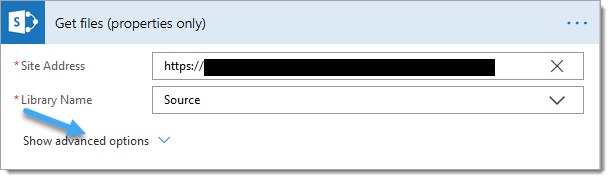
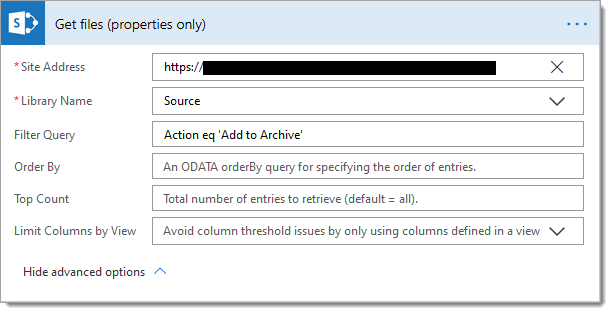
3. Add a ‘Get files (properties only)‘ SharePoint action
3.a. Site Address: Enter the location of the SharePoint site where the target files are stored
3.b. Library Name: Select the source SharePoint library containing the target files

3.d. Click ‘Show advanced options‘
To retrieve a collection of specific files we’re going to use an ODATA filter query. The query will be setup to obtain a collection of documents where the ‘Action‘ column is set to ‘Add to Archive‘
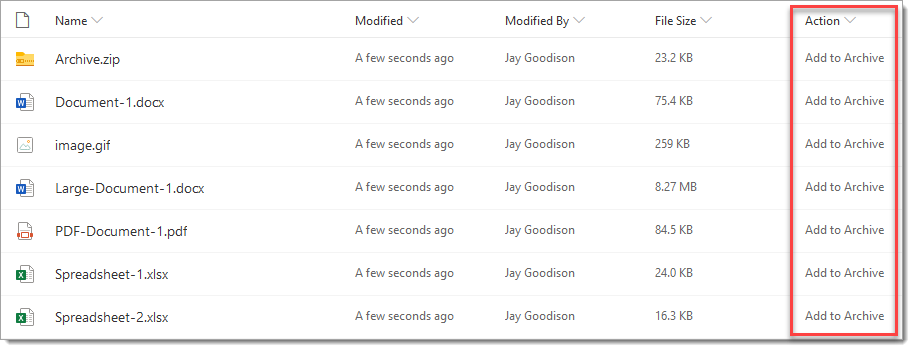
3.e. Filter Query: Add the following query Action eq ‘Add to Archive’
4. Add an ‘Initialize variable‘ action
4.a. Name: set to ‘Files‘
4.b. Type: Select ‘Array‘

5. Add a ‘Get file content‘ SharePoint action
5.a. Site Address: set as per step 3.a
5.b. File Identifier: Select the ‘Identifier‘ property from the ‘Get files (properties only)‘ SharePoint action
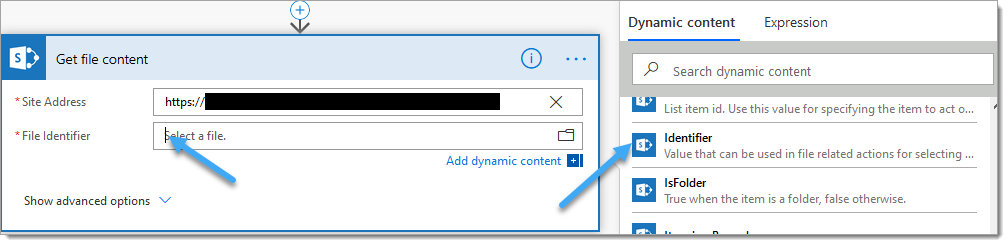
Power Automate will now automatically create an ‘Apply to each‘ loop and move the ‘Get file content‘ action into the loop
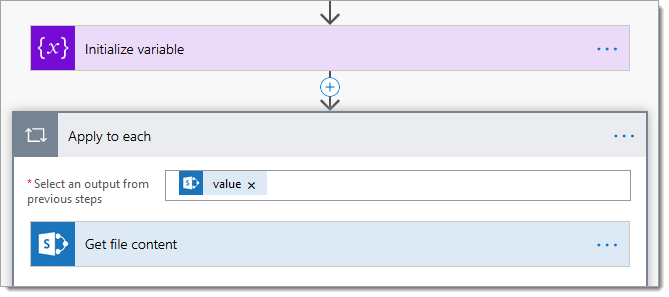
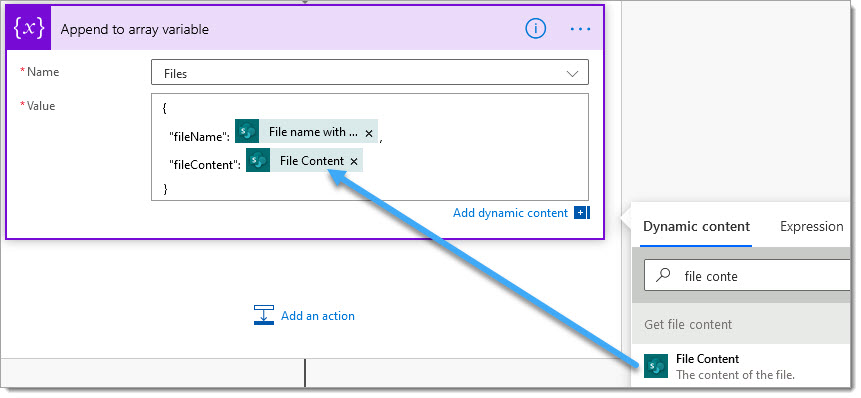
6. Underneath the ‘Get file content‘ action, add a ‘Append to array variable‘ action
6.a. Name: Select the ‘Files‘ variable created in step 4
6.b. Value: Enter the following JSON
{
    "fileName":,
    "fileContent":
}
6.c. Place the cursor after “fileName”: and select the ‘File name with extension‘ property from the ‘Get files (properties only)‘ SharePoint action
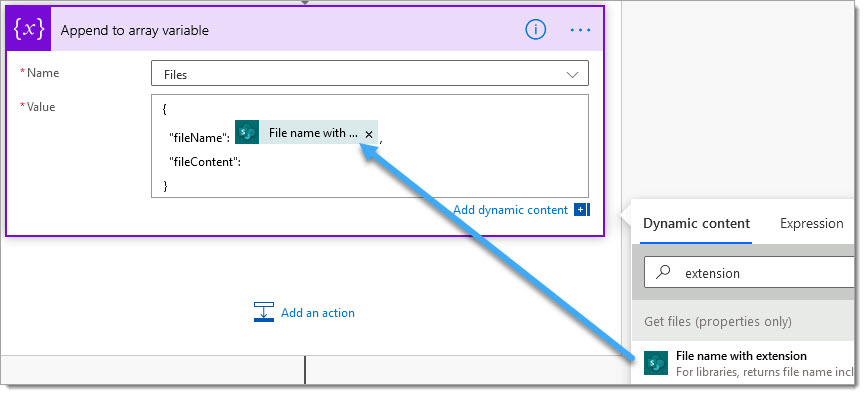
6.d. Place the cursor after “fileContent”: and select the ‘File Content’ property from the ‘Get file content‘ SharePoint action
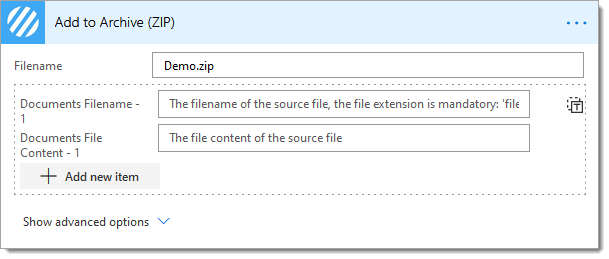
7. Underneath the ‘Apply to each‘ loop, add an Encodian Archive (ZIP) – Create‘ (previously Add to Archive (ZIP)) action
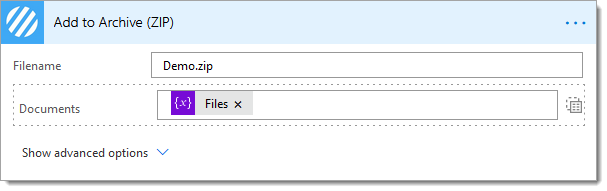
7.a. Filename: Enter a name for the archive package (ZIP file)
7.b. Click the ‘Switch to input entire array icon‘

7.d. Documents: Select the ‘Files‘ variable
NOTE: If you experience issues executing the ‘Add to Archive (ZIP)‘ action please review the following article: https://www.encodian.com/2019/12/errors-processing-document-arrays/
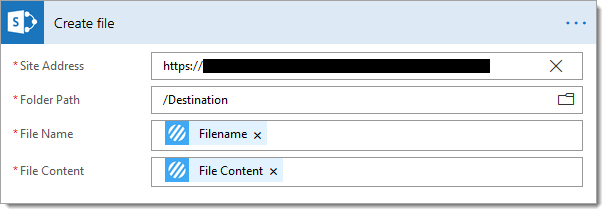
8. Add a ‘Create file‘ SharePoint action
8.a. Site Address: Set to the value of the SharePoint site which contains the target document library
8.b. Folder Path: Set to the value of the target SharePoint folder
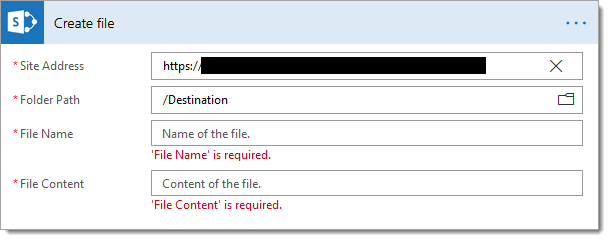
8.c. File Name: Select the ‘Filename‘ property from the Archive (ZIP) – Create (previously Add to Archive (ZIP)) Encodian action
8.d. File Content: Select the ‘File Content‘ property from the Archive (ZIP) – Create (previously Add to Archive (ZIP)) Encodian action
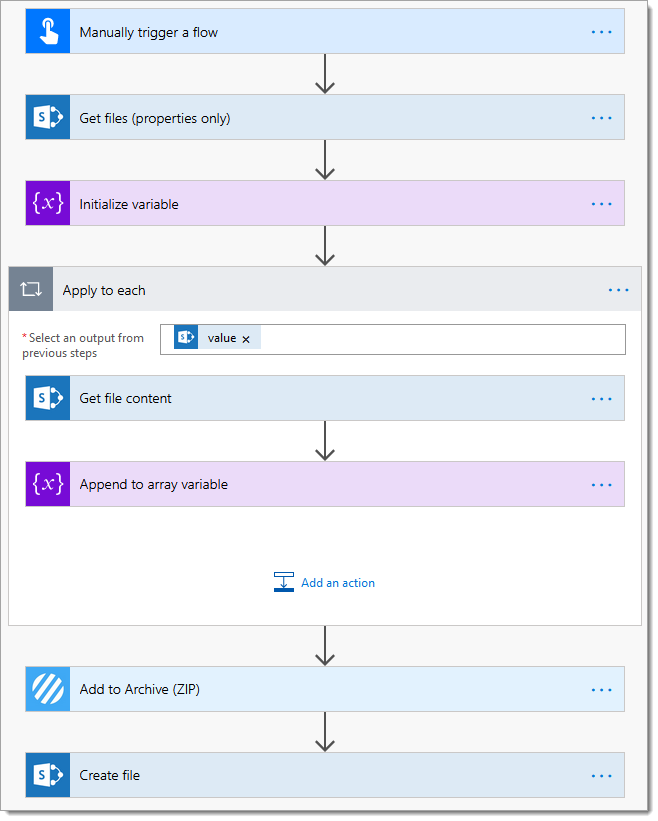
9. The completed flow should follow this construct:
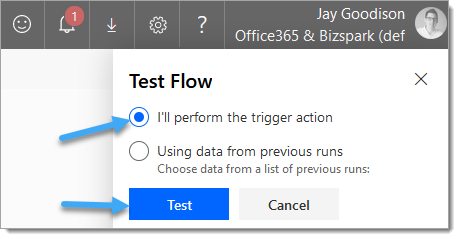
10. Now let’s test the Flow! Select ‘I’ll perform the trigger action‘ and click ‘Save & Test‘
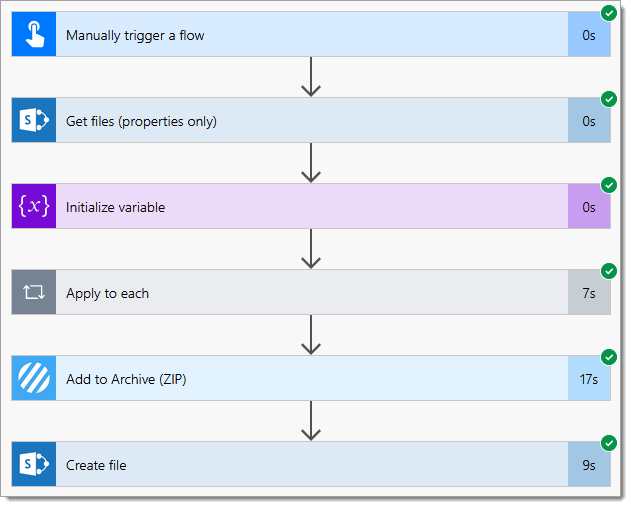
11. Verify the Flow has executed successfully
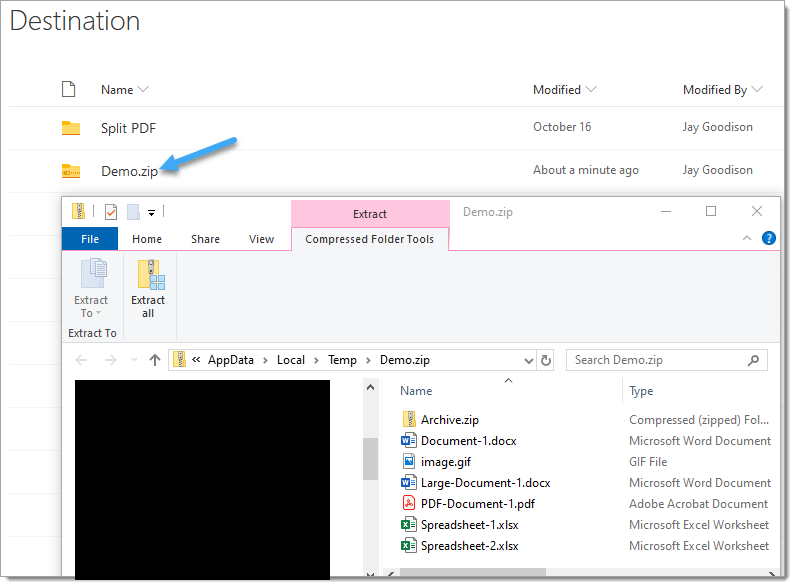
12. Verify the archive (ZIP file) has been created successfully:
We hope you’ve found this guide useful, and as ever, please share any feedback or comments – all are welcome!
UPDATE: We’re excited to announce some significant updates to Flowr for Power Automate! As of October 2024, we’ve improved by updating action names and splitting Flowr’s central Power Automate connector into nine specialized connectors. These changes will make your workflow faster, smoother, and more efficient. The new action names are more precise and intuitive, saving you time, while the focused connectors enhance performance and flexibility. This update also helps future-proof the platform for even more powerful features. Check out our updated action names blog.
Managing Director

