We’ve recently release several new capabilities for Encodian Flowr, including the new ‘Merge Excel Files‘ action. The ‘Merge Excel Files‘ flow action enables you to merge up to 1000 Microsoft Excel files (and related formats) into a single file of the selected output format. The following file formats are supported for merging:
The output file format can be set to either:
To showcase how to merge a collection of files using the ‘Merge Excel Files‘ flow action we’re going to create a manually triggered flow which obtains a collection of files from a SharePoint library and then adds the merged file back to SharePoint.
Please remember that the source location(s) of the files to be merged and the destination of the merged file can be anywhere Power Automate supports, such as Box, Azure Storage, OneDrive, Outlook, etc.
Create a new Flow using the ‘Instant cloud flow‘ option
Enter a name for the Flow, select the ‘Manually trigger a flow‘ trigger action and click ‘Create‘

Add a ‘Initialize variable‘ action
3.a. Name: Enter ‘Files’
3.b. Type: Select ‘Array‘

Add a SharePoint ‘Get files (properties only)‘ action
4.a. Site Address: Enter the location of the target SharePoint site
4.b. List or Library Name: Select the target SharePoint document library
4.c. Limit Entries to Folder: Set to a specific folder if required

This configuration will obtain the properties for the following files:

Add a SharePoint ‘Get file content‘ action
5.a. Site Address: As per step 4.a.
5.b. File Identifier: Select the ‘Identifier’ property provided by the ‘Get files (properties only)‘ action
Upon selection this will automatically place the ”Get file content‘ action into an ‘Apply to each‘ control, this is because the ‘Get files (properties only)‘ action returns an array of documents (one or more)

Add an ‘Append to Array Variable‘ action
6.a Name: Select the ‘Files’ variable
6.b. Value: Add the following JSON to the ‘Append to array variable‘ variable
 {
   "fileName": ,
   "fileContent":
 }
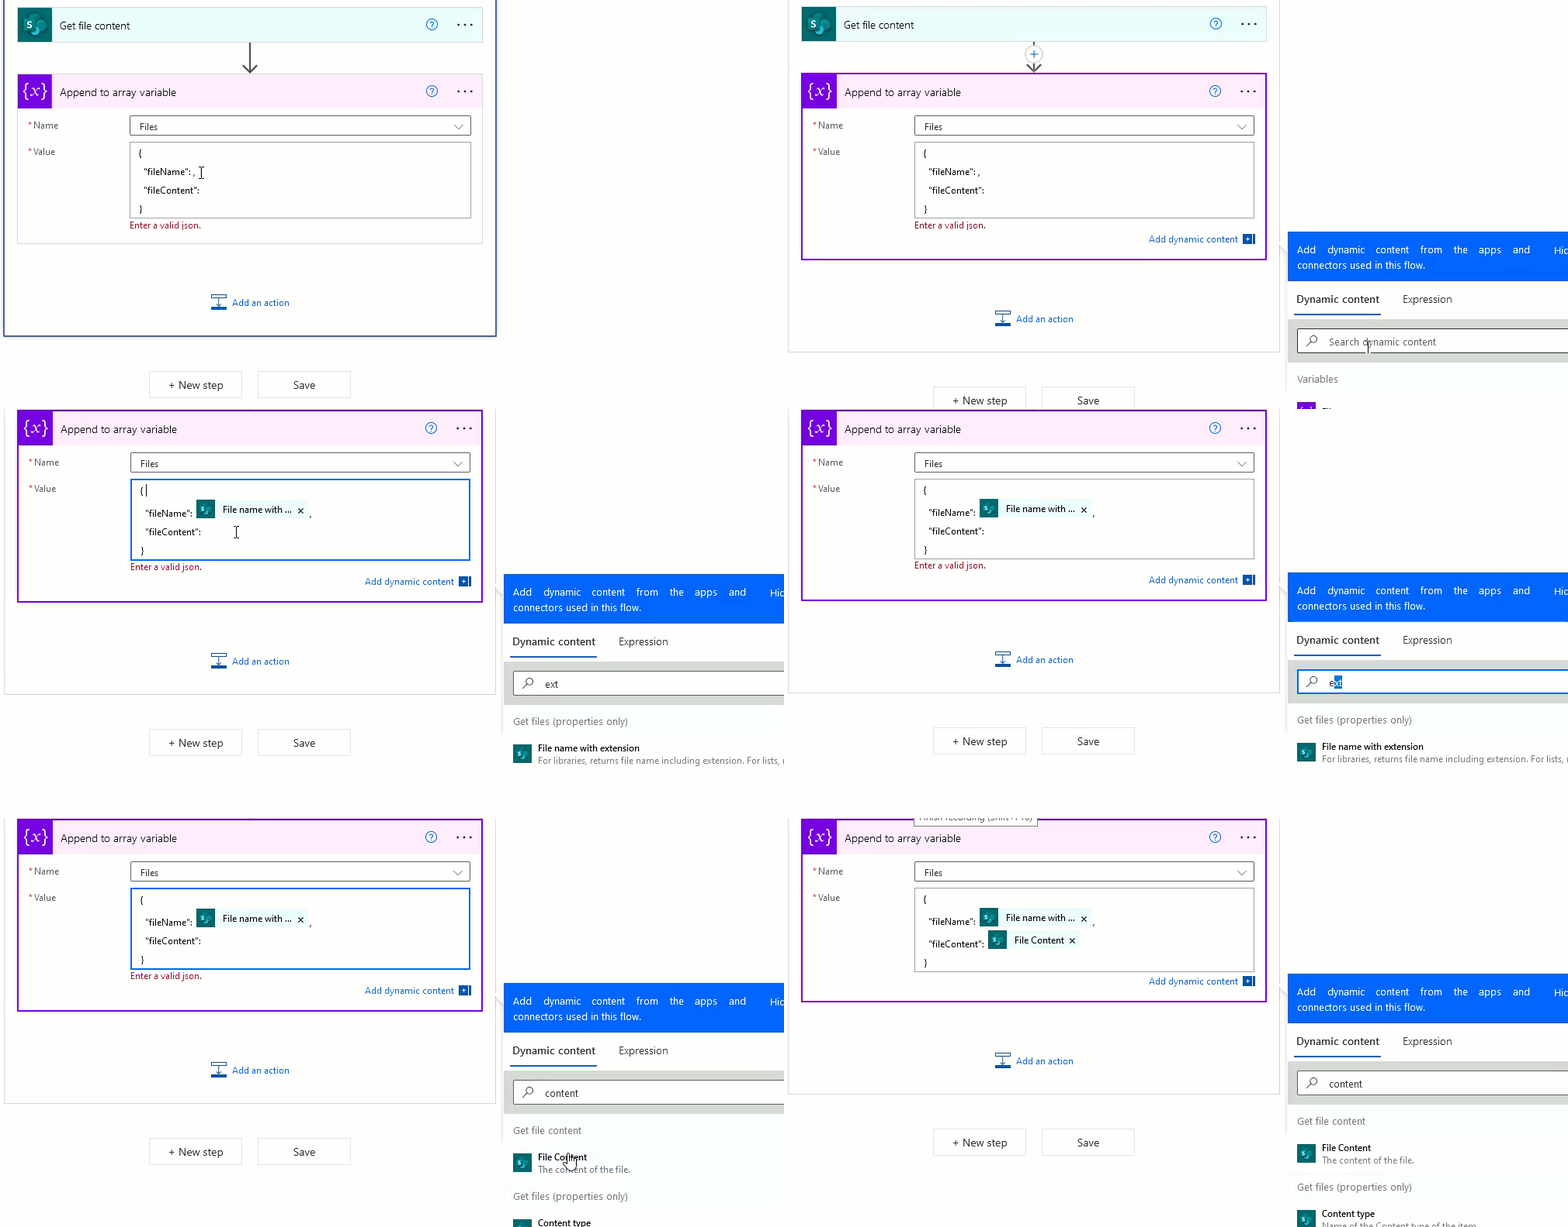
6.c. Append the following properties as per the animation below:

The competed JSON value is as follows:
{
"fileName": @{items('Apply_to_each')?['{FilenameWithExtension}']},
"fileContent": @{body('Get_file_content')}
}
Add the Encodian ‘Merge Excel Files‘ action underneath the ‘Apply to each‘ action
7.a. Filename: Enter a name for the output document
7.b. Click the ‘Switch to input entire array‘ icon

7.c. Pass the ‘Files’ variable created in step #3

The configuration to create the merged file is now complete! Next, you need to add actions to do something with the merged file.. for this example, we’re just going to add the file to SharePoint.
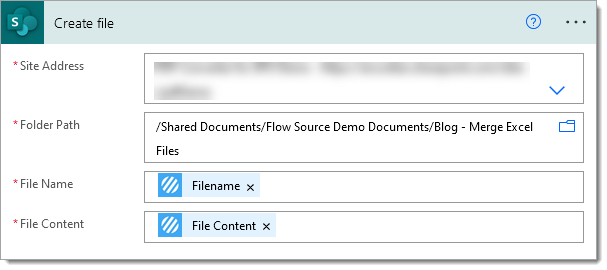
Add a SharePoint ‘Create file‘ action
8.a. Site Address: Enter the location of the target SharePoint site
8.b. Folder Path: Select the target SharePoint library/folder
8.c. File Name: Select the ‘Filename‘ property from the the ‘Merge Excel Files‘ action
8.d. File Content: Select the ‘File Content‘ property from the the ‘Merge Excel Files‘ action

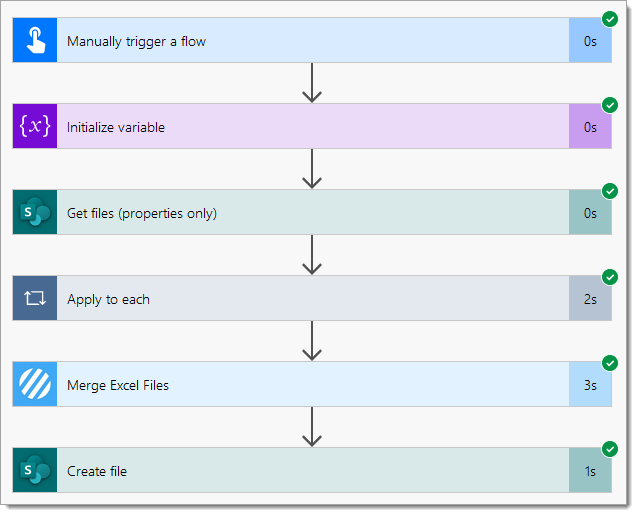
Your Flow is now complete and should follow this construct… albeit you may have a different trigger action!

Next, test your Flow and validate the merged file has been created:

Validate the resulting file has been processed correctly:

We hope you’ve found this guide useful, and as ever, please share any feedback or comments – all are welcome!
You can find further documentation and guidance on the Encodian support portal: Merge Excel Files
Managing Director