Transcribing audio files manually can be time-consuming and error-prone, especially when dealing with large volumes of recordings. Fortunately, the Encodian Flowr Power Automate action ‘AI – Speech to Text‘ offers a powerful and efficient way to automatically convert spoken audio content into written text.
Many organisations now store Teams recordings, interviews, or voice notes in SharePoint. Automating transcription ensures these recordings become searchable, accessible, and actionable. Whether for compliance, knowledge sharing, or productivity. Unlike standalone transcription services, Encodian Flowr integrates directly with Microsoft 365 and Power Automate, making it easy to manage at scale.
In this tutorial, we’ll demonstrate how to create a Power Automate flow that monitors a SharePoint document library, automatically transcribes audio, and saves the results to Word documents.

1.a. Flow name: Provide a name for your flow
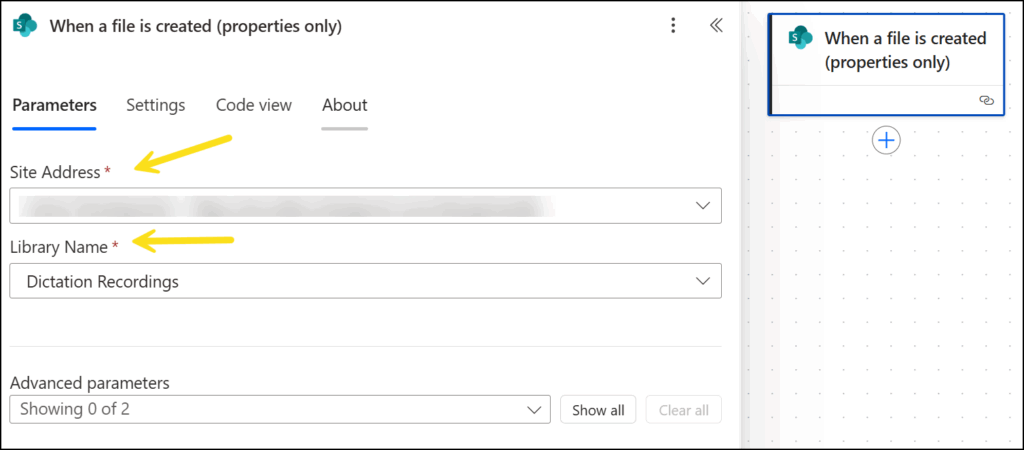
1.b. Trigger: Select the SharePoint ‘When a file is created (properties only)‘ trigger action
1.c. Click ‘Create‘.

2.a. Site Address: Select the name of the site where you have previously created the document libraries ‘Dictation Recordings’, ‘Dictation Templates’ and ‘Dictation Transcripts’.
2.b. Library Name: Select the library ‘Dictation Recordings’.
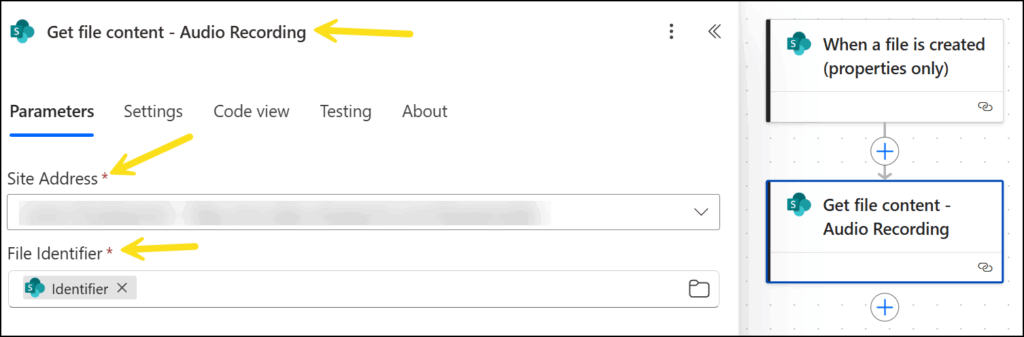
We now need to configure the flow to retrieve the audio file content from the SharePoint ‘Dictation Recordings’ library
3.a. Rename the action to ‘Get file content – Audio Recording’
3.b. Site Address: Select the name of the site where you have previously created the document libraries ‘Dictation Recordings’, ‘Dictation Templates’ and ‘Dictation Transcripts’.
3.c. File Identifier: Select the ‘Identifier’ property provided by the ‘When a file is created (properties only)‘ action.
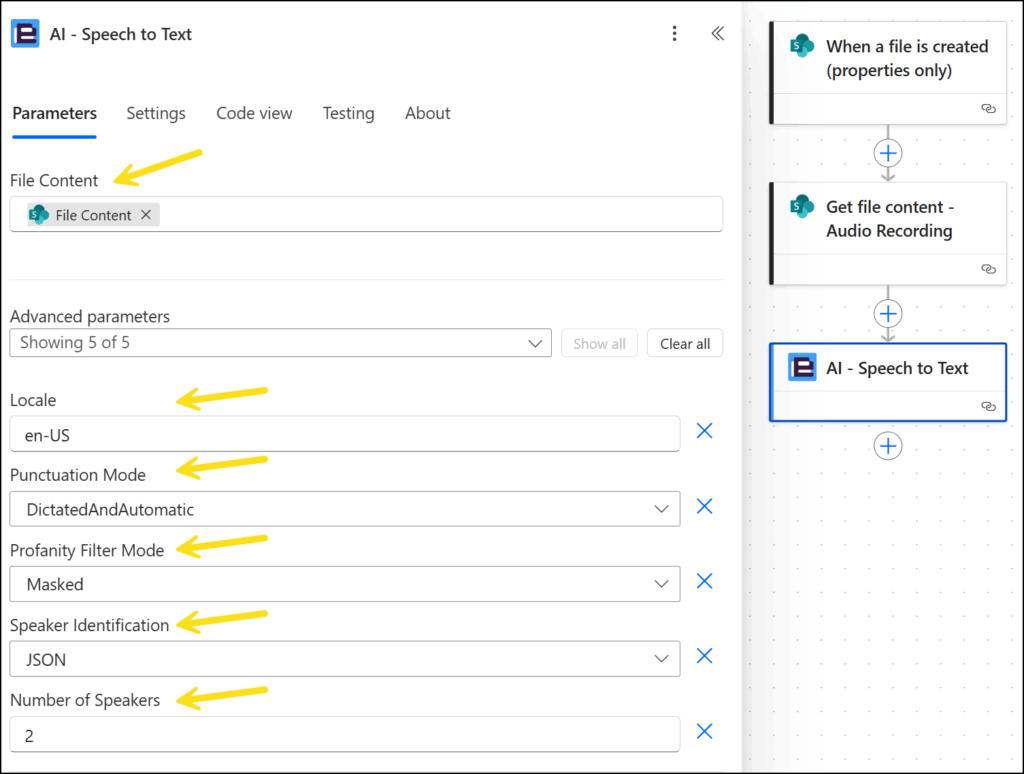
Now we need to add the Encodian action to transcribe the audio file with AI:
4.a. File Content: Select the ‘File Content’ output from the ‘Get file content – Audio Recording’ action.
4.b. Locale: Select ‘en-US’.
4.c. Punctuation Mode: Select ‘DictatedAndAutomatic’.
4.d. Profanity Filter Mode: Select ‘Masked’.
4.e. Speaker Identification: Select ‘JSON’.
4.f. Number of Speakers: Enter ‘2’. Please note this value is hardcoded but could also be informed by metadata added against the audio file when it is uploaded to the SharePoint document library.
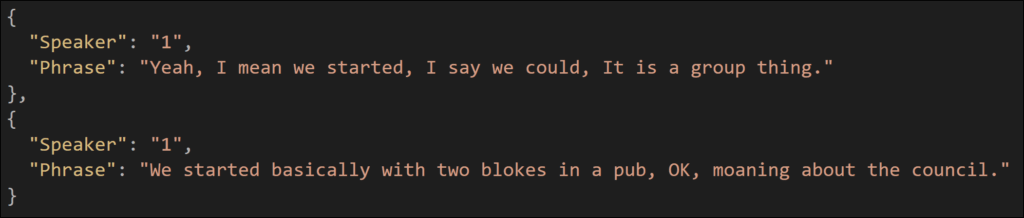
The transcribed text is returned as a JSON dataset as a collection of items with a ‘Speaker’ and ‘Phrase’ variable.
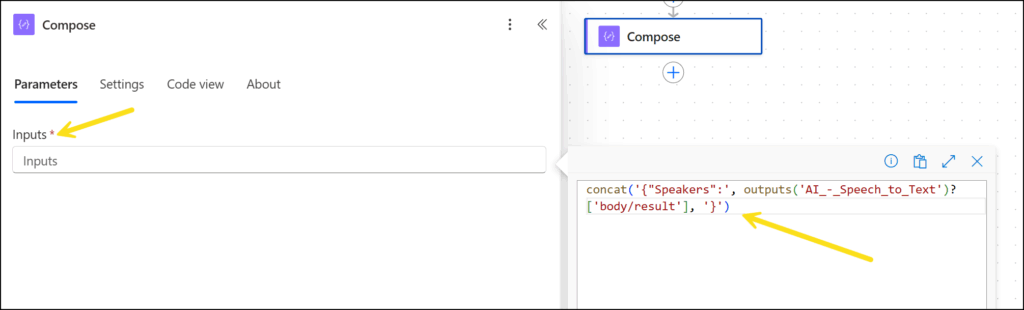
We’re going to use the Encodian ‘Word – Populate’ action to add this data to a Microsoft Word document, and for this scenario, we’ll need to format the data as an array. To do this, we will add a collection name of ‘Speakers’ and square brackets using the Power Automate ‘Compose’ action.

5.a. Inputs: Enter the expression ‘concat(‘{“Speakers”:’, outputs(‘AI_-_Speech_to_Text’)?[‘body/result’], ‘}’)’
We now need to configure the flow to add the data to a Microsoft Word template, so we’ll add an action to retrieve the template from the SharePoint ‘Dictation Templates’ library
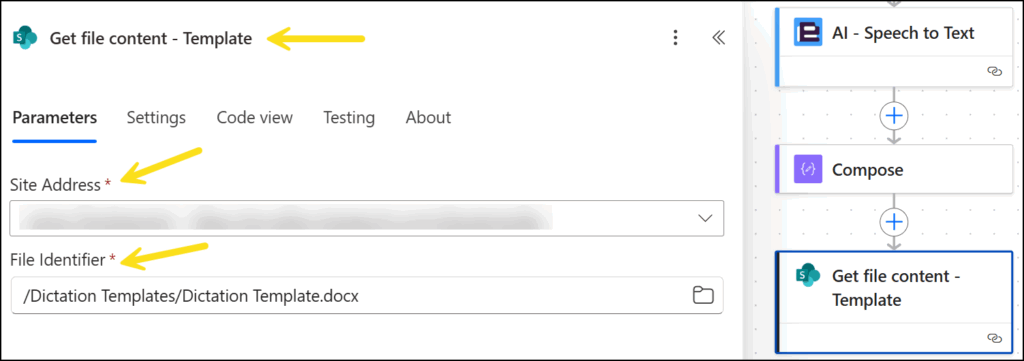
6.a. Rename the action to ‘Get file content – Template’
6.b. Site Address: Select the name of the site where you have previously created the document libraries ‘Dictation Recordings’, ‘Dictation Templates’, and ‘Dictation Transcripts’.
6.c. File Identifier: Select the file ‘Dictation Template.docx’ from the library ‘Dictation Template’.
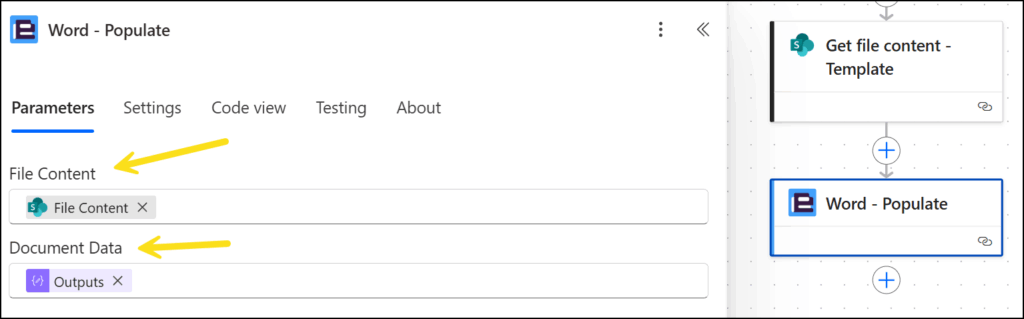
7.a. File Content: Select the ‘File content’ output from the ‘Get file content – Template’ action.
7.b. Document Data: Select the ‘Outputs’ output from the ‘Compose’ action.
We now have the transcribed data added to a Microsoft Word document which we can save to SharePoint:
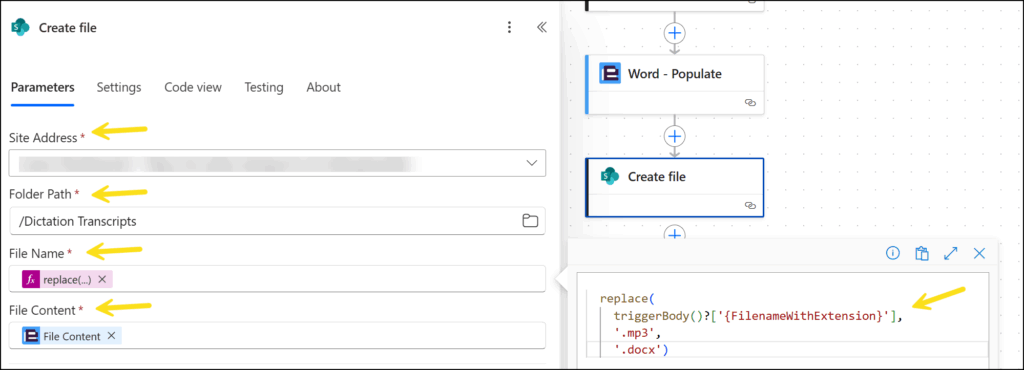
8.a. Site Address: Select the name of the site where you have previously created the document libraries ‘Dictation Recordings’, ‘Dictation Templates’ and ‘Dictation Transcripts’.
8.b. Folder Path: Select the ‘Dictation Transcripts’ document library.
8.c. File Name: Create a new filename by replacing the extension of the original audio file filename. Enter the expression ‘replace(triggerBody()?[‘{FilenameWithExtension}’], ‘.mp3’, ‘.docx’)’.
8.d. File Content: Select the ‘File content’ output from the Encodian ‘Word – Populate’ action.
Upload the sample audio file to the ‘Dictation Recordings’ document library. Await the execution of the Flow, then view the output in the ‘Dictation Transcripts’ document library.
![]()
Once you’ve automated audio transcription, you can extend this flow further in so many ways. Check out these examples:
Q: Can Power Automate transcribe audio files automatically?
Yes. With Encodian Flowr’s ‘AI – Speech to Text‘ action, you can transcribe .mp3, .wav, and other supported audio formats.
Q: Which languages are supported?
Encodian Speech to Text supports multiple locales, including en-US, en-GB, de-DE, fr-FR, and more.
Q: Can I identify multiple speakers in the transcript?
Yes. The JSON output supports speaker separation by assigning text segments to different speaker IDs.
Q: Can I customise the transcription?
Yes. Options include profanity filtering, punctuation mode, and speaker count configuration.
We hope this post provides a helpful guide to transcribing audio files using Power Automate and the Encodian Flowr connectors. If you require further assistance, please review the documentation on our support portal or raise a ticket with our support team.
Please share any feedback or comments – all are welcome.
Search 200+ Actions to see how Flowr can save you time
Sign up for your free 30-day trial; no cards, catches, or contracts.
CEO

