This step-by-step guide will provide an example of how to extract PDF form data in Microsoft Power Automate using Encodian’s PDF – Extract Form Data (previously Get PDF Form Data) action before creating a SharePoint list item using the extracted data. Once you have extracted the data, you can do anything with it (Power Automate capabilities permitting). This is just a straightforward example.
A holiday request PDF form is completed by company employees and sent to a generic mailbox for manual processing. This Power Automate solution picks up all relevant new emails, extracts the data from the PDF Form attachment, and adds the data to a SharePoint list for further approval processing.
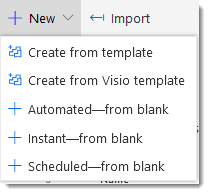
1. Create a new Flow using the ‘Automated — from blank‘ option
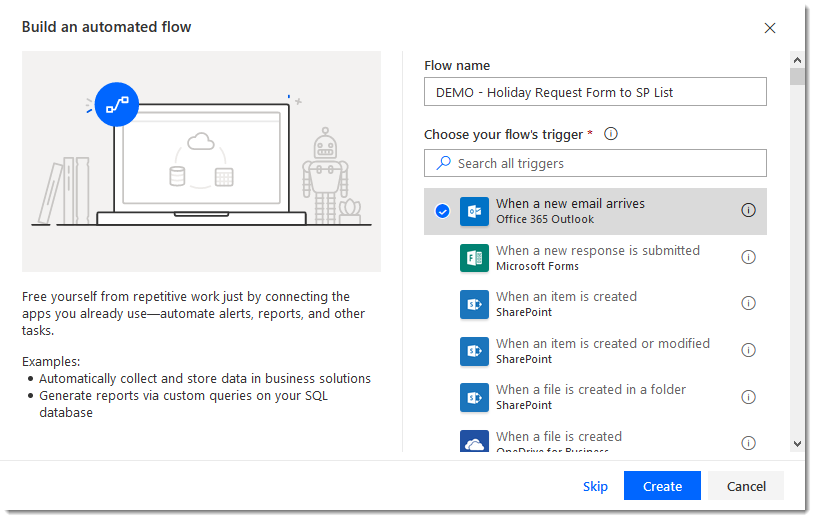
2. Enter a name for the Flow, select the ‘When a new email arrives‘ trigger, and click ‘Create.‘
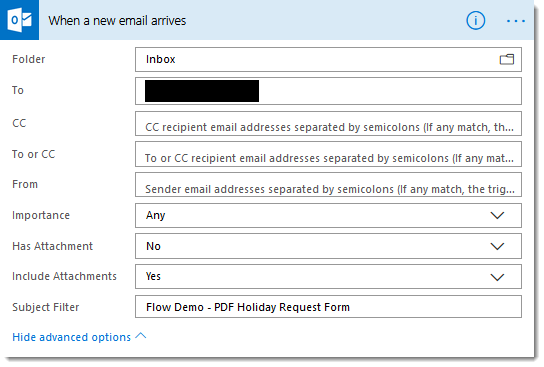
3. Configure the ‘When a new email arrives‘ trigger action to enable the targeted emails to be identified. In this example, we have set the following fields: To, Include Attachments and Subject Filter
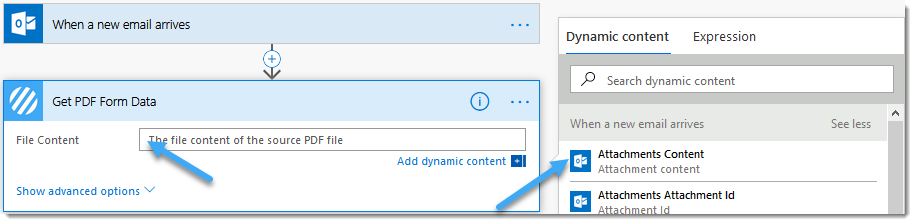
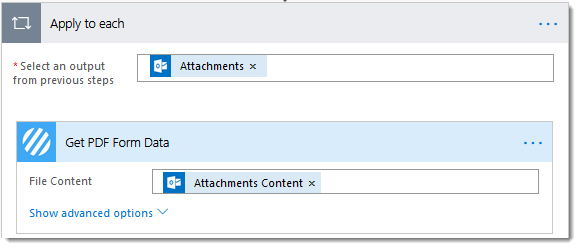
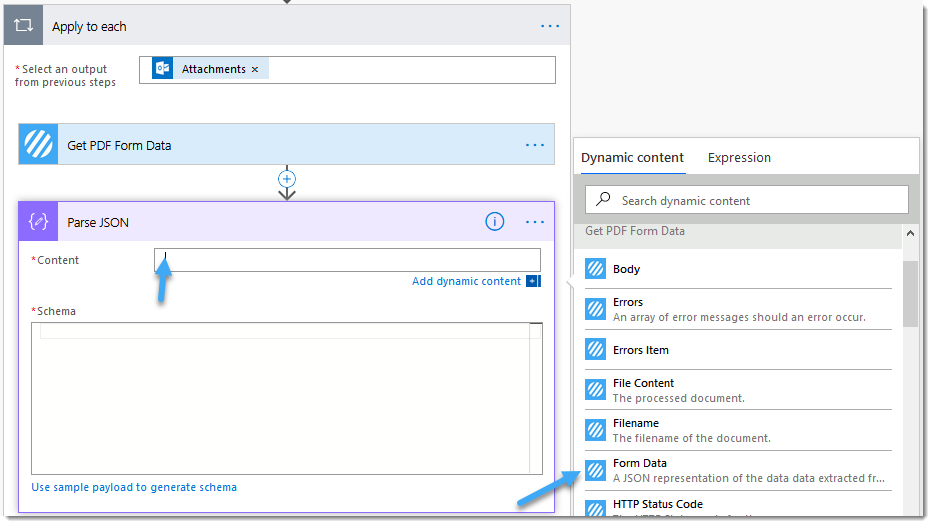
4. Add a ‘Get PDF Form Data‘ action
4.a. File Content: Select the ‘Attachments Content‘ field from the ‘When a new email arrives‘ action
NOTE: As there could be more than one attachment in an email, Power Automate will automatically place the PDF – Extract Form Data (previously Get PDF Form Data) action into an ‘Apply to Each‘ loop. You may need to add additional configuration to your flow to identify the correct attachment(s) as needed.
5. We now need to obtain a sample of the generated JSON data, enabling us to add additional actions to parse and use the returned JSON data.
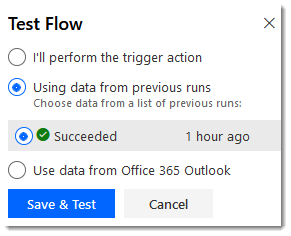
5.a. Test the Flow using your preferred method. Click ‘Save & Test‘
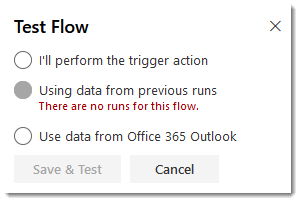
5.b. For this example, I selected ‘I’ll perform the trigger action‘, which I invoked by manually sending an email aligned to the configuration of the trigger action.
5.c. Once the Flow has been executed, open the PDF – Extract Form Data (previously Get PDF Form Data) action and click ‘Click to download.‘
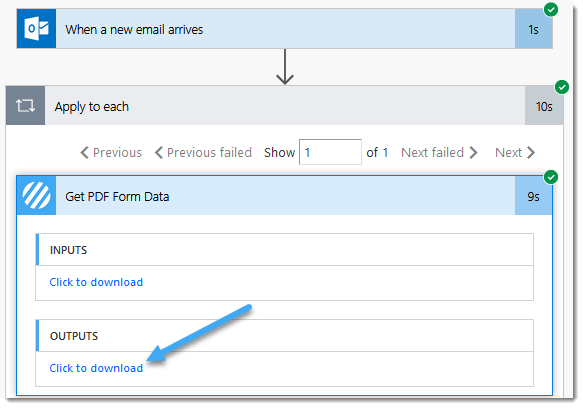
5.d. Depending on your browser, the JSON payload will either download as a file or open within a new browser tab. We use Firefox’s developer edition browser, which opens the JSON file in a new browser tab
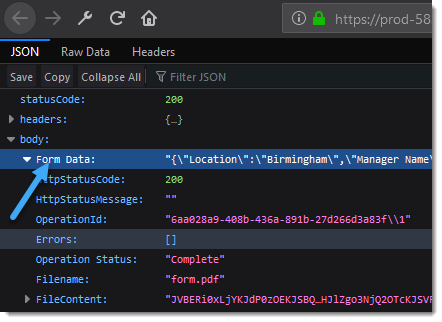
5.e. Locate and obtain the value of the ‘Form Data‘ node.
5.f. The JSON will contain ” escape characters which we need to remove. This can either be done with a text or code editor using ‘Find and Replace’ or online service.
6. Add a ‘Parse JSON‘ action
6.a. Content: Select the ‘Form Data‘ field from the PDF – Extract Form Data (previously Get PDF Form Data) action
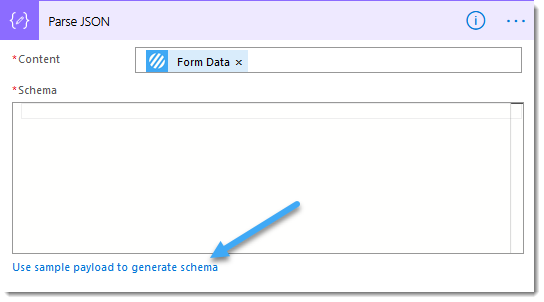
6.b. Click ‘Use sample payload to generate schema.‘
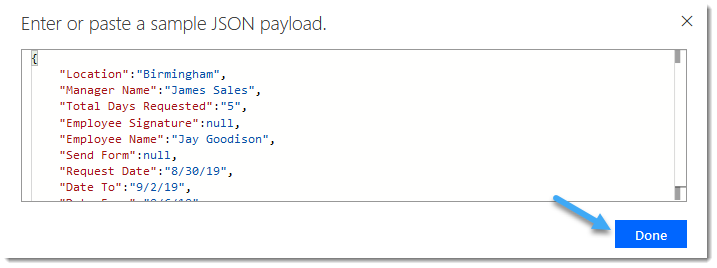
6.c. Copy and paste the cleaned JSON generated in Step 5.f to the text-area control, and click ‘Done.‘
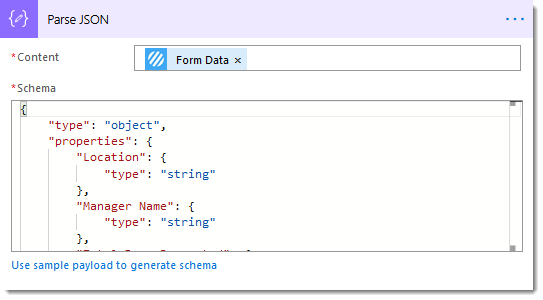
6.d. The ‘Parse JSON‘ action is now configured and will allow data to be selected as Flow dynamic data in subsequent actions.
7. Add SharePoint ‘Create Item‘ action
7.a. Site Address: Enter the location of the SharePoint list where the list item should be added.
7.b. List Name: Select the SharePoint list where the list item should be added
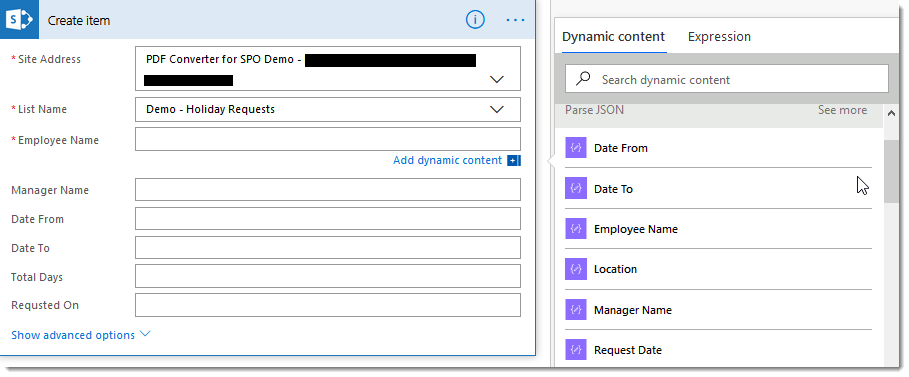
7.c Map fields from the ‘Parse JSON‘ action to the ‘Create Item‘ action.

8. Retest the Flow using data from the previous run
9. The flow should execute successfully
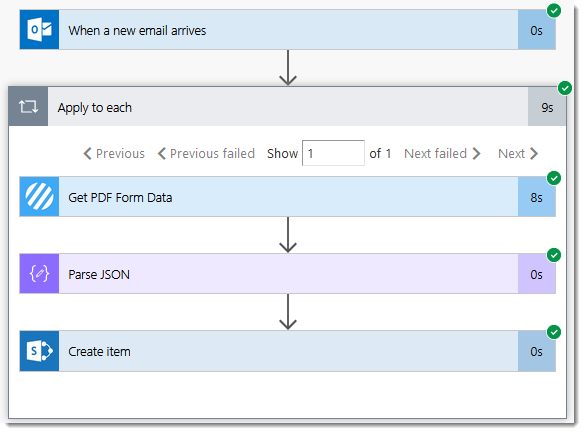
10. A new list item within the target SharePoint list should have been created.

Whilst this Flow adds a SharePoint list item. You can do anything with the extracted data and add custom system integration via HTTP Rest calls and Azure functions!
If you have any questions, comments, or need assistance, please contact us through the Encodian Support Portal.
Happy Flow building 🙂
UPDATE: We’re excited to announce some significant updates to Flowr for Power Automate! As of October 2024, we’ve improved by updating action names and splitting Flowr’s central Power Automate connector into nine specialized connectors. These changes will make your workflow faster, smoother, and more efficient. The new action names are more precise and intuitive, saving you time, while the focused connectors enhance performance and flexibility. This update also helps future-proof the platform for even more powerful features. Check out our updated action names blog.
Managing Director

