The who, what, where, when, why and how of redacting documents in Power Automate.
We’ve been having many conversations recently with customers, community members and Microsoft about providing secure access to information and documents contained within Office 365 and how to secure documents at REST, where there is a requirement to distribute outside of an organisation’s Office 365 tenant.
There are already well-documented features within the Microsoft Office client applications which enable sections/resources to be protected. However, what happens where you want to redact the content and what happens where you want to redact the content across multiple different file formats, including Microsoft Office File Formats?
Encodian has recently released the PDF – Redact (previously Redact PDF) Power Automate action, which redacts content in PDF documents! But hang on… does this only work for PDF documents? Yes, that is 100% correct and with good reason. Our research showed that in 99.99% of use cases where redaction was required, the document must be shared in a consistent, secure and immutable format (PDF), regardless of source file format.
By combining Microsoft Power Automate’s native or Encodian’s advanced PDF conversion actions, we can provide document redaction for 70+ file formats, allowing redaction rules to be easily applied to documents.
The PDF – Redact (previously Redact PDF) action allows users to specify one or more rules that locate content based on a free text search or a regex query. For example, you could specify to redact ‘Please redact me‘ where all instances of that text found within the document would be redacted. You could also utilise a regex for complex queries to find matching content before redacting.
The following steps outline how to set up a new Flow which locates sections within a document based on start and end tags using a regex query.
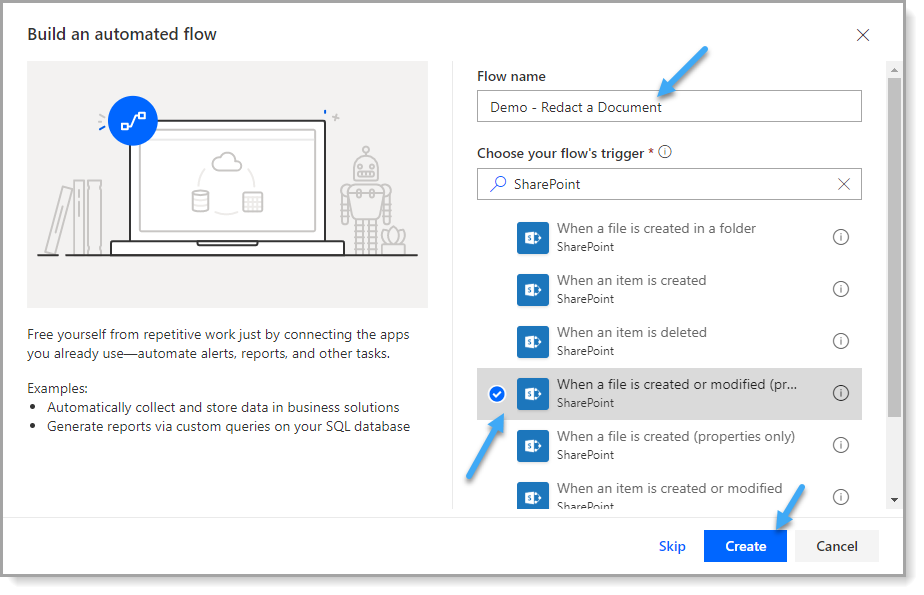
1. Create a new Flow from a blank template

2. Enter a name for the flow, select the ‘When a file is created or modified (properties only)‘ trigger action, and click ‘Create.‘
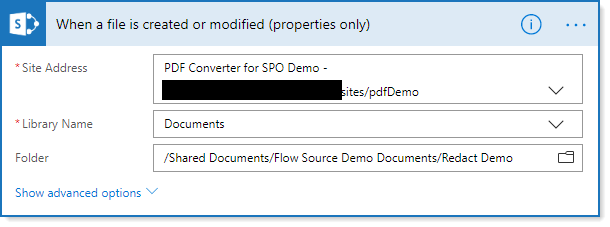
3. Update the SharePoint trigger actions with the selected site, library and folder location
3a: Site Address: <SharePoint Web Url>
3b: Library Name: <Library Name>
3c: Folder: (Optional) <Folder Name
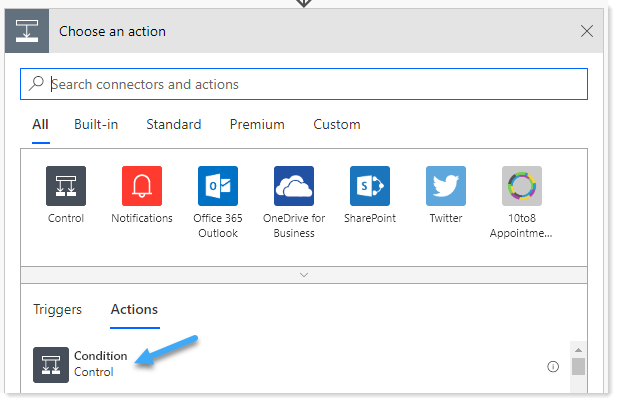
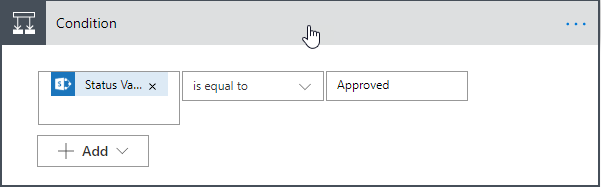
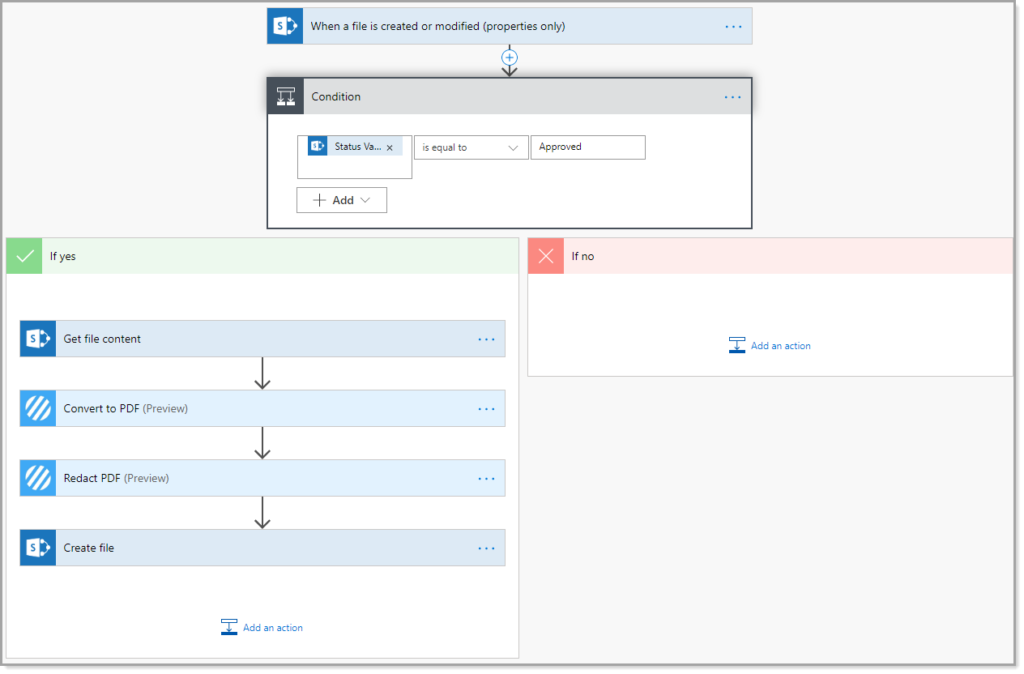
4. Add a ‘Condition‘ action to check whether the updated document has been approved.
5. To check whether a document has been approved, a choice field has been added to the SharePoint document library. We need to check whether the ‘Status‘ field value equals ‘Approved‘. Of course, you can apply your logic here as necessary. Set the condition action as follows:
5a. Set the condition value to the ‘Status Value‘ from the SharePoint trigger action.
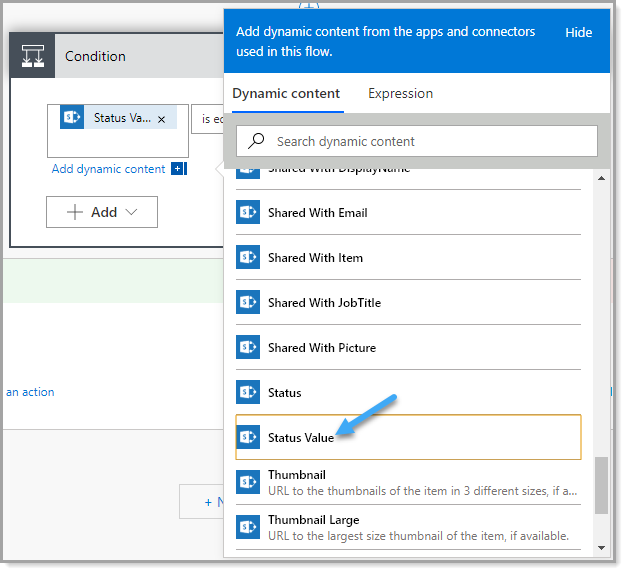
5b. Set the operator to ‘is equal to.‘
5c. Set the equation value to ‘Approved.‘
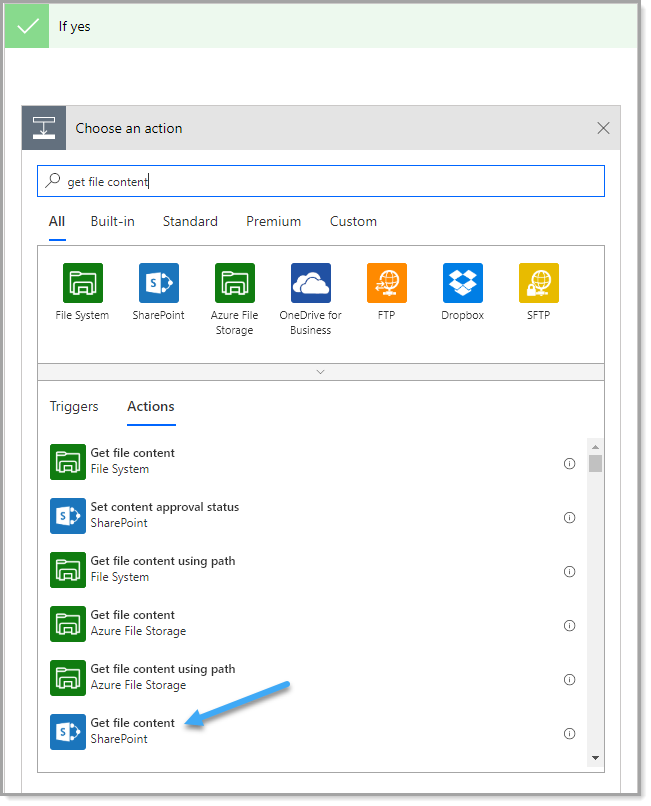
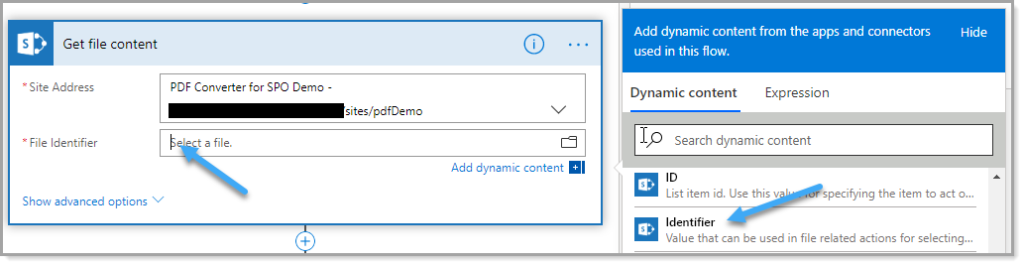
6. Within the ‘If yes‘ branch, add a SharePoint ‘Get File Contents‘ action
6a. Site Address: As per the value to set in step 3a
6b. File Identifier: Select the ‘Identifier‘ value from the SharePoint trigger action
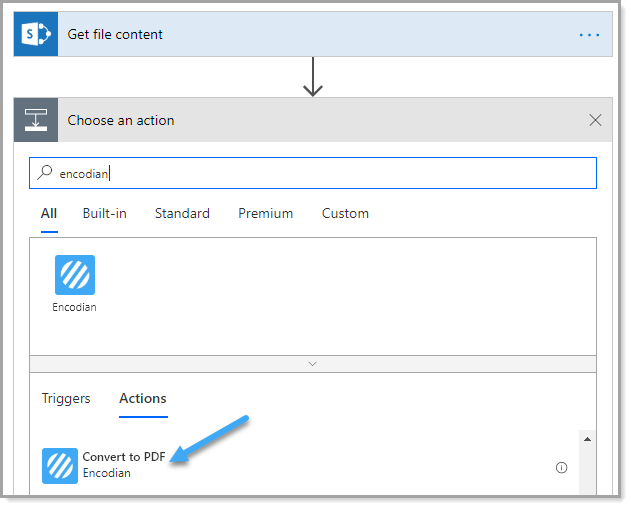
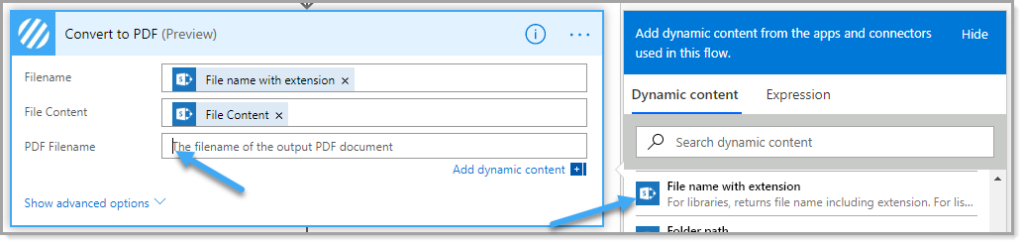
7. Next, add an Encodian Convert – File to PDF (previously Convert to PDF) action
7a. Filename: Select the ‘File name with extension‘ field from the SharePoint trigger action
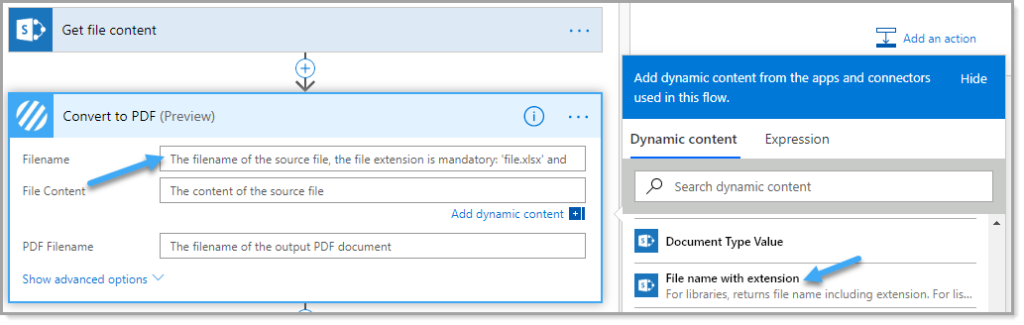
7b. File Content: Select the ‘File Content‘ field from the ‘Get File Content‘ action
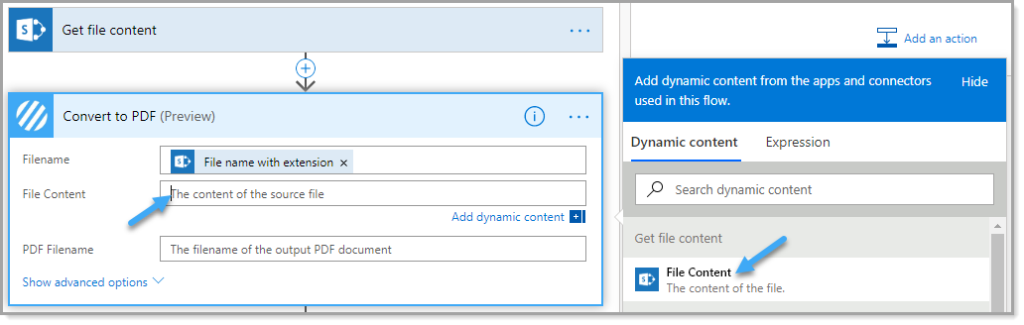
7c. PDF Filename: Select the ‘ File name with extension ‘ field from the SharePoint trigger action
8. Next, add an Encodian PDF – Redact (previously Redact PDF) action
8a. Filename: Select the ‘Filename‘ value from the Convert – File to PDF (previously Convert to PDF) action
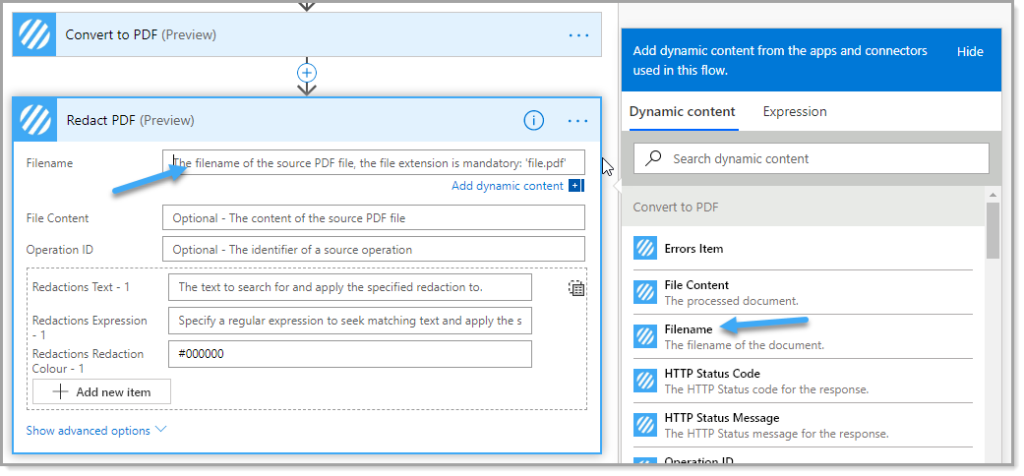
8b. File Content: Select the ‘File Content‘ value from the Convert – File to PDF (previously Convert to PDF) action
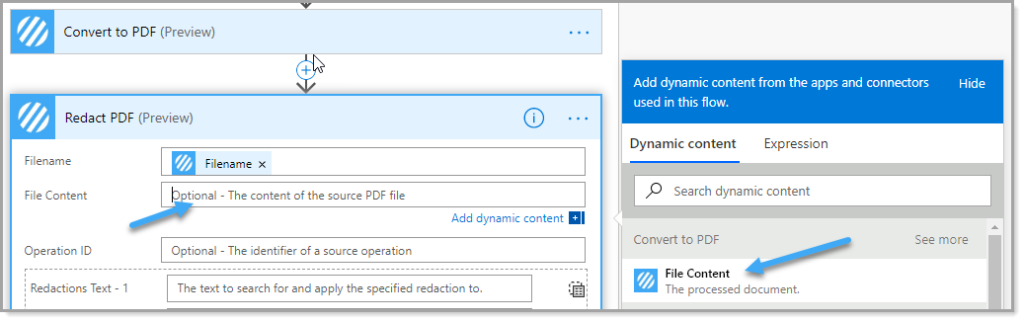
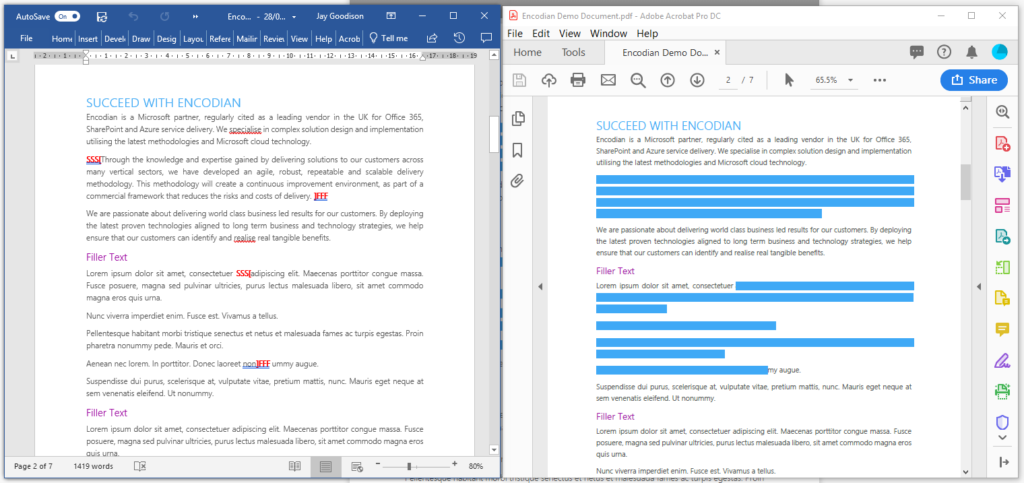
8c. Redactions Expression – 1: Add the following regex expression ‘SSS[(?s)(.*?)]FFF‘
8d. Redactions Redaction Colour – 1: Add your chosen redaction HTML colour code

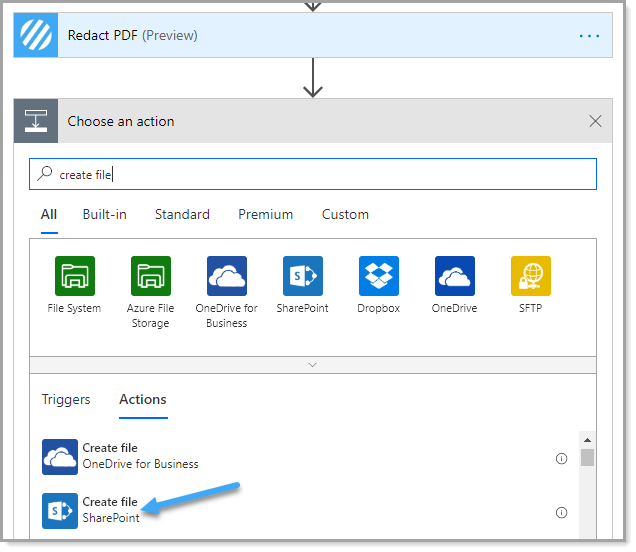
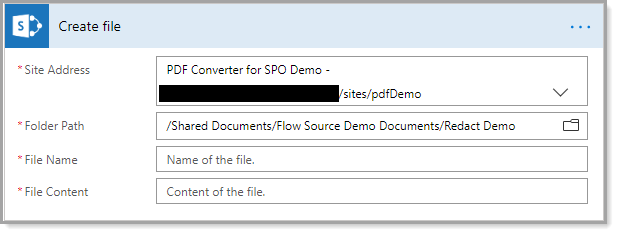
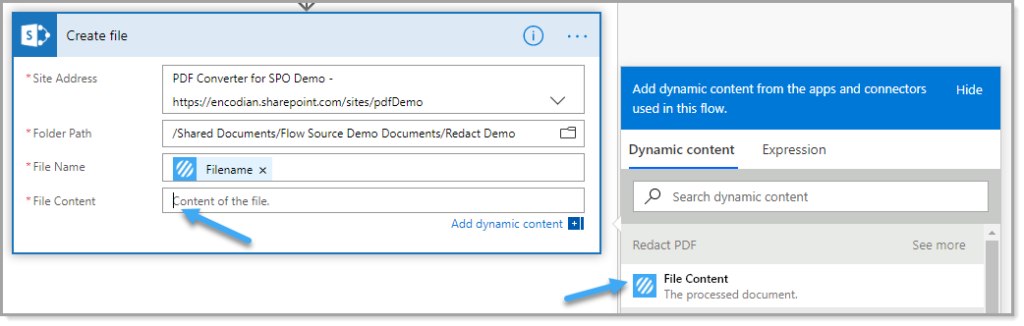
9. Next, add a SharePoint ‘Create file‘ action
9a. Site Address: As per the value to set in step 3a
9b. Folder Path: Enter the chosen destination library/folder
9c. File Name: Select the ‘Filename‘ value from the PDF – Redact (previously Redact PDF) action
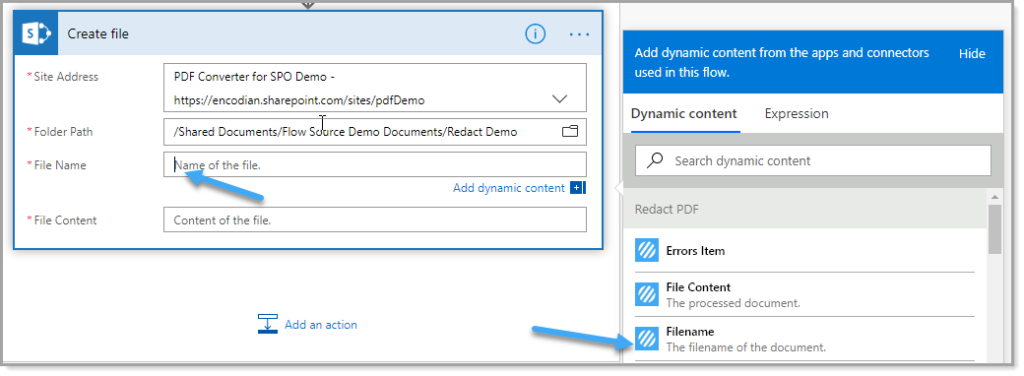
9d. File Content: Select the ‘File Content‘ value from the PDF – Redact (previously Redact PDF) action
10. The flow is now complete and ready for testing. Your completed Flow should look similar to:
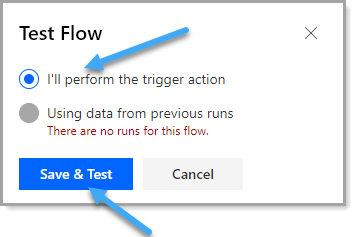
11. Click ‘Test‘, click ‘I’ll perform the trigger action‘, click ‘Save & Test‘
12. Update the target SharePoint file and set the required value to ensure the document will be processed according to your configured business logic. In this example, I will update the ‘Status‘ field to equal ‘Approved‘ to trigger the flow.
13. Your new Flow should successfully execute
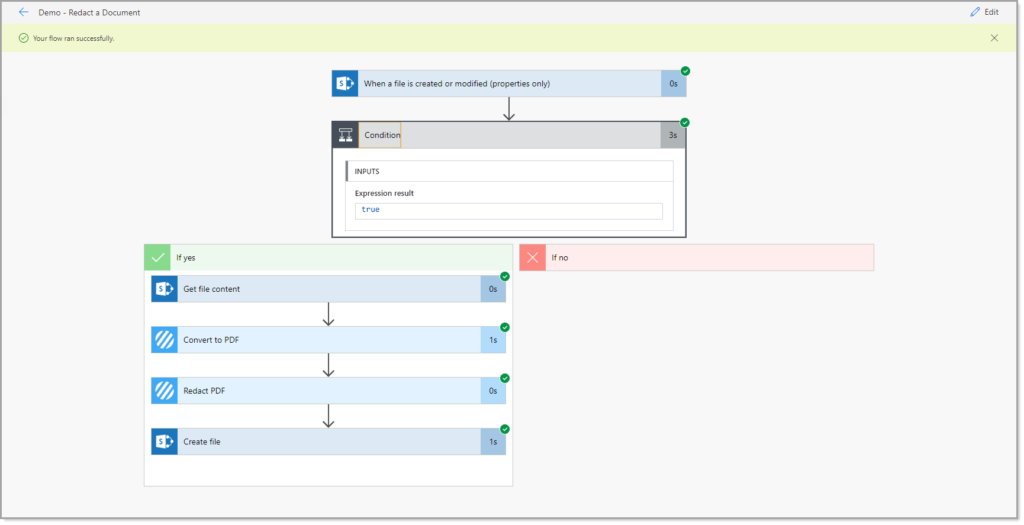
The resulting document should have been redacted according to the configuration supplied.
Now, who’s ready to redact documents in Power Automate?
UPDATE: We’re excited to announce some significant updates to Flowr for Power Automate! As of October 2024, we’ve improved by updating action names and splitting Flowr’s central Power Automate connector into nine specialized connectors. These changes will make your workflow faster, smoother, and more efficient. The new action names are more precise and intuitive, saving you time, while the focused connectors enhance performance and flexibility. This update also helps future-proof the platform for even more powerful features. Check out our updated action names blog.
Managing Director

