Are you stuck trying to automatically watermark images with Power Automate but all your images are different sizes? Maybe one was taken on a phone and another isn’t in a standard format or even a regular image ratio. Whenever this is the case, you will need your watermark to be adjusted to match the image dimensions automatically.
Watch the how-to video here or keep reading for a step-by-step guide!
In this flow, we will use the ‘Image – Add Image Watermark (previously Add Image Watermark to Image), Image – Extract Metadata (previously Get Image Information) and Image – Resize (previously Resize an Image) Encodian Flowr actions to resize a watermark image in proportion to a sample image and then combine them with Power Automate.
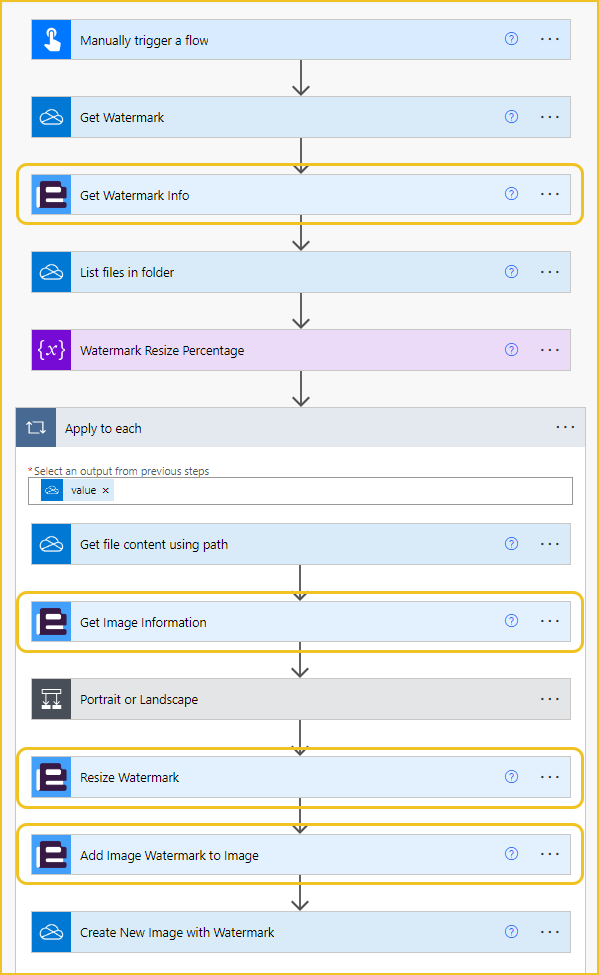
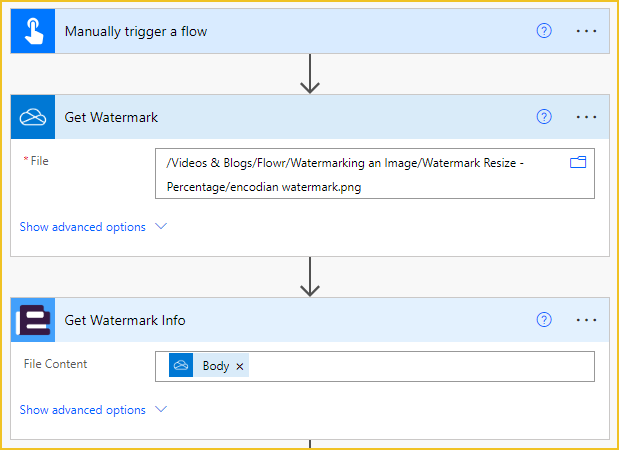
Firstly, we need to bring the watermark image content into the flow to find its dimensions to use in the resizing calculation in a future step. In this example, the watermark image is saved in a OneDrive location. Once we have the image content, we can use the ‘Get Image Information‘ Flowr action to find the dimensions of the watermark.
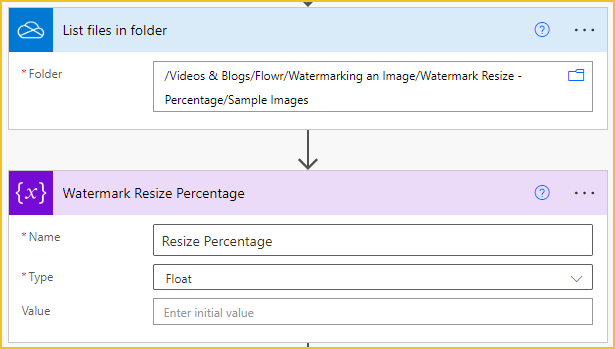
The images that need watermarking are saved in a OneDrive folder; the flow will loop through each item in the folder to add the watermark. To do this we need to use the ‘List files in folder‘ OneDrive action. This step will change depending on where your images are saved and how you pass them into the flow.
Finally, before we start looping through each image, a variable called ‘Resize Percentage‘ is initialised, which stores the percentage that the watermark image will be resized. The variable is of type float.
The remaining flow steps will all take place in and apply to each loop.
Now we have the OneDrive path of the image – we can get the image content. We can then use this with a second ‘Get Image Information‘ Flowr action to get the image dimensions. Once we have the image dimensions, we can determine whether the image is portrait or landscape; the orientation of the image will alter the maths used.
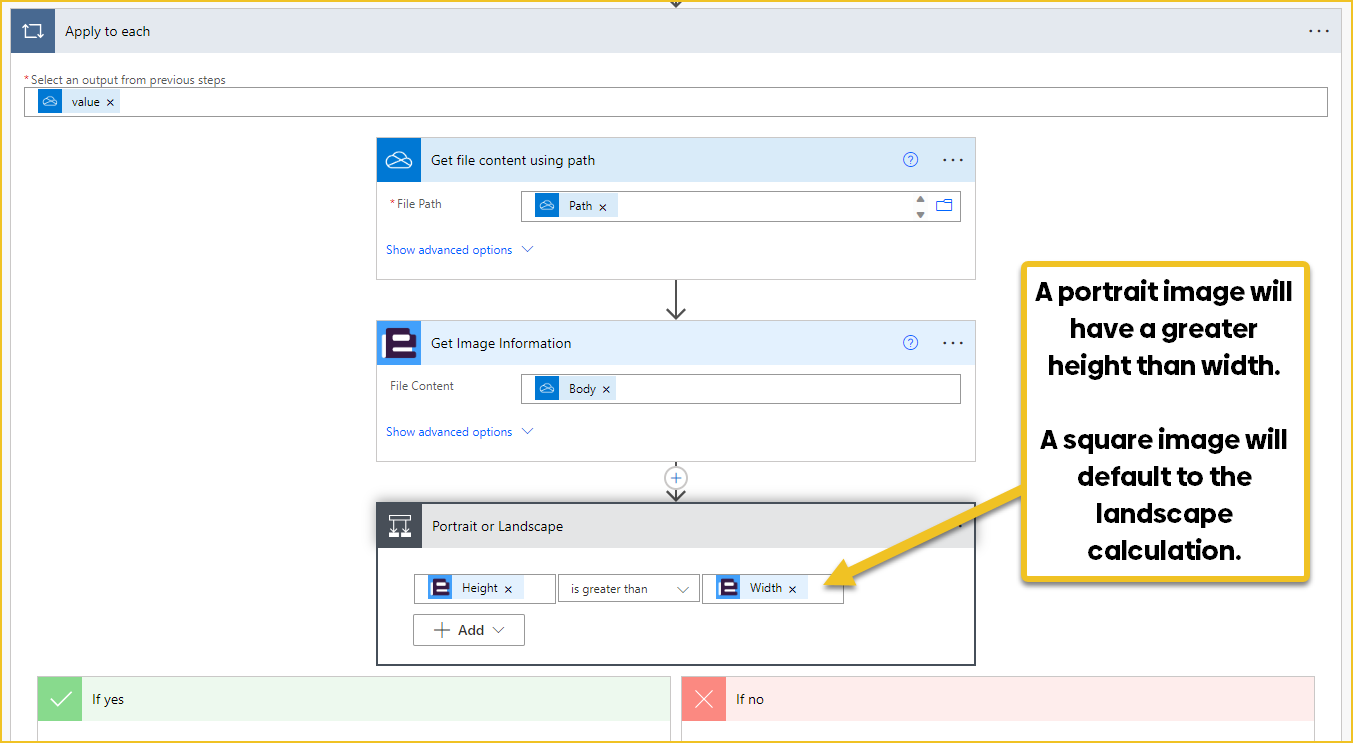
Once the orientation of the image is determined, the desired height of the watermark image is calculated using the following calculations:
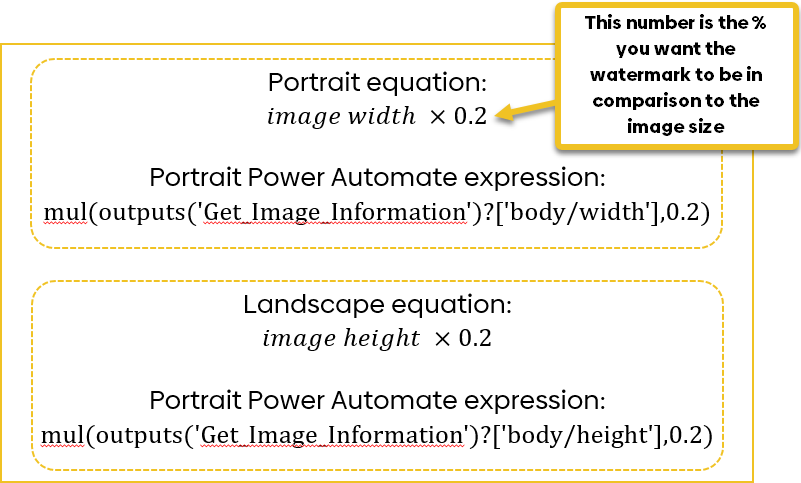
mul(outputs('Get_Image_information')?['body/width'],0.2)
mul(outputs('Get_Image_information')?['body/height'],0.2)
In these calculations, the watermark image is set at 20% of the image size; you can change this percentage by changing the decimal multiplier in the calculations.
When we know what the height of the watermark image needs to be, we can calculate what the resize percentage is to reach the desired height. The calculation for this is the same for both portrait and landscape orientations.
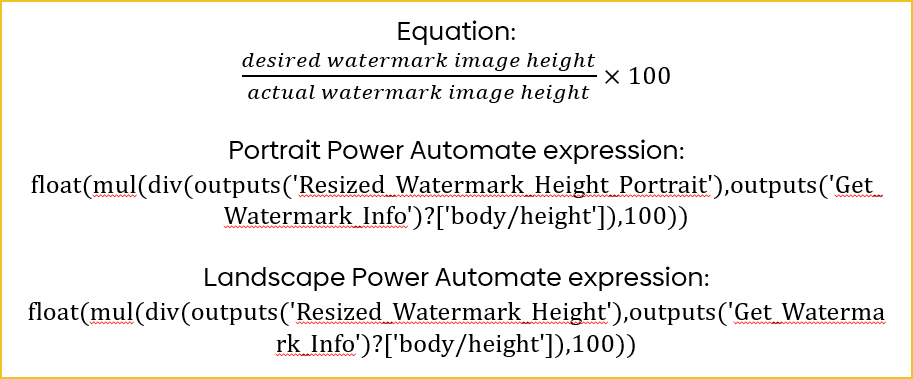
float(mul(div(outputs('Resized_Watermark_Height_Portrait'),outputs('Get_Watermark_Info')?['body/height']),100))
float(mul(div(outputs('Resized_Watermark_Height'),outputs('Get_Watermark_Info')?['body/height']),100))
In the Power Automate expressions, we add float() to ensure the outputs are float values; this is needed for the rounding in the next step. Once the percentage has been calculated, it can be set to the ‘Resize Percentage‘ variable we initialised at the start of the flow.

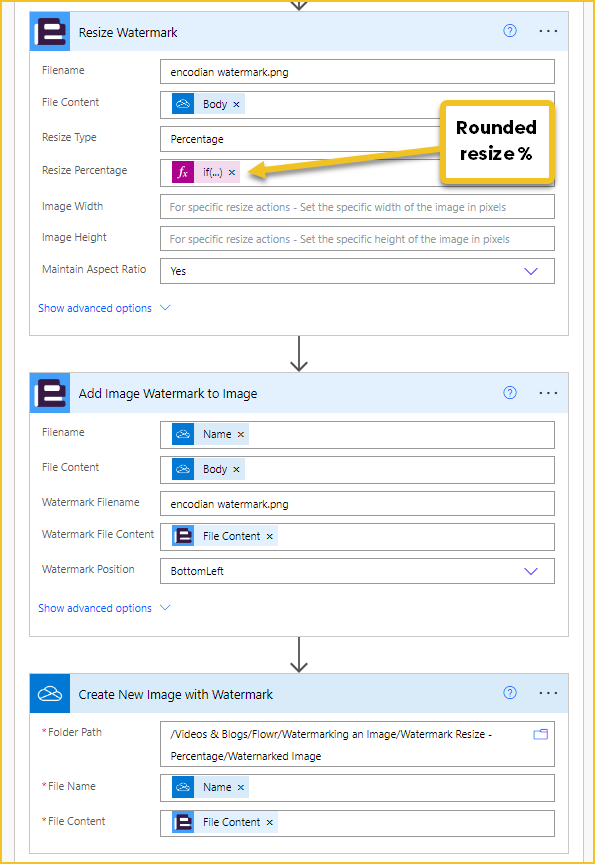
Now we have everything we need to resize the watermark image and add it to the sample image!
The last Power Automate expression we need to use rounds the resize percentage to a whole number; this is the input for the Resize Percentage field of the ‘Resize Watermark‘ step:

if(greater(Mod(variables('Resize Percentage'),1),0.5),add(int(first(split(string(variables('Resize Percentage')),'.'))),1),first(split(string(variables('Resize Percentage')),'.')))
After the watermark is added to the image, the last step is to save the newly watermarked images. My flow saves the images to a OneDrive folder, but this step will likely change depending on your use case.


UPDATE: We’re excited to announce some significant updates to Flowr for Power Automate! As of October 2024, we’ve improved by updating action names and splitting Flowr’s central Power Automate connector into nine specialized connectors. These changes will make your workflow faster, smoother, and more efficient. The new action names are more precise and intuitive, saving you time, while the focused connectors enhance performance and flexibility. This update also helps future-proof the platform for even more powerful features. Check out our updated action names blog.
Technical Evangelist

