Want to know how to populate a Word or PDF document using Power Automate? Well, you’re in the right place!
Back in May 2020, we posted to show how you can dynamically add data to a PDF or Word document using the following Encodian actions:
Now, these actions still provide viable options for adding data to PDF / Word documents. Still, there is a fourth option which we’d suggest as the optimal solution for generating documents and populating them with data. The Word – Populate (previously Populate Word Document) action provides a powerful solution which handles conditional logic, repeating sections, table data, lists, HTML, document insertion, charts and much more! Please refer to the syntax documentation for further details: Template Syntax for Populate Word Document. We’ve previously posted example solutions which use the Word – Populate (previously Populate Word Document) action, which is well worth reviewing:
The Word – Populate (previously Populate Word Document)action requires two elements
1. File Content: The Microsoft Word Document (DOCX) to populate
2. Document Data: The JSON data to populate the document with
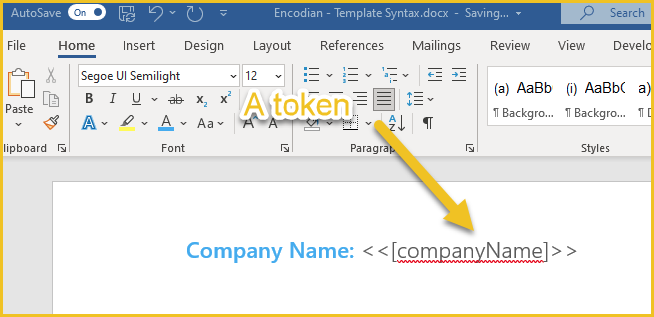
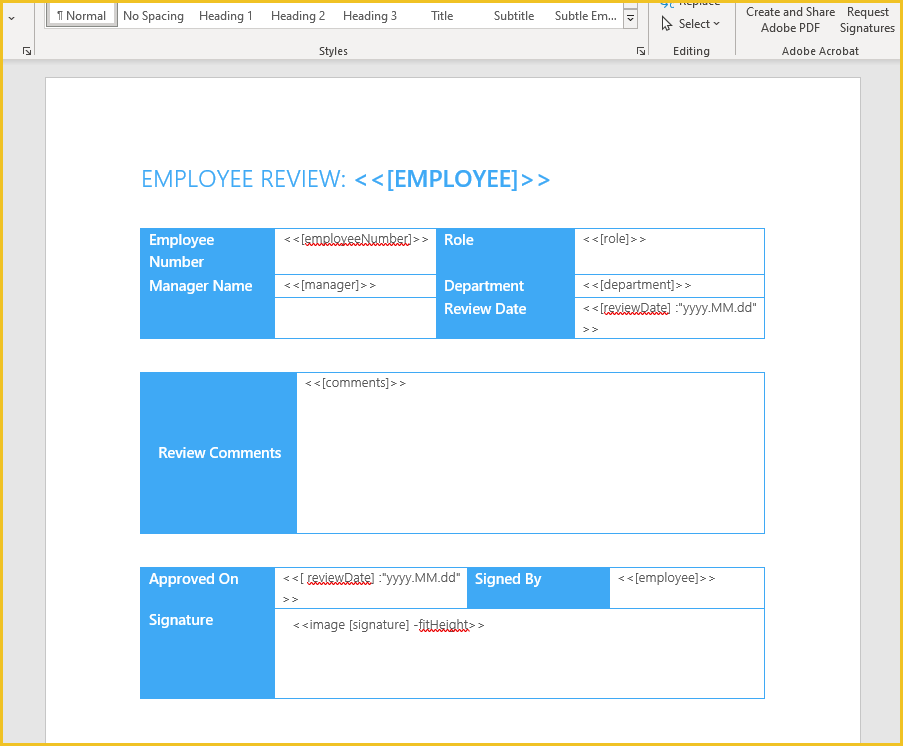
The Microsoft Word document should be configured with tokens which will be replaced at runtime with the JSON data provided. An example of a token:
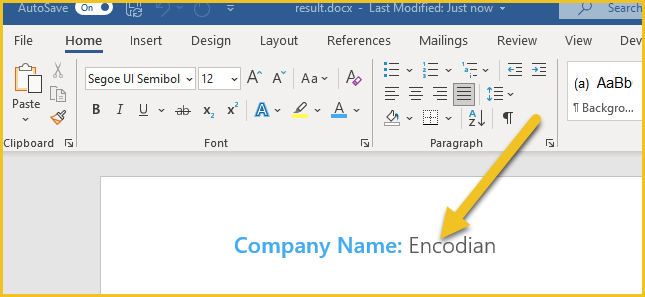
An example of a corresponding JSON data structure:
{
   "companyName":"Encodian"
}
Note that the name of the JSON node matches the value of the token: companyName
Here is a very simple Flow which will populate the manually provided document and save the output to OneDrive:

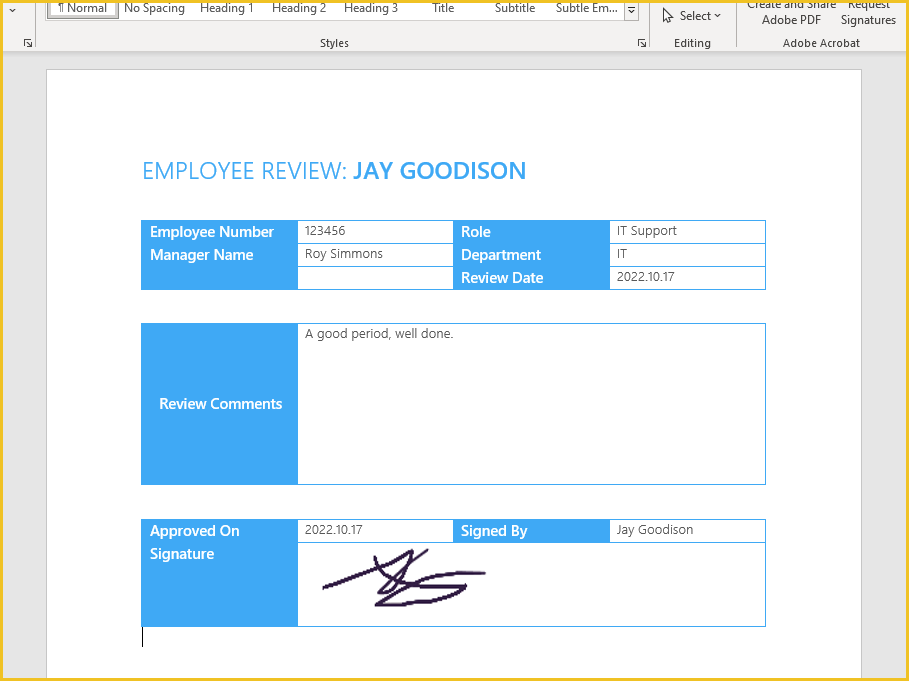
The resulting document:
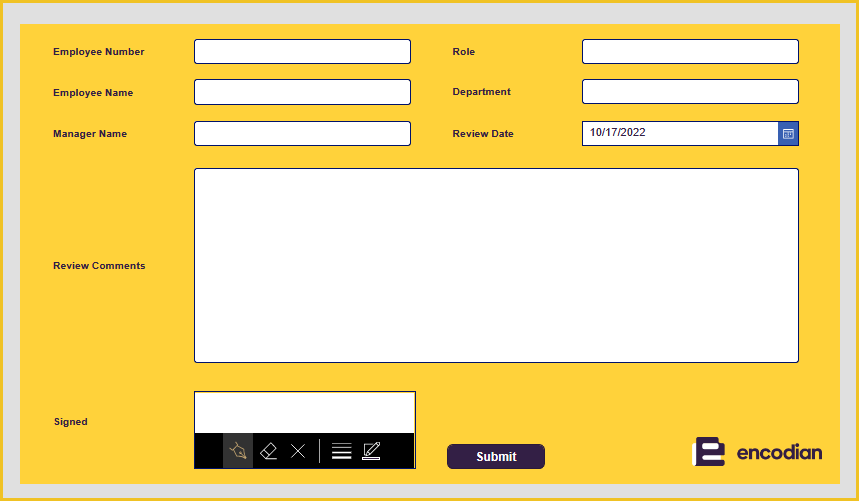
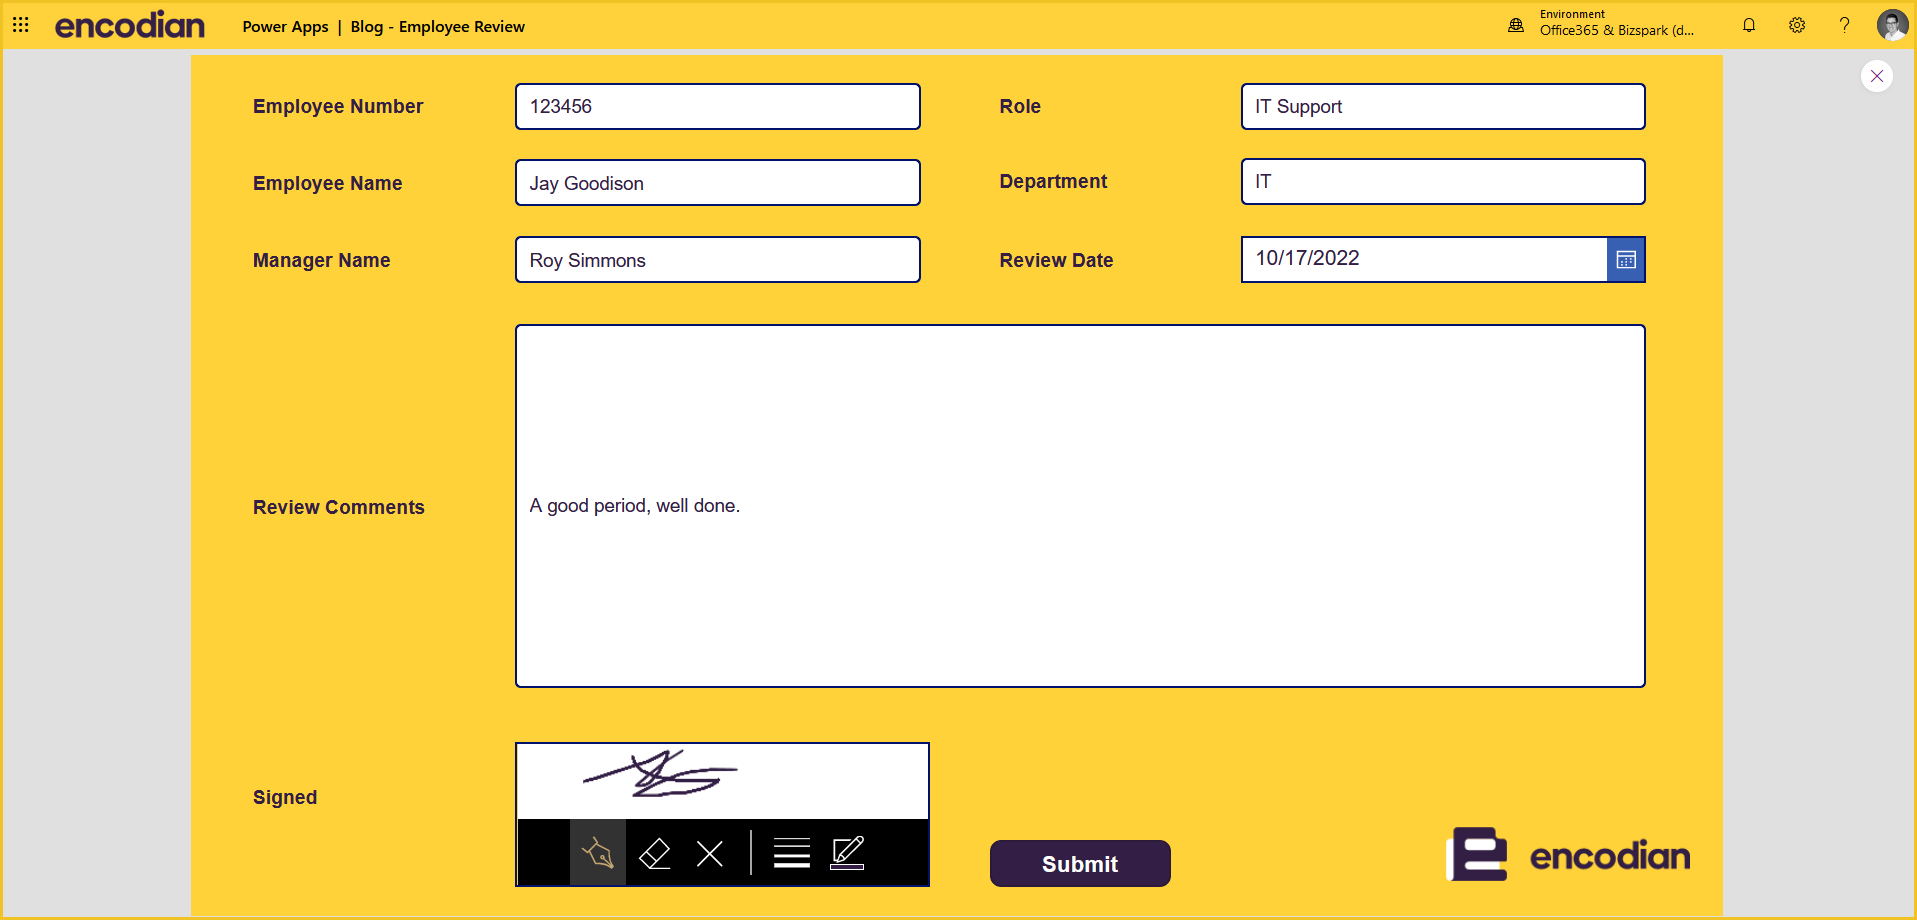
Consider this common scenario; We have a PowerApp which collates data for a business purpose, and once the data is collated, we need to create a document rendition of that data. I have set up a very simple PowerApp for conducting an ‘Employee Review’ to demonstrate this. I will pass the data to Power Automate to create a document representing the data captured during the review.
This is the super simple PowerApp, noting I have just added controls to a screen as opposed to using a form:
Follow these simple steps to update the PowerApp to pass data to a Power Automate flow.
1. Click ‘Power Automate‘ > ‘Create new flow.‘

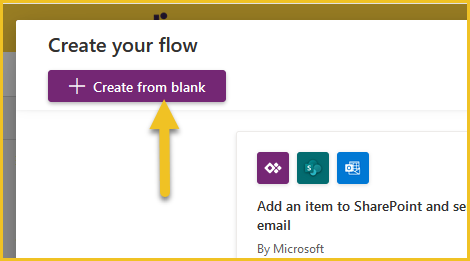
2. Click ‘Create from blank.‘
3. Set a name for your Flow
4. Add the SharePoint ‘Get File Content‘ action or related action to obtain the ‘File Content’ of the Word template file.
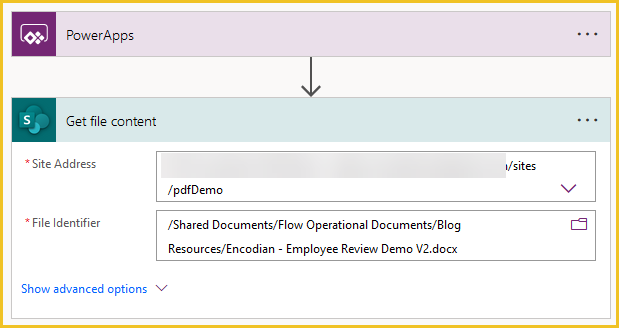
The word template for this demo has been configured as follows:
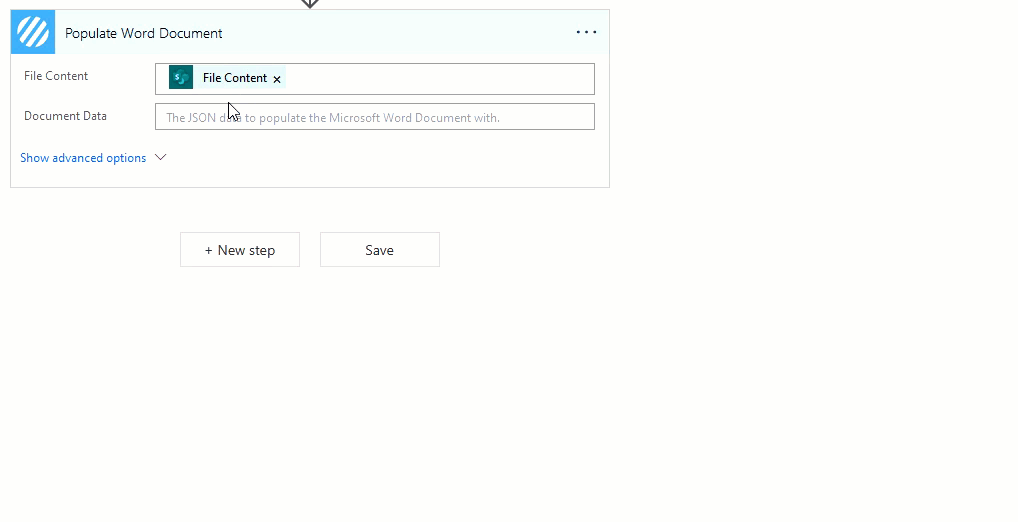
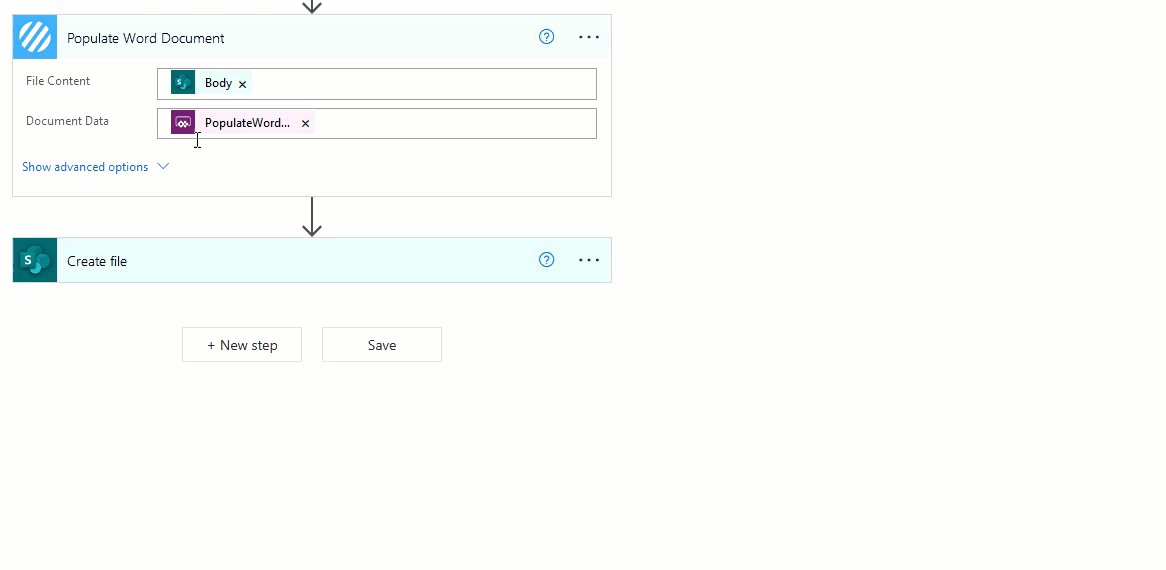
5. Add the Encodian Word – Populate (previously Populate Word Document) action
5.a. File Content: Select the ‘File Content‘ property provided by the SharePoint ‘Get file content‘ action
5.b. Document Data: Select ‘Ask in PowerApps‘
We’ll configure the PowerApp to provide data as a JSON string. However, the pen input control within the example PowerApp will give the image as a dataUri value and not a base64 string.
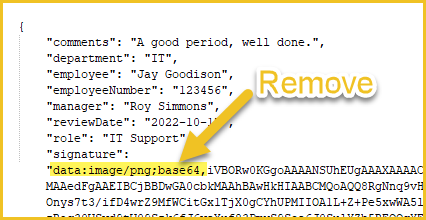
The Encodian action only expects a base64 value; therefore, we can add this simple replace() expression to omit the unwanted dataUri details.
Additionally, the PowerApp will return the data as an array, but we only need access to a single property (the JSON string), so therefor we need to use the following complete expression configuration to replace the unwanted data values and obtain the first item within the array: first(json(replace(<PowerAppProperty>,’data:image/png;base64,’,”)))
Update the flow as follows:
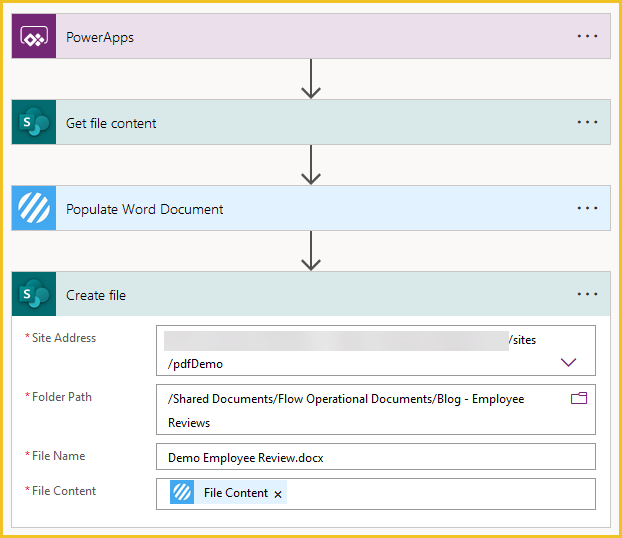
We now need to do something with the generated file. For this demo, we’ll save it to SharePoint. You may wish to parse the JSON value provided by PowerApp so that you can use this data within the flow. I’ve just hard-coded the filename value for demo purposes.
6. Add a SharePoint ‘Create file‘ action
6.a. Site Address: Set to the value of the SharePoint site, which contains the target document library
6.b. Folder Path: Set to the value of the target SharePoint folder
6.c. File Name: Enter the required value
6.d. File Content: Select the ‘File Content‘ property from the ‘Populate Word‘ action
7. Save and close the flow
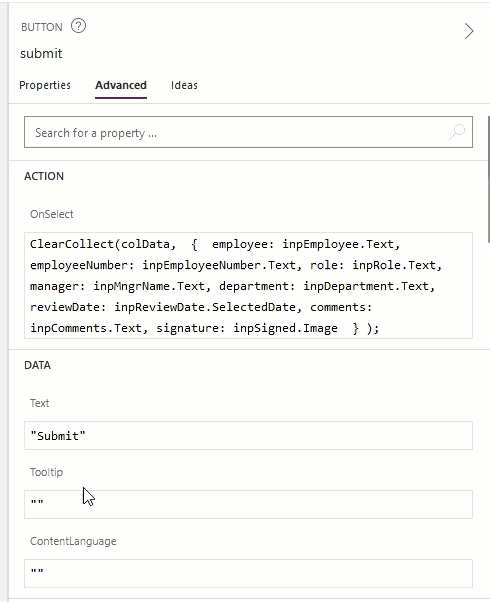
8. Within the PowerApp, select your submit button, and click ‘Advanced.‘
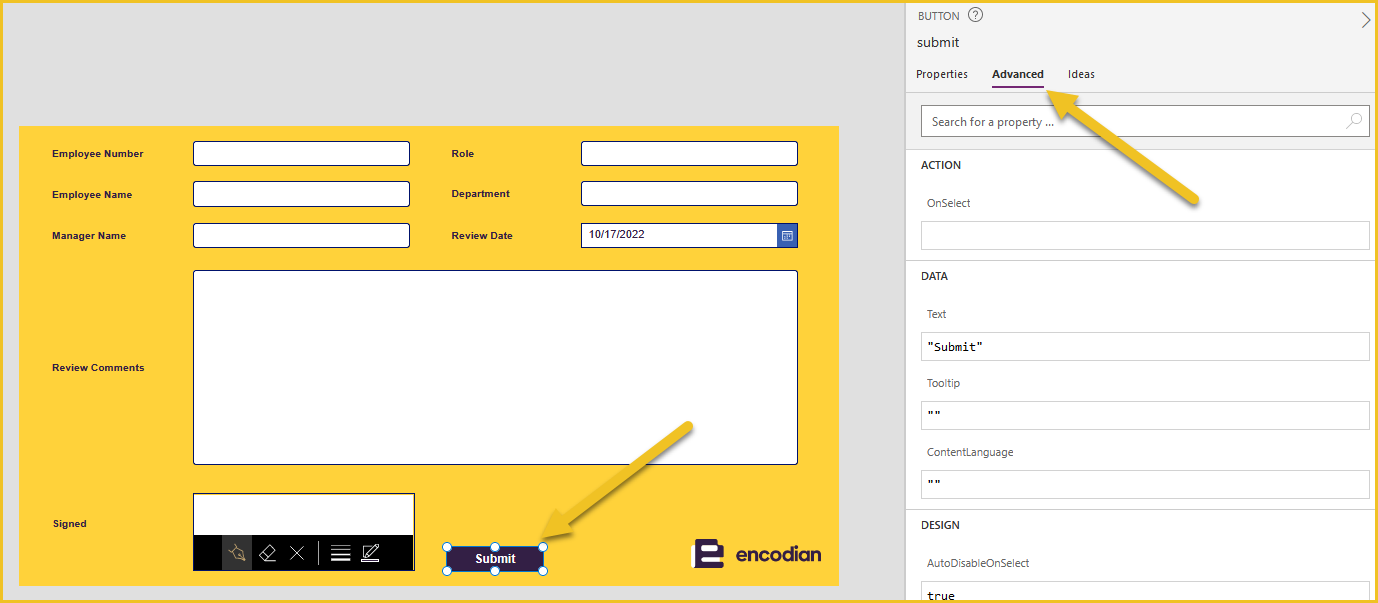
9. Within the ‘OnSelect’ property, add the following configuration, updating as required for your application:
ClearCollect(colData,
  {
    employee: inpEmployee.Text,
    employeeNumber: inpEmployeeNumber.Text,
    role: inpRole.Text,
    manager: inpMngrName.Text,
    department: inpDepartment.Text,
    managerRole: inpMngrRole.Text,
    reviewDate: inpReviewDate.SelectedDate,
    comments: inpComments.Text,
    signature: inpSigned.Image
  }
);
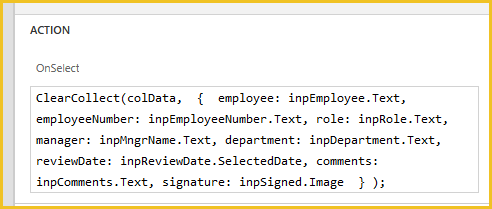
This configuration collates data within the form into a collection so we can pass it to the Power Automate flow.
10. Underneath the previously added configuration, append the following: ‘<autoSelect>‘.Run(JSON(colData, IncludeBinaryData));
11. Your PowerApp is ready for testing. When you click the ‘Submit’ button, the data will be sent to the Power Automate flow.
12. The Power Automate flow will be invoked, and the JSON data will be passed to the Encodian action

13. The document will be available from the configured location.
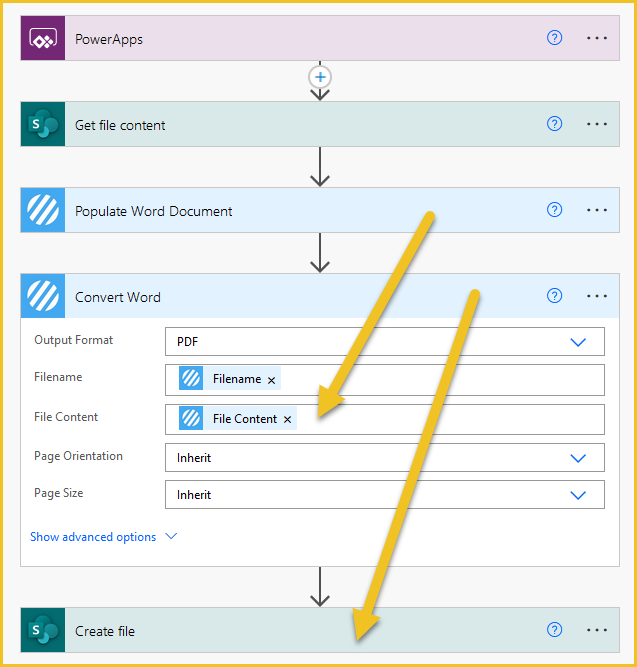
If a PDF rendition is required, update your flow to use the Encodian ‘Convert – Word‘ action as follows:
We hope this post provides valuable information on how to build documents passing dynamic data, specifically how to do this using data collated via a PowerApp.
Please share any feedback or comments – all are welcome
UPDATE: We’re excited to announce some significant updates to Flowr for Power Automate! As of October 2024, we’ve improved by updating action names and splitting Flowr’s central Power Automate connector into nine specialized connectors. These changes will make your workflow faster, smoother, and more efficient. The new action names are more precise and intuitive, saving you time, while the focused connectors enhance performance and flexibility. This update also helps future-proof the platform for even more powerful features. Check out our updated action names blog.
Managing Director

