Although Power Automate and SharePoint are both Microsoft products, they don’t interact as well as any of us would like…
But hopefully, you’ve already picked up some of our recent announcements regarding our new product ‘Trigr‘, which provides the following critical features for SharePoint and Power Automate integration:
This article will focus on the first feature and provide a step-by-step guide covering how to set up your Encodian ‘Trigr‘ subscription and configure it to make a single Power Automate Flow available across all SharePoint sites and contained document libraries (or lists) within your SharePoint Online tenant instantly!
If you’d prefer a video tutorial, please check out the following: Activate and configure a ‘Trigr’ trial subscription.
This step-by-step guide is broken down into the following sections:
Fear, not. The entire process takes no more than 5 to 10 minutes!
The first step is super simple. To create an Encodian ‘Trigr‘ trial, complete the following form on our website: Encodian ‘Trigr’ Sign-Up Form.
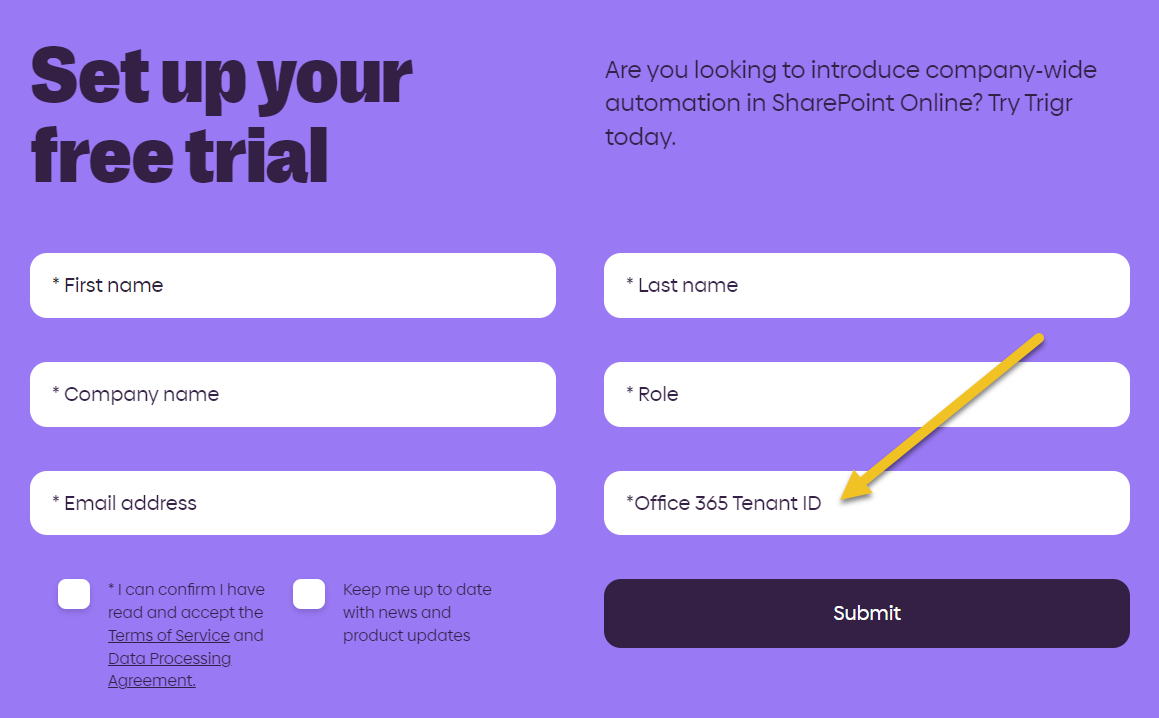
Note: Providing the correct ‘Microsoft 365 Tenant ID‘ is critical. This is used to associate your Encodian subscription with your SharePoint Online tenant, and configuration issues will be created if the value is incorrect!
If you are unsure how to obtain the correct ‘Microsoft 365 Tenant ID‘ value, please review the following short article: Retrieve your Microsoft 365 Tenant ID.
If you still need help, please raise a support ticket with Encodian.
So currently, to deploy a single Power Automate Flow to targeted SharePoint sites and contained libraries and/or lists, you’ll need to create multiple Power Automate flows. This is not ideal and is one of the reasons we made ‘Trigr‘.
Encodian ‘Trigr’ does not make copies of a flow, ‘Trigr‘ provides a SharePoint extension (App) which dynamically displays all required Power Automate flows to the user. Thus this is available everywhere, all SharePoint lists and libraries (or specific ones if you have applied a specific targeting configuration.
The first step, therefore, is to install the ‘Trigr‘ SharePoint Online app:
1. Download the ‘Trigr.sppkg‘ app package
2. Navigate to the SharePoint Admin Center by entering the following URL in your browser. Replace yourtenantprefix with your Microsoft 365 tenant prefix.
https://{your-tenant-prefix}-admin.sharepoint.com
3. In the left sidebar, select More features
4. Locate the Apps section and select ‘Open‘.
5. Click ‘Upload.‘
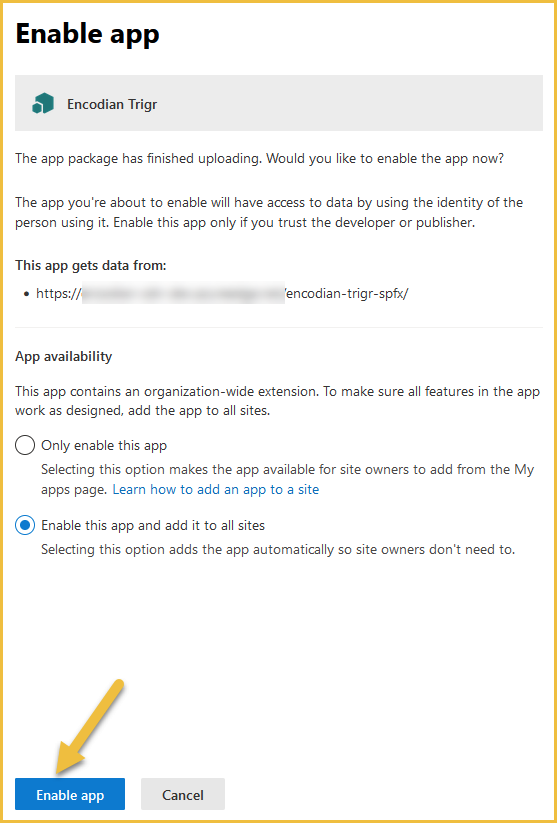
6. Select the preferred deployment option. We recommend deploying the Encodian Trigr app to all sites by selecting the ‘Enable this app and add it to all sites‘ option
7. Click ‘Enable App‘
8. Click ‘Close.‘
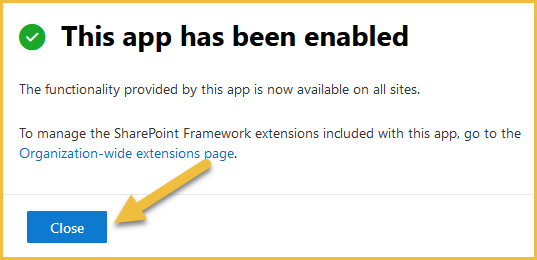
The Encodian ‘Trigr‘ SharePoint Online app has been deployed and will be available within your SharePoint sites (Document libraries and lists).
Now that we’ve deployed the Encodian ‘Trigr‘ SharePoint Online app, we need to create a Power Automate flow which we’ll then make available across the SharePoint Online tenant.
The link between a Power Automate flow and the Encodian ‘Trigr‘ SharePoint Online app is created by the ‘When a user runs a Trigr‘ Power Automate trigger action.

When a user starts a Power Automate flow from the Encodian ‘Trigr‘ SharePoint Online app ‘Actions’ menu item, a call is made to the ‘When a user runs a Trigr‘ Power Automate trigger action to start the flow, passing all of the relevant context information; who started the flow, selected items/files, site address, library name, etc.
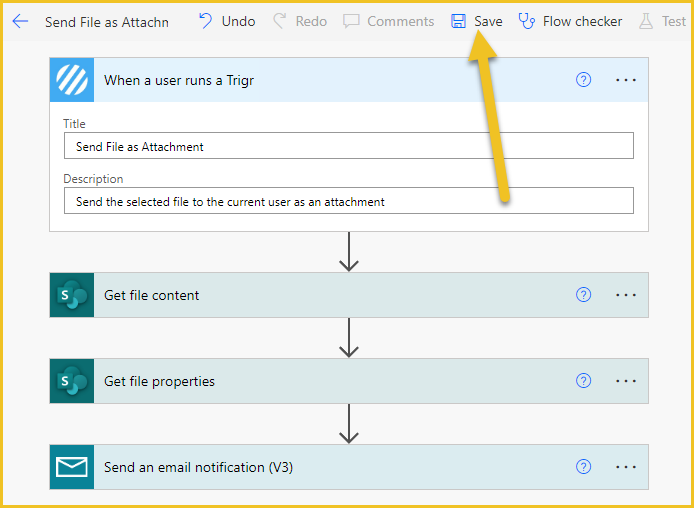
For this demo, I’m going to create a very simple flow :
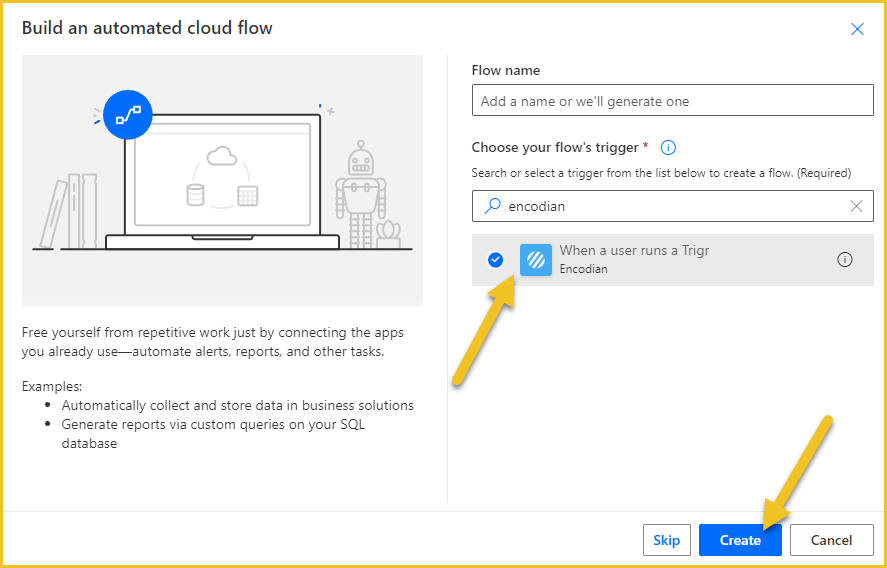
1. Navigate to Power Automate
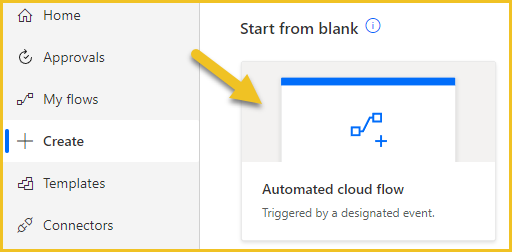
2. Click ‘Create‘ > ‘Automated cloud flow.‘
3. Type ‘encodian‘ in the search box
4. Select the ‘When a user runs a Trigr‘ action, and click ‘Create.‘
5. Complete the ‘Title‘ and ‘Description‘ fields
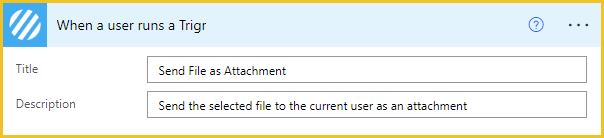
As the description implies, I will configure this flow to send the selected document to the current user.
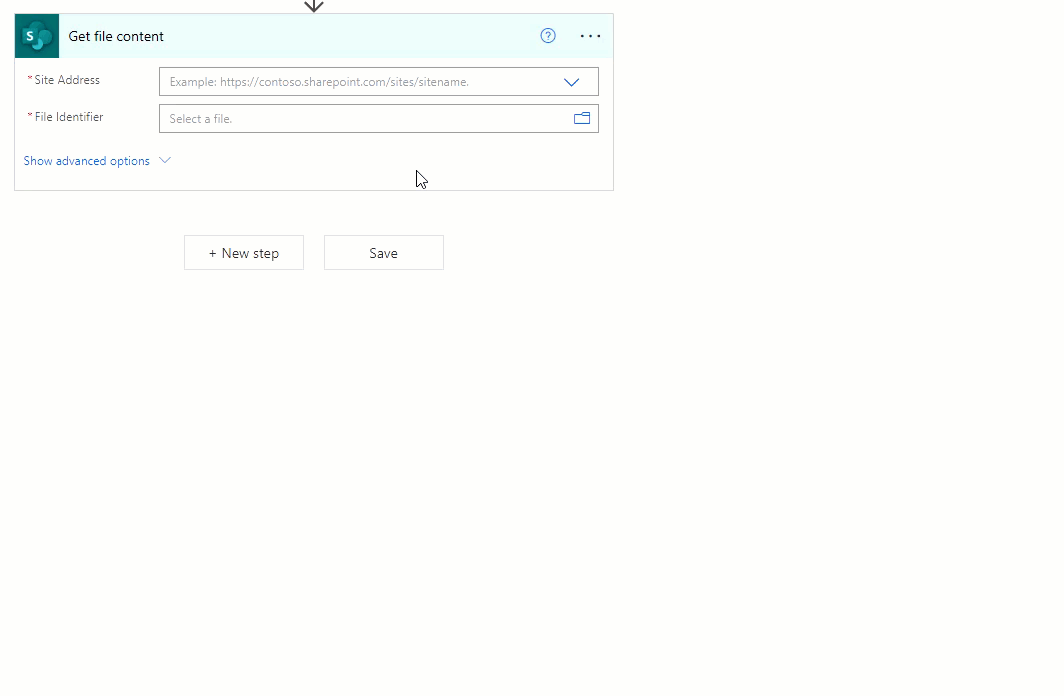
6. Add the SharePoint ‘Get file content‘ action
6.a. Site Address: Select the ‘Site Address’ value provided by the ‘When a user runs a Trigr‘ trigger action
6.b. File Identifier: Select the ‘File Identifier‘ value provided by the ‘When a user runs a Trigr‘ trigger action
Next, we need to add the SharePoint ‘Get file properties‘ action to get the filename of the selected file, but before we do that, we need to consider a Power Automate ‘ism’!
The data from the ‘When a user runs a Trigr‘ trigger action is dynamic, so values are unavailable until runtime, like Power Automate variables. Power automate doesn’t handle this particularly well, so when you enter a dynamic value as opposed to a typed value into SharePoint connector actions, you will not be able to access the properties provided by the SharePoint action and thus cannot configure your flow for example:

To work around this issue is very simple; When creating your flows, use hard-coded values, and once you have completed the configuration, go back and replace the hard-coded values with the dynamic properties:
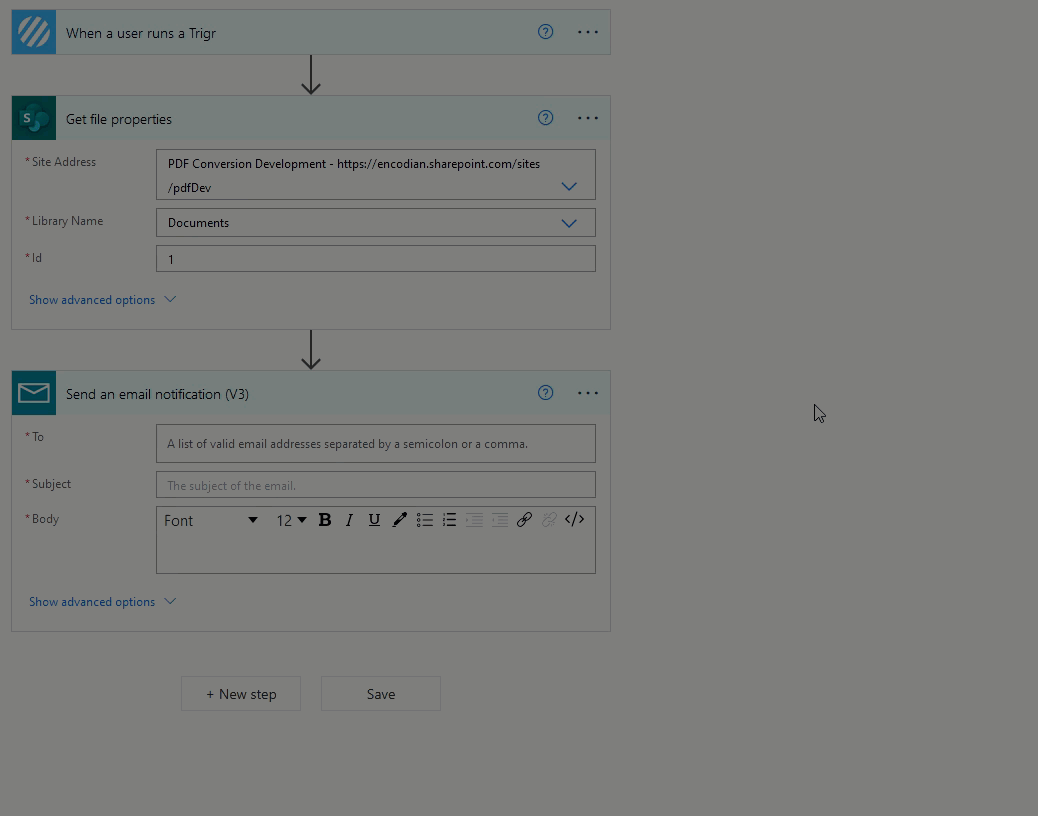
7. Add the SharePoint ‘Get file properties‘ action
7.a. Site Address: Select any SharePoint site (we will replace this later)
7.b. Library Name: Select any SharePoint library (we will replace this later)
7.b. Id: Enter ‘1‘ (we will replace this later)
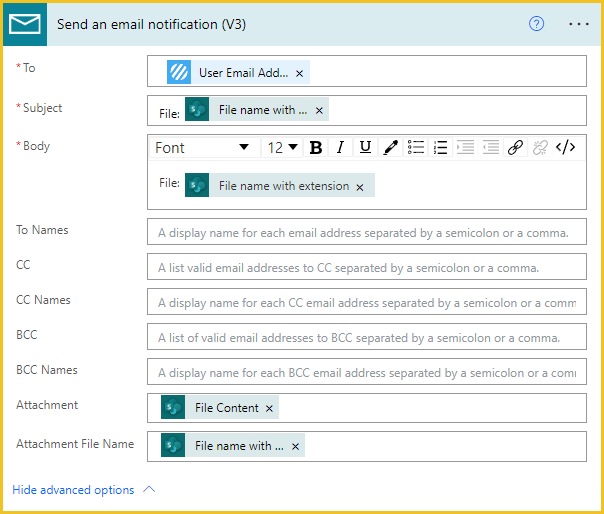
8. Add the ‘Send an email notification (V3)‘ action
8.a. To Select the ‘User Email Address’ value provided by the ‘When a user runs a Trigr‘ trigger action
8.b. Subject: Enter a value using dynamic values as required
8.c. Body: Enter a value using dynamic values as required
8.d. Attachment: Select the ‘File Content‘ value provided by the SharePoint ‘Get file content‘ action
8.e. Attachment File Name: Select the ‘File name with extension‘ value provided by the SharePoint ‘Get file properties‘ action
We now need to go back and update the SharePoint ‘Get file properties‘ action to use dynamic values from the ‘When a user runs a Trigr‘ trigger action.
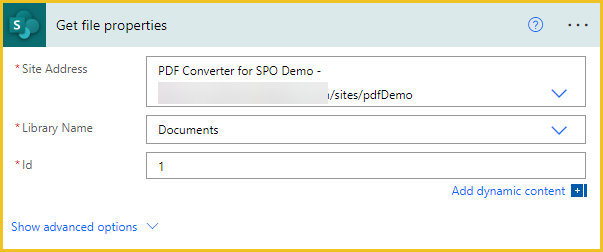
9. Add the SharePoint ‘Get file properties‘ action
9.a. Site Address: Select the ‘Site Address’ value provided by the ‘When a user runs a Trigr‘ trigger action
9.b. Library Name: Select the ‘Library Name’ value provided by the ‘When a user runs a Trigr‘ trigger action
9.b. Id:: Select the ‘Item’ value provided by the ‘When a user runs a Trigr‘ trigger action
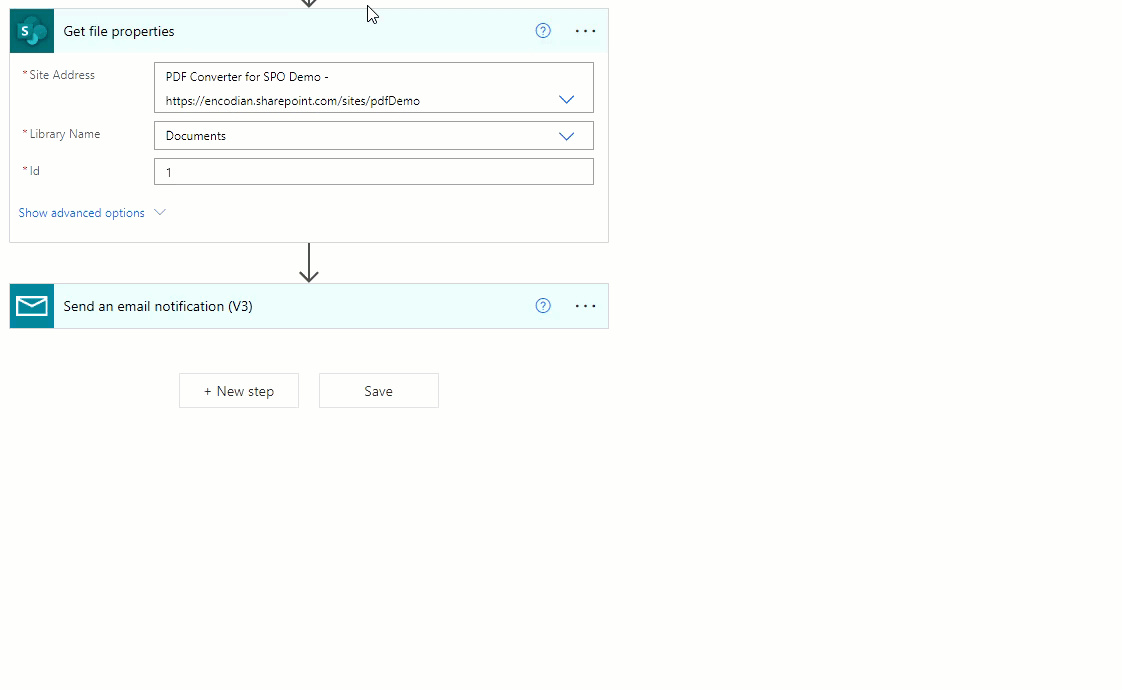
10. Enter a name for your flow (we’d suggest the same as the ‘Title’ value set in step #5) and click ‘Save.‘
We’re done. The flow is fully configured and will work regardless of which document library it was launched from!
A quick recap! We’ve deployed the Encodian ‘Trigr‘ SharePoint Online app and created a Power Automate flow. We will now configure ‘Trigr‘ to make the Power Automate Flow available across the SharePoint Online tenant.
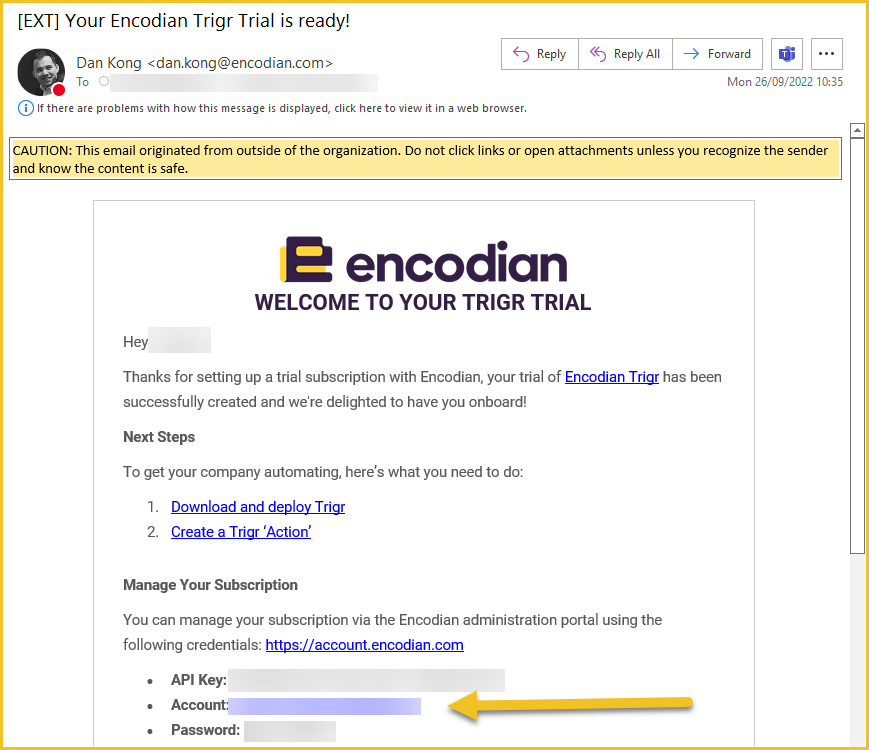
1. Navigate to your Encodian Account Portal
2. Login using the credentials supplied in the ‘Your Encodian Trigr Trial is ready!‘ email provided in Step 1 – Activate your ‘Trigr trial section.
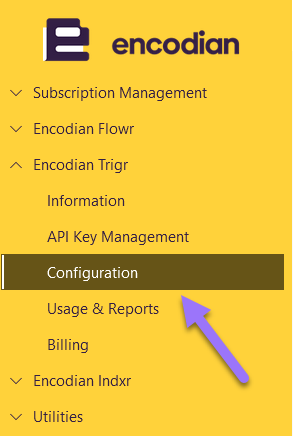
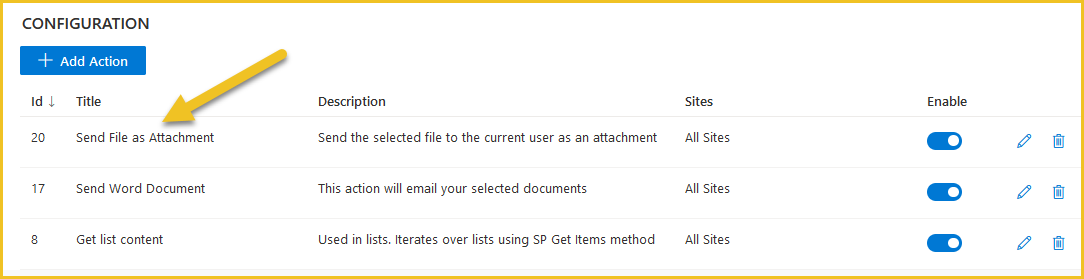
3. Select ‘Encodian Trigr’ > ‘Configuration’
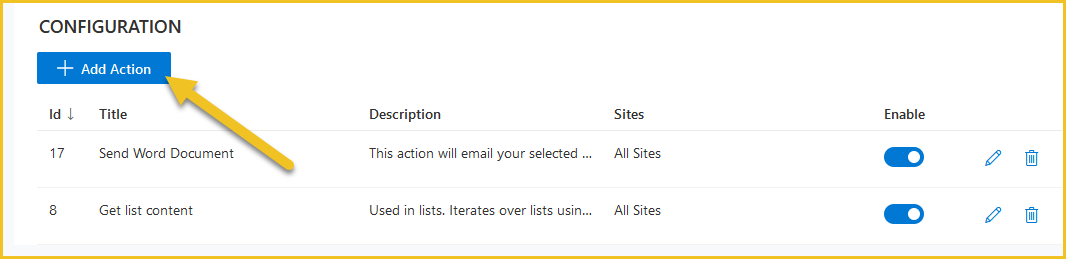
4. Click ‘Add Action.‘
5. On the ‘Add Action‘ form
5.a. The Power Automate flow created in the Create a Power Automate flow using ‘Trigr’ section will be displayed. Select this item.
5.b. Update the ‘Title‘ and ‘Description‘ fields if required
5.c. Add a ‘Run Message‘ which will be displayed to the user after the flow has been triggered
5.d. Del-select the ‘Lists‘ checkbox in the ‘Appear in‘ section. Our flow is document library-specific, so we do not want the action to appear within lists.
5.e. Click ‘Create.‘

If you’d like to discover more about dynamic forms which enable you to capture data from end users before starting the flow, then please review: Add a ‘Dynamic Form’ to an Encodian Trigr Action
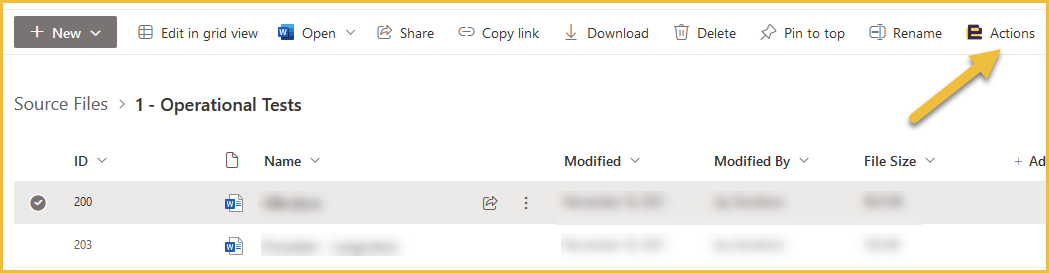
6. Your ‘Action‘ has now been created and will be available across all SharePoint sites
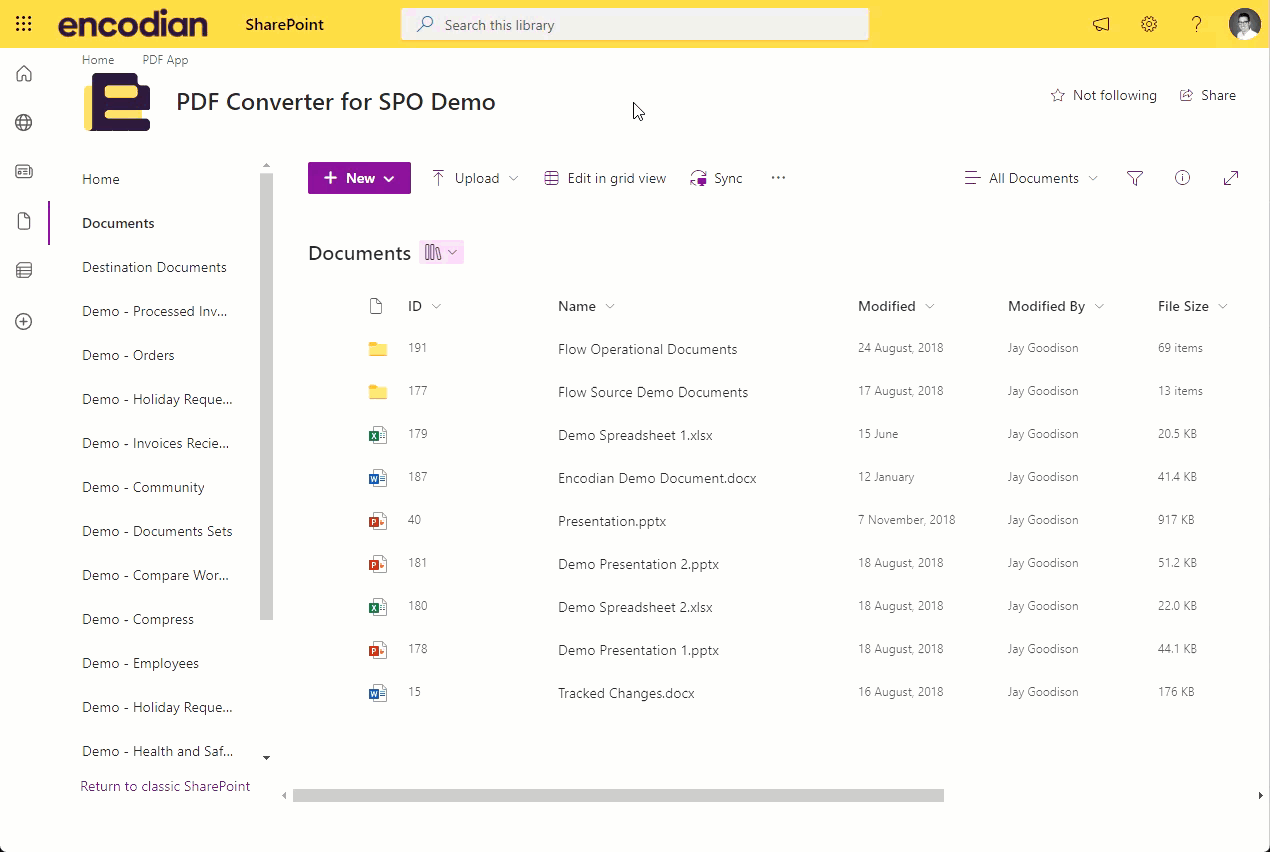
And via the ‘Trigr‘ SharePoint App:
Hopefully, this post provides a detailed guide on deploying a single Power Automate flow and making it available across your entire SharePoint Online tenant with Encodian ‘Trigr.’
We hope you’ve found this guide useful; please share any feedback or comments. All are welcome!
Managing Director

