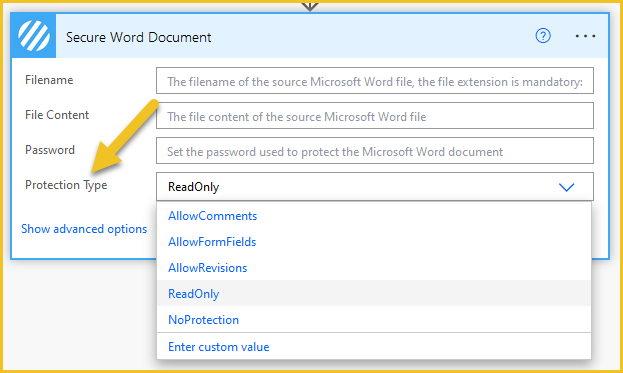
We recently released the Word – Secure (previously Secure Word Document) action, which can be used to secure (also known as protect) a Microsoft Document covering all the typical file formats (DOCX, DOC, DOTX, DOT, DOCM, DOTM and RTF). The action provides the following options for securing/protecting the Word document controlled by the ‘Protection Type‘ option:
For this post we’ll provide two very basic examples for using the Word – Secure (previously Secure Word Document) action to add protection and remove protection from the Word document. **We’ve also included a bonus video showing how you can quickly use Encodian Trigr to deploy the flow used for these examples to your entire SharePoint environment!
For this basic example we’re simply going to create a manually invoked Power Automate Flow, secure the selected Word Document and save to OneDrive, simple!
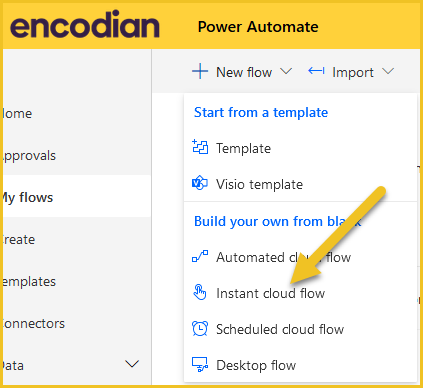
1. Navigate to https://make.powerautomate.com
2. Click ‘New flow‘ > ‘Instant cloud flow‘
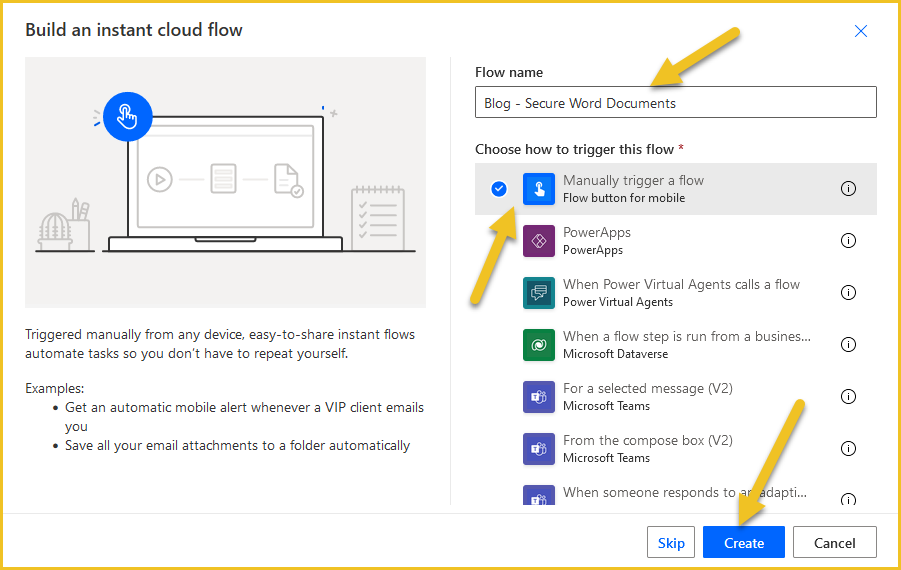
3. Complete the form:
3.a Flow name: Enter a relevant name for your flow
3.b Trigger: Select the ‘Manually trigger a flow‘ trigger action
3.c Click ‘Create‘
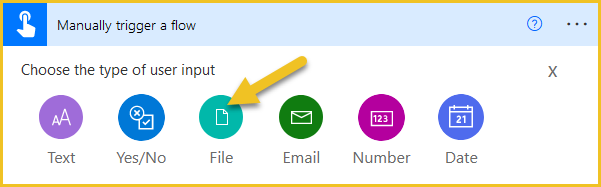
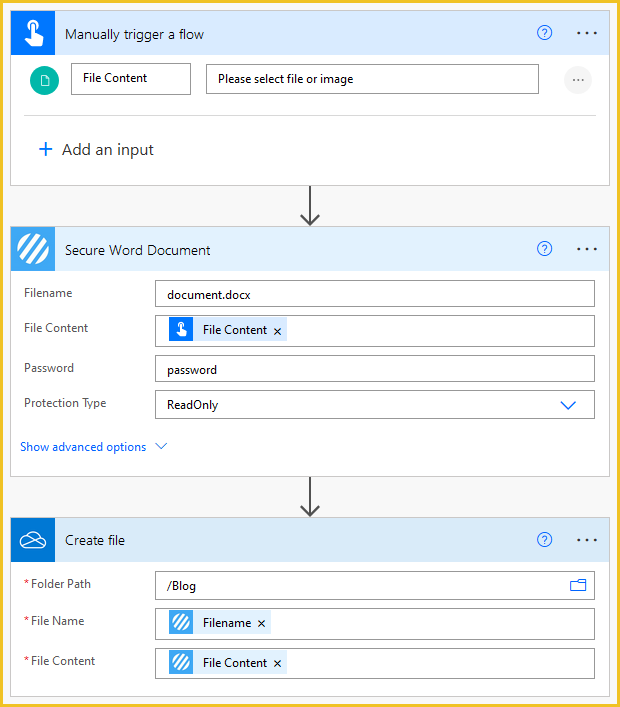
4. Select the ‘Manually trigger a flow‘ trigger action, click ‘Add an input‘

5. Select ‘File‘
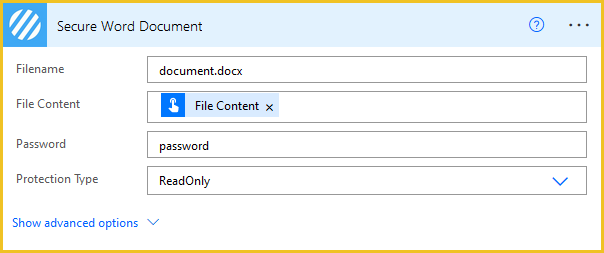
6.Underneath the ‘Manually trigger a flow‘ trigger action, add the Encodian Word – Secure (previously Secure Word Document) action:
6.a. Filename: Manually enter a value; in a real-world scenario, you would obtain the filename from the file properties.
6.b. File Content: Select the ‘File Content‘ property provided by the ‘Manually trigger a flow‘ trigger action
6.c. Password: Enter the password which will be used to protect and remove protection from the document
6.d. Protection Type: Select the ‘ReadOnly‘ option
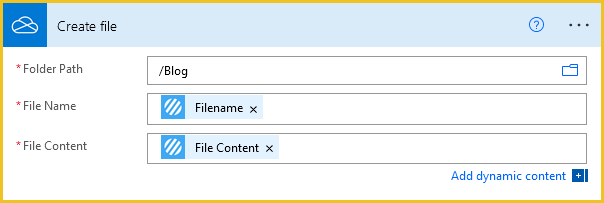
7. Underneath the Encodian Word – Secure (previously Secure Word Document) action, add the OneDrive ‘Create File‘ action
7.a. Folder Path: Select the location within OneDrive to save the protected Word document
7.b. File Name: Select the ‘Filename‘ property provided by the Encodian Word – Secure (previously Secure Word Document) action
7.c. File Content: Select the ‘File Content’ property provided by the Encodian Word – Secure (previously Secure Word Document) action
That’s it all done! The Power Automate flow will now secure the selected document and save it to the configured OneDrive location! Your flow should look similar to the following:
After executing the flow, you will see the secured Microsoft Word document added to your OneDrive:

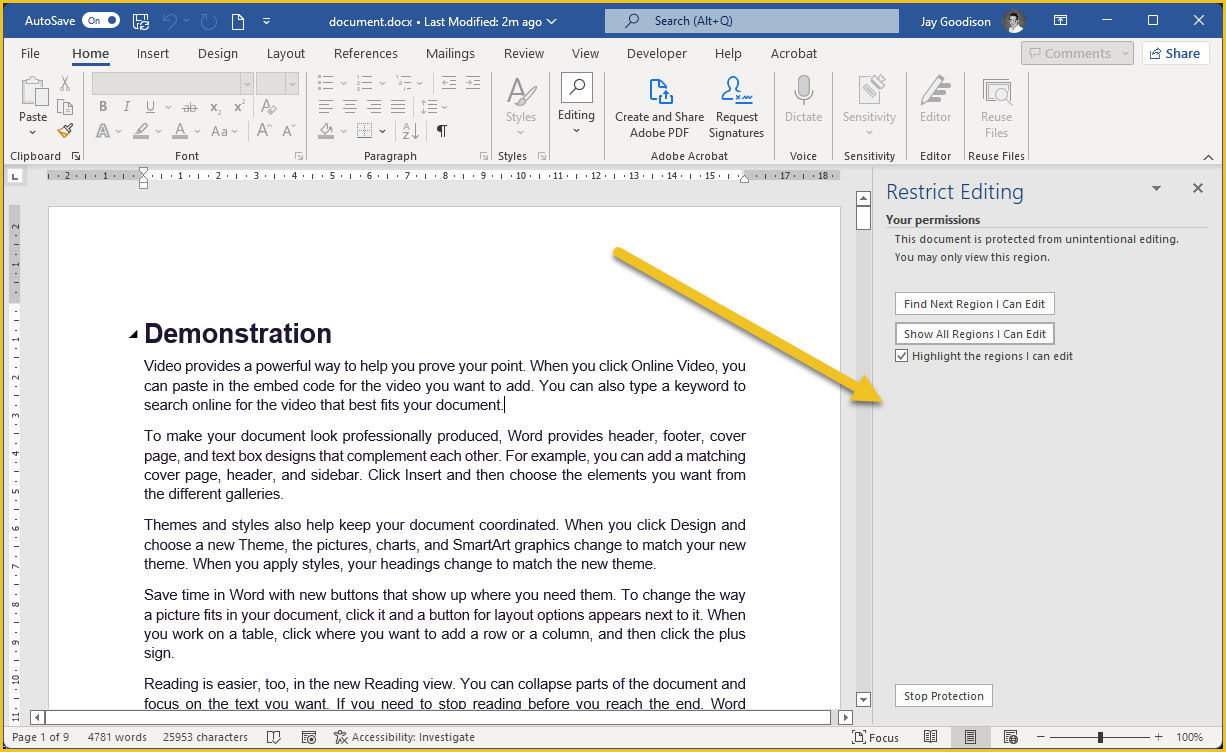
And upon opening the file, you’ll be able to verify the protection level applied to the document:
Following on from adding protection (securing) a Microsoft Word Document, this section outlines how to remove protection.
1. Configure your flow as per the ‘Protect a Microsoft Word Document with Power Automate‘ of this article
2. Update the Encodian Word – Secure (previously Secure Word Document) action as follows: 2.a. Protection Type: Select the ‘NoProtection‘ option
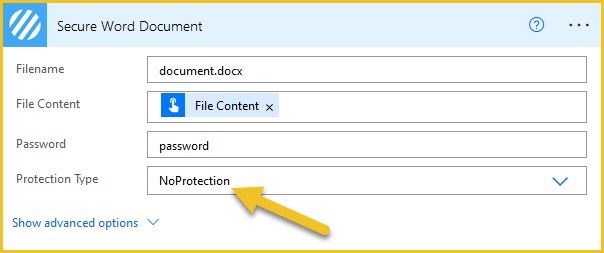
That’s it :)! The flow has now been configured to remove protection from the selection of the Microsoft Word Document!
What if you wanted to deploy the Flow you have created to secure/protect Microsoft Word documents to all SharePoint libraries? This can be very quickly achieved using Encodian Trigr, check out the following video guide 🙂
We hope this post provides a helpful example of how you secure Microsoft Word documents using the Encodian Word – Secure (previously Secure Word Document) action and Microsoft Power Automate.
Please share any feedback or comments – all are welcome!
Managing Director

