Many new, exciting AI features, including GPT technology, have recently been added to the Power Platform. Prompts are a new feature within AI Builder that allows you to manipulate text using GPT. Prebuilt prompts are readily available, or you can create your own prompts! This blog will show you how to make and use Custom AI Prompts in Power Apps and Power Automate. We will go through two different prompts, one to be used within a Power App and one to be used within a flow:
Additional Resources
The AI Builder page within Power Apps has been renamed the AI hub. Here, you can find everything related to AI in the Power Platform.
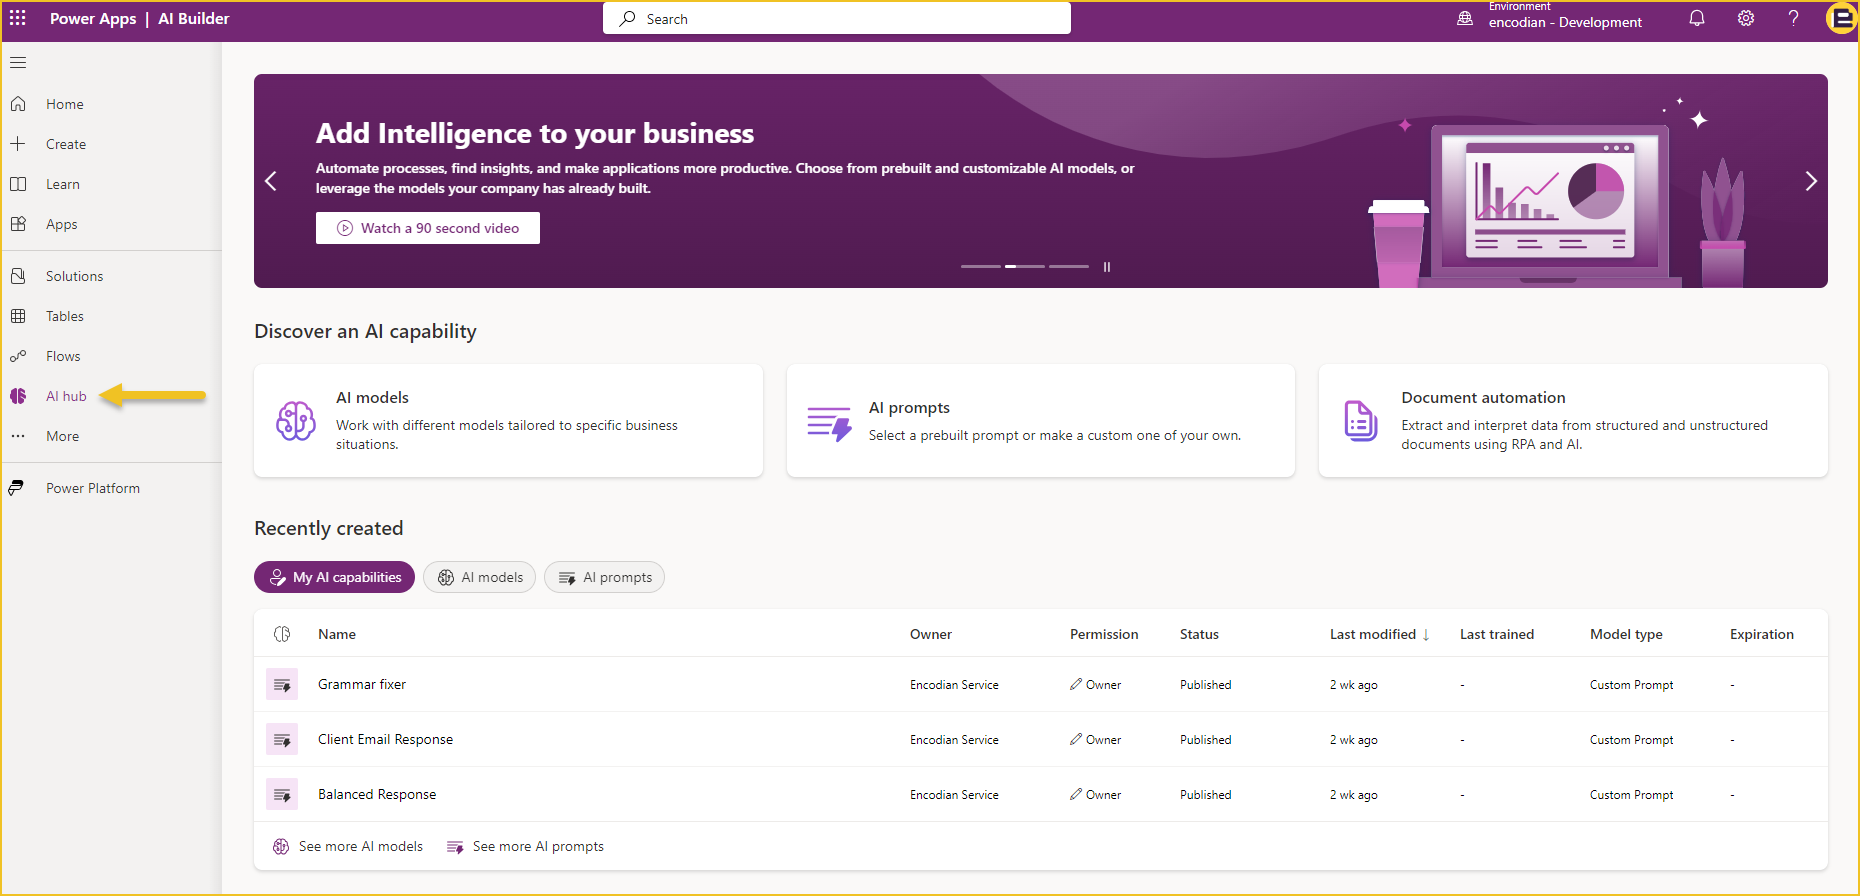
Here, there are ready-made AI models, AI learning resources, and Prompts. Like the prebuilt AI models, there are already prebuilt AI prompts for different scenarios, such as responding to a complaint or summarising text. However, you can also create custom AI prompts and share these with others!
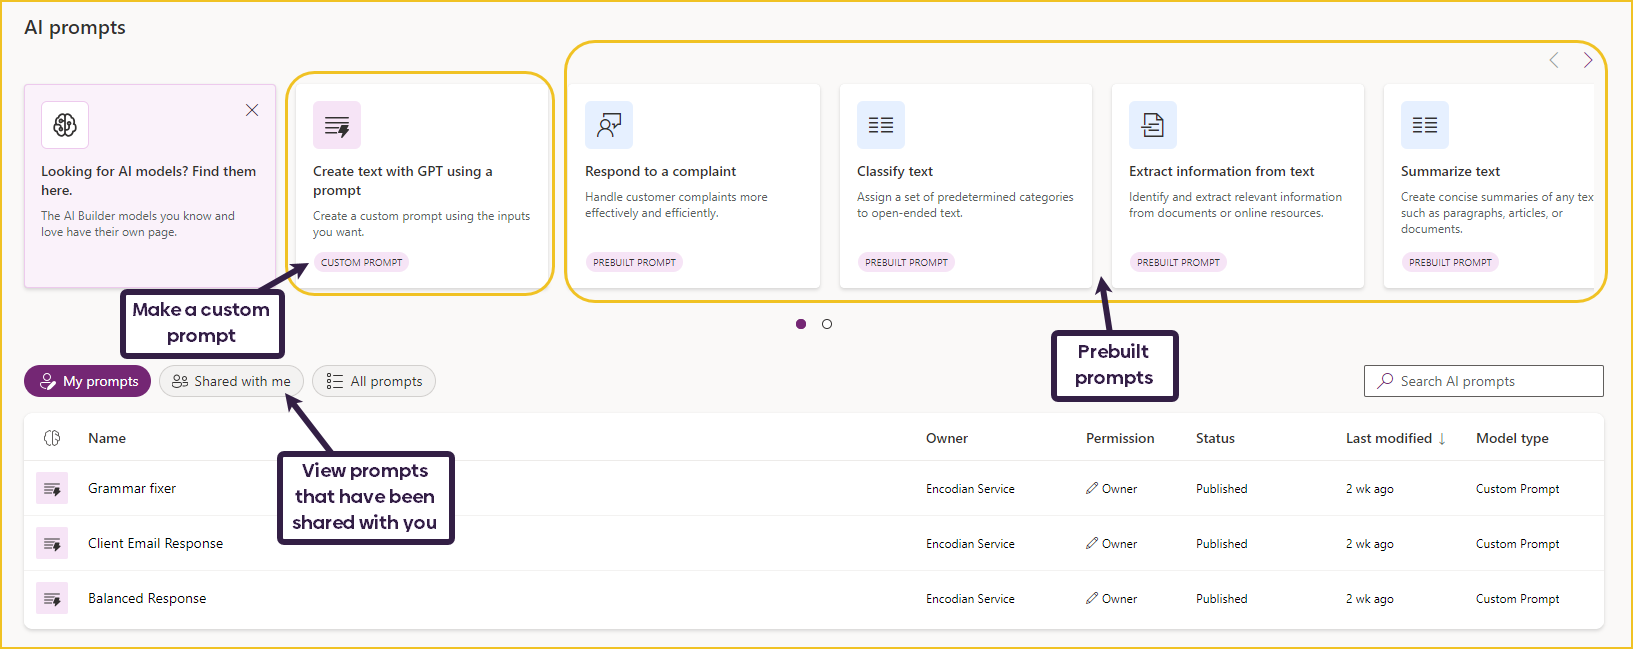
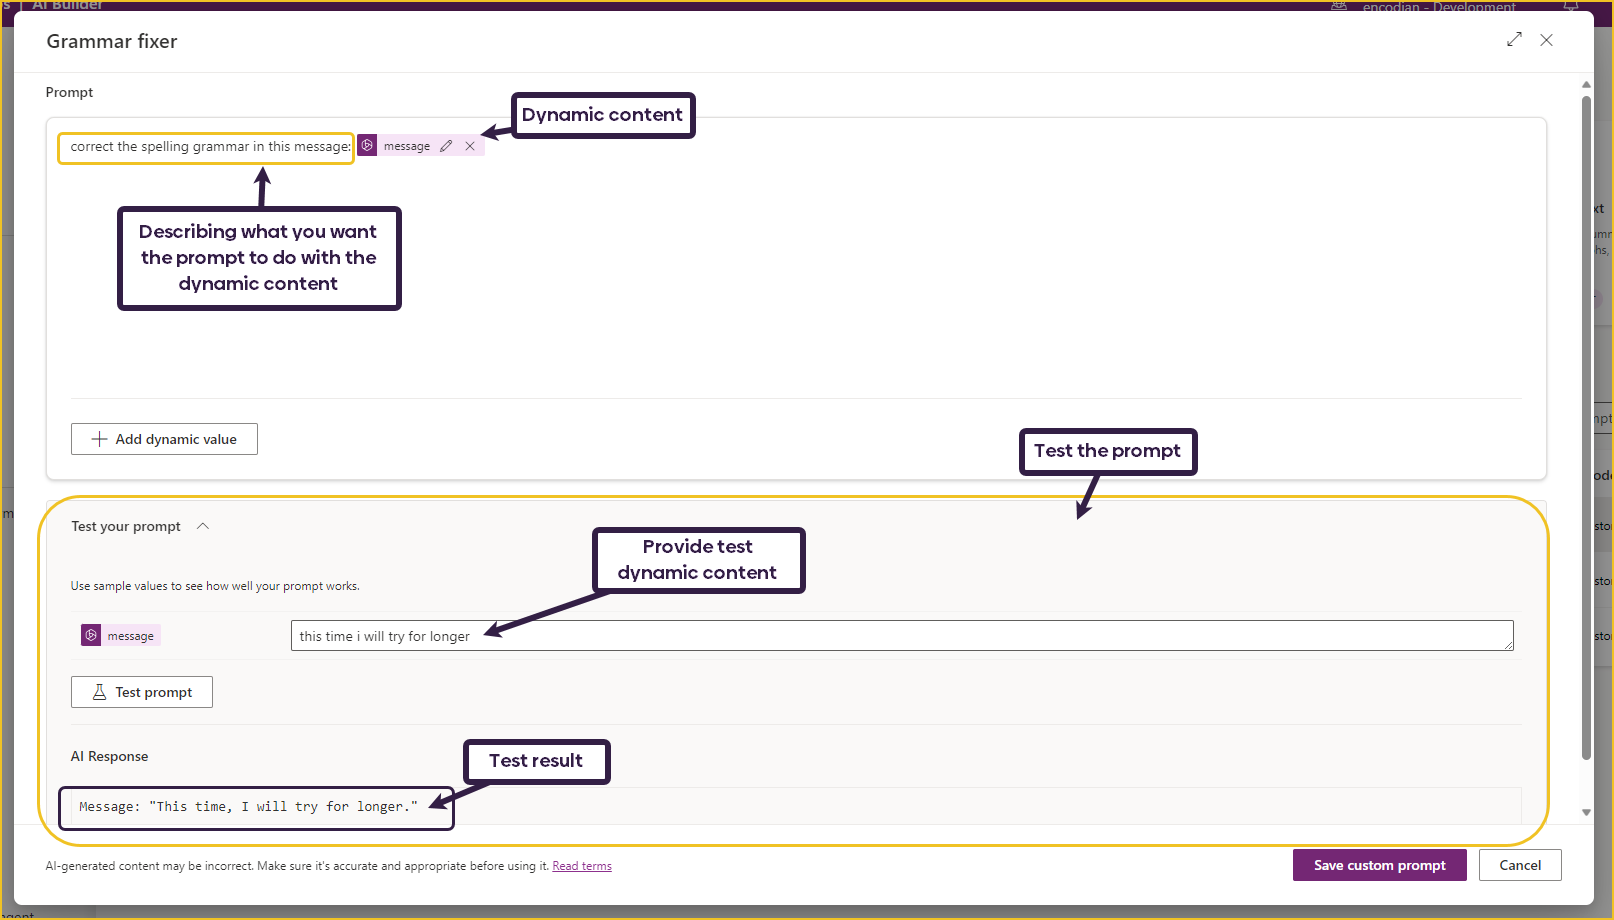
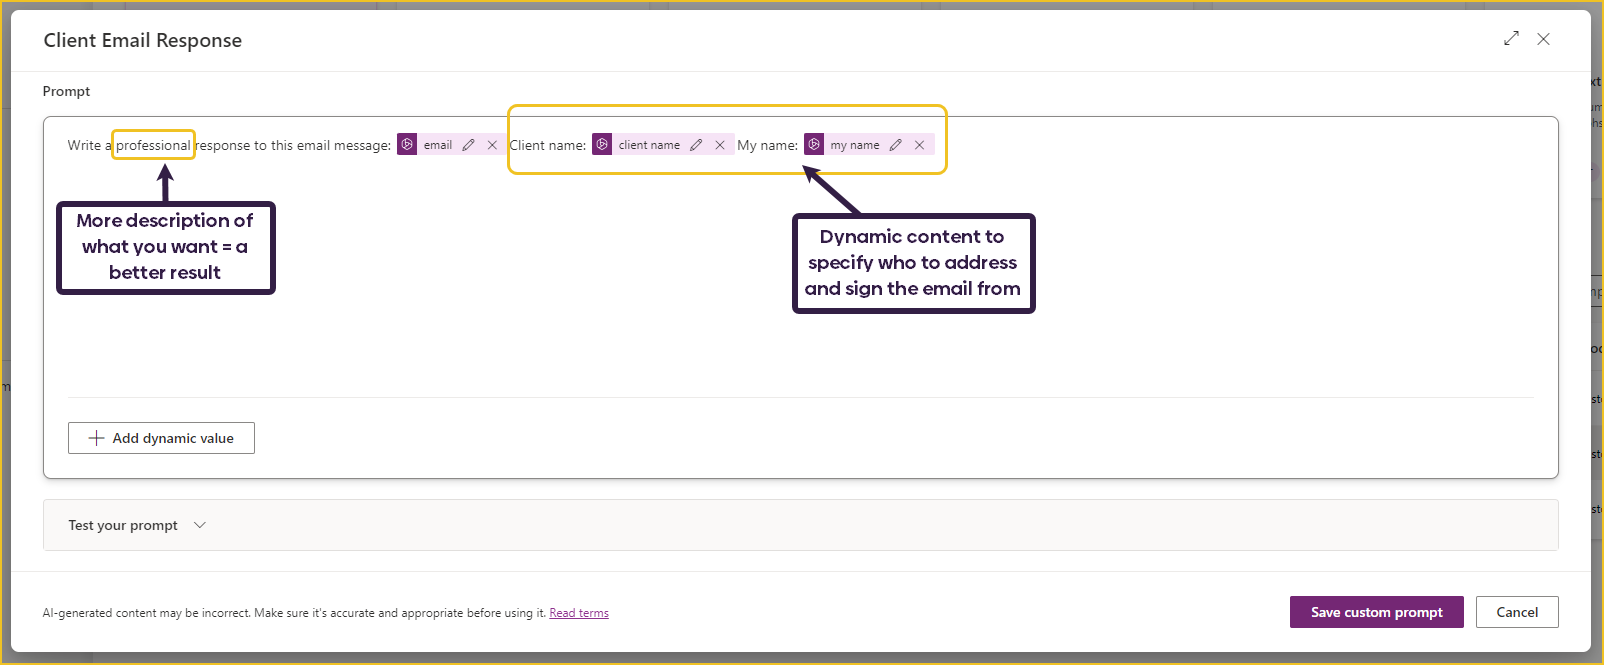
When creating a custom prompt, you must provide the prompt text yourself. The more descriptive your prompt is, the better the result will be. You can add dynamic values to your prompt. These are the inputs that will change each time the prompt is used. For example, if you want your prompts to look over an email, you would have an ‘Email’ dynamic value and write what you would like the prompt to do with that dynamic content using free text.
Once you have written your prompt, you can test it to ensure you are happy with the response. Provide the test dynamic values and then click ‘Test’ prompt.
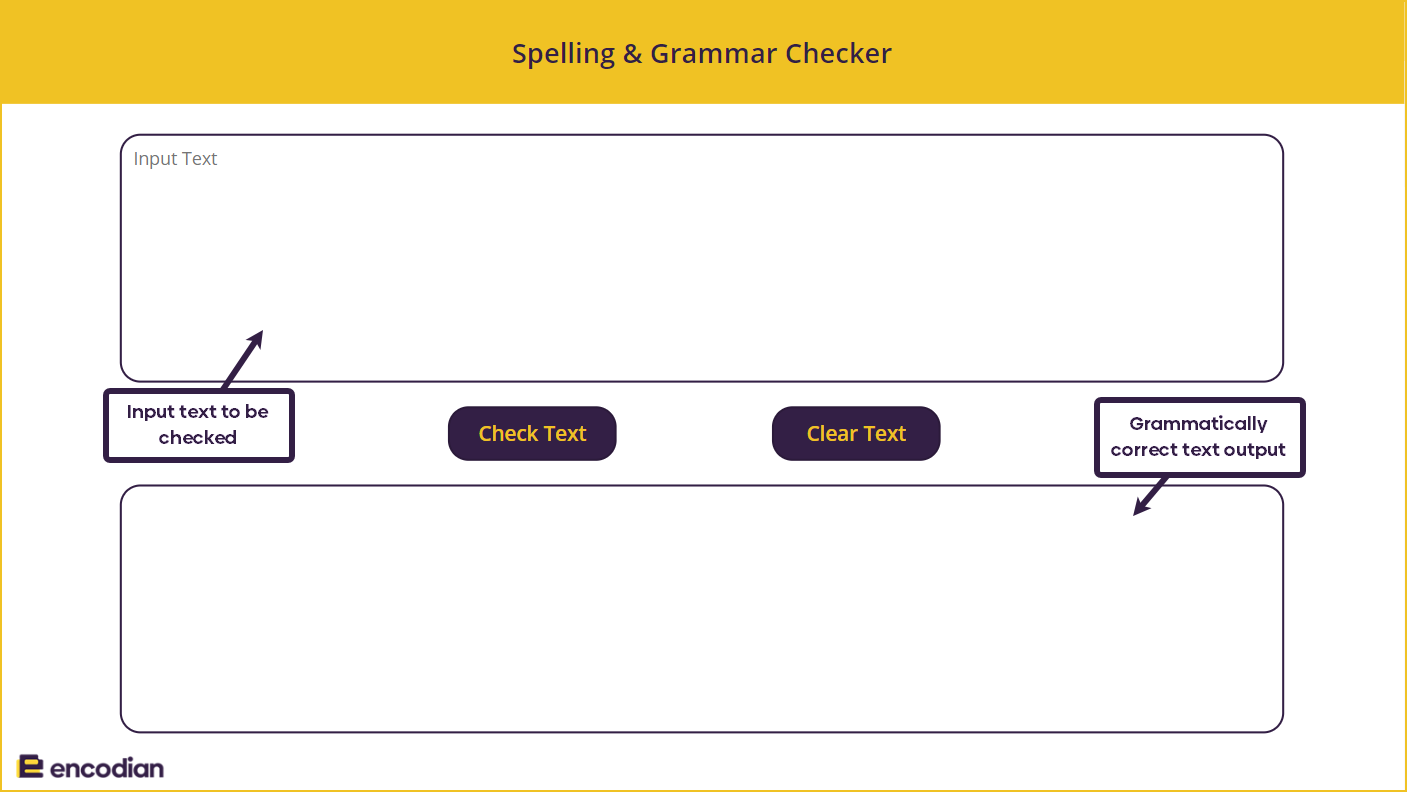
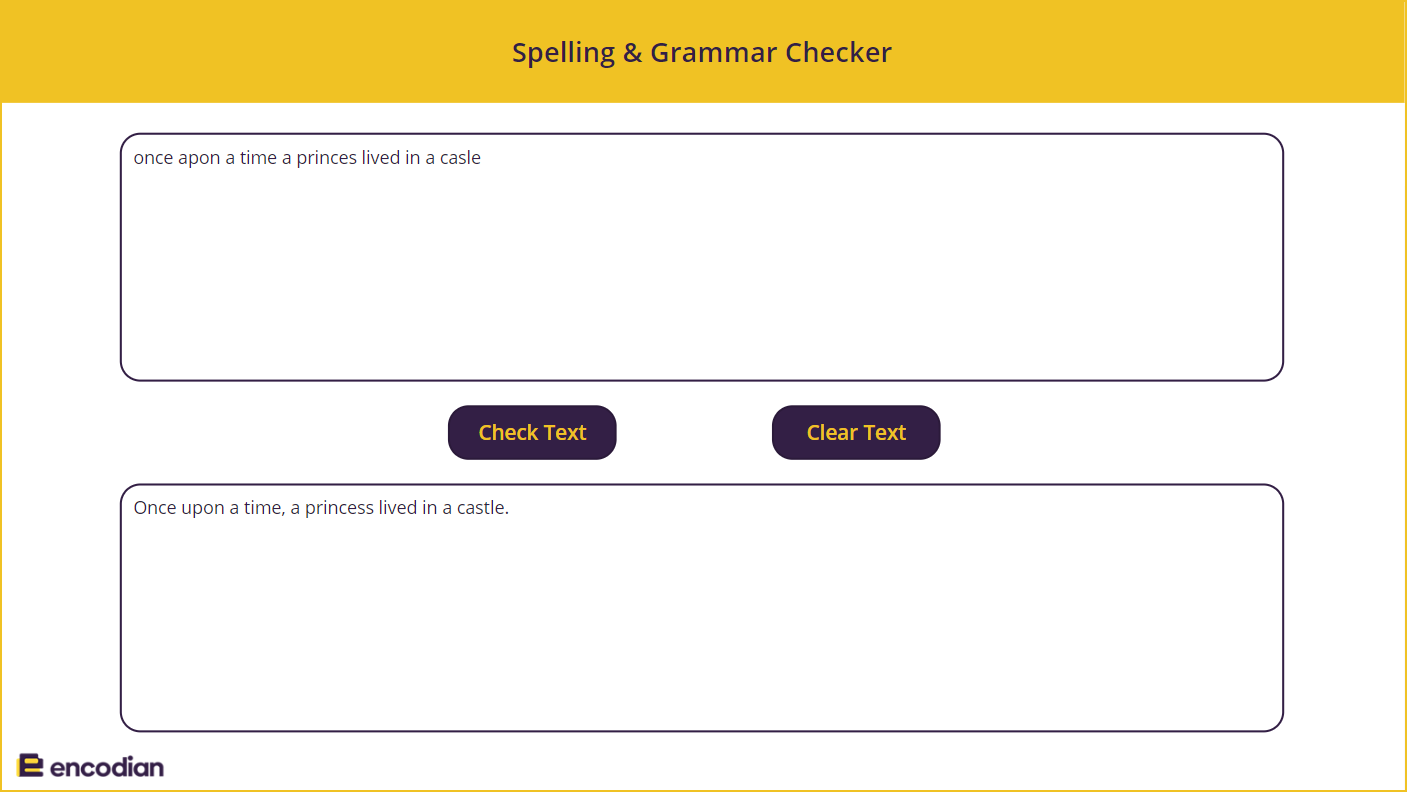
The grammar testing prompt will be used inside a simple Power App, which has been created to demonstrate how to use prompts.
The app allows you to input text, which will be the dynamic input for the prompt. When you click ‘Check Text’, the AI prompt will run and produce a result, which is displayed in the bottom box. Both boxes are text inputs; however, the bottom one is disabled, so you can’t type into it; it will only display the text.
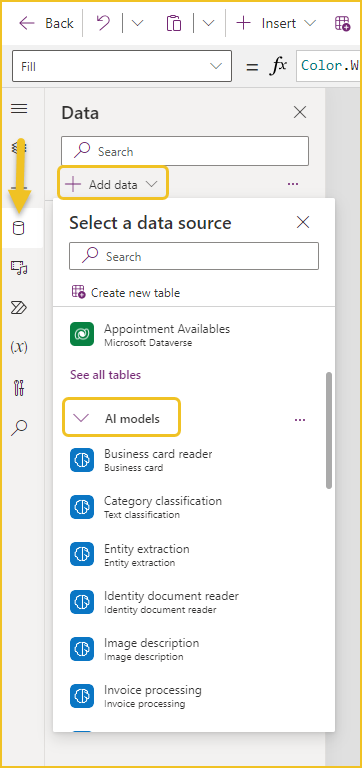
To use the AI Prompt in the app, you must first add it as a data source. When you click to add data, underneath ‘Tables,’ there is a section called ‘AI models’. This is where you can add all your AI models and prompts to the app.
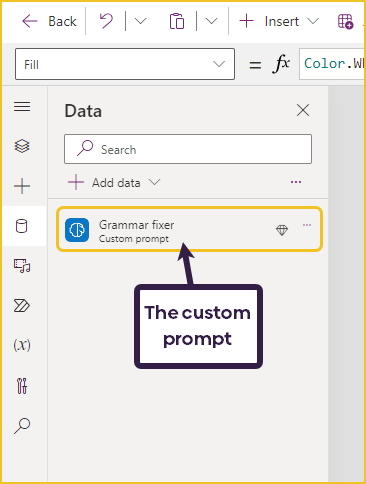
Now, you can use the prompt within the app. You call the prompt similar to how you call a Power Automate flow:
NameOfPrompt.Predict(dynamicInput1,dynamicInput2...)
To use the result of the prompt, I am saving it in a variable called result. This is saved as a record. To get the text value, it will be:
result.Text
This is the result when putting the text result as the Default value of the bottom box:
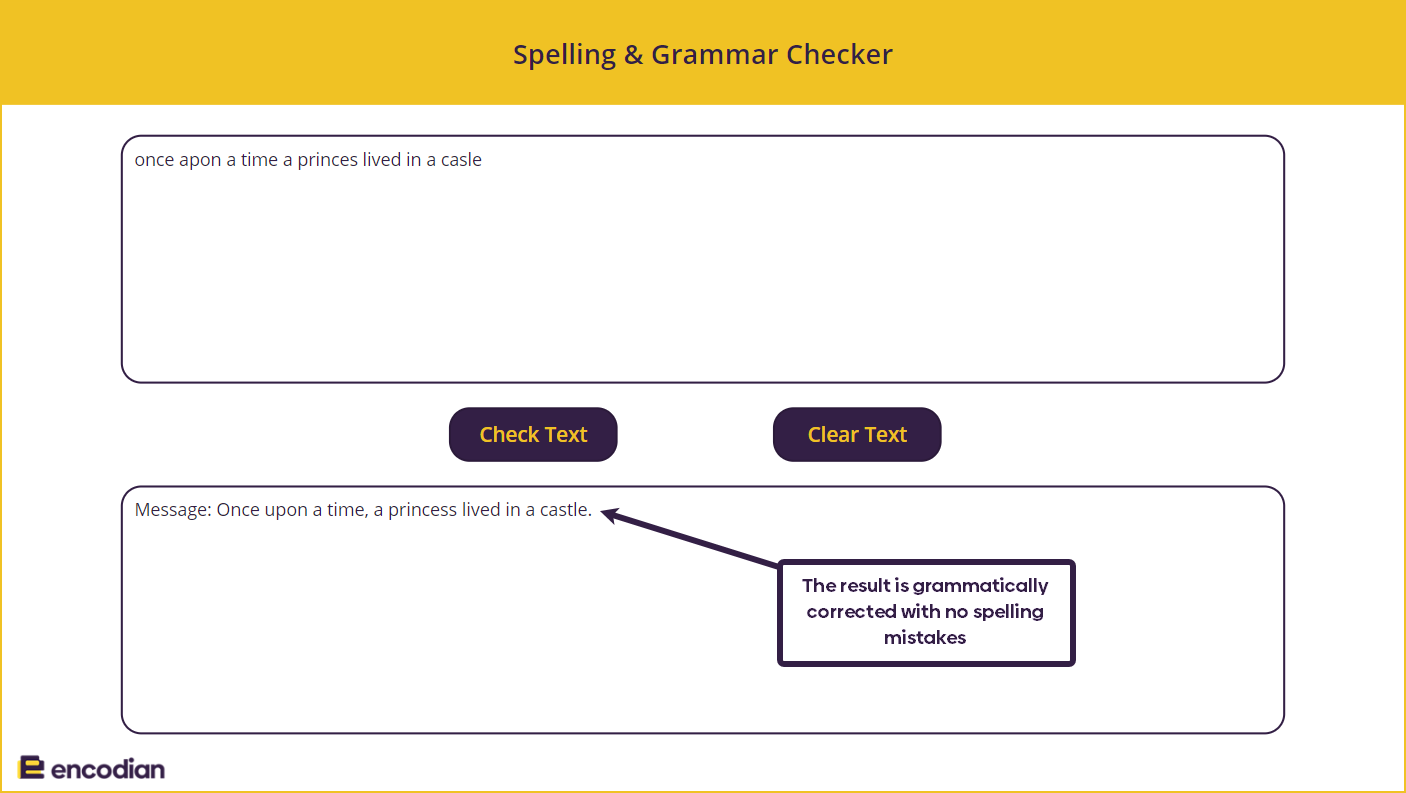
As we can see from the photo, the AI prompt has worked! However, all the result text will return with ‘Message: ‘ in front of it. To remove this, we need to trim the string.
Set(result, First( Split( Last( Split( 'Grammar fixer'.Predict(TextInput1.Text).Text, "Message: " ) ).Value, "Message: " ) ).Value)
This formula takes the result of the Prompt and trims it after ‘Message: ‘, keeping the actual text result as expected. The result when using the above formula:
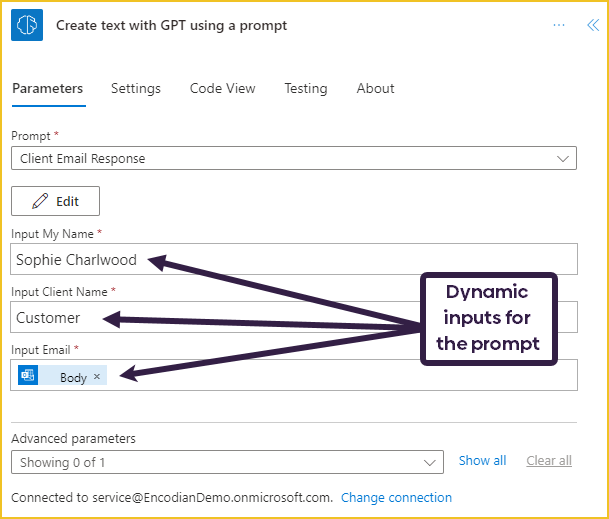
To use prompts in Power Automate, you add them the same way you would an action, with the connector being AI Builder. The action you need to select is ‘Create text with GPT using a prompt.’ You can then select the prompt you want to use.
When you use a prompt in Power Automate, if you don’t add an approval step afterwards, your flow will save with an error.
![]()
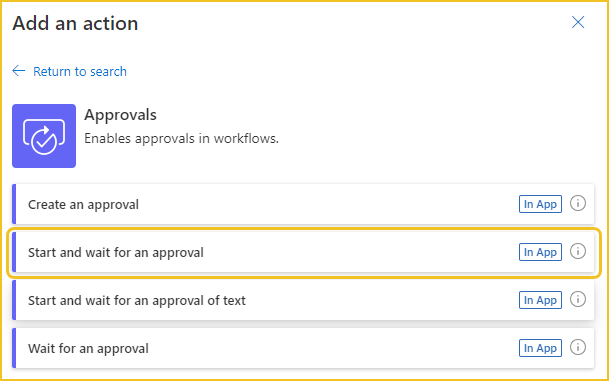
It is best practice to check the output before using it further. AI may not always get a response correct, and it needs to be double-checked by a human before potentially being used in the business or emailed out. To combat this, Power Automate has added a new type of approval called ‘Start and wait for an approval of text’ to be used after a prompt action.
You can save and use your flow without this approval step, as it only saves as a warning but this is not recomended!
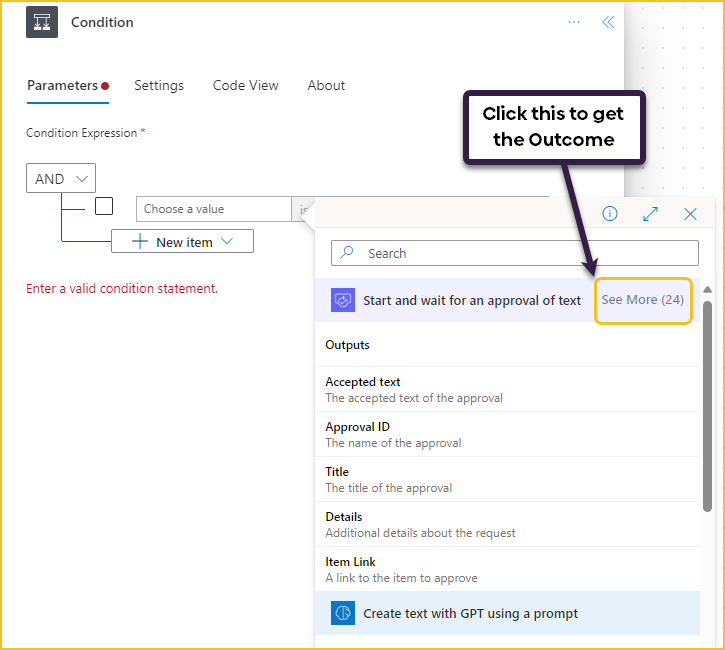
You can then add a condition to the flow based on the approval outcome. If you are using the new designer, the outcome dynamic content of the approval action is initially hidden. You need to click ‘See More’ to be able to select it:

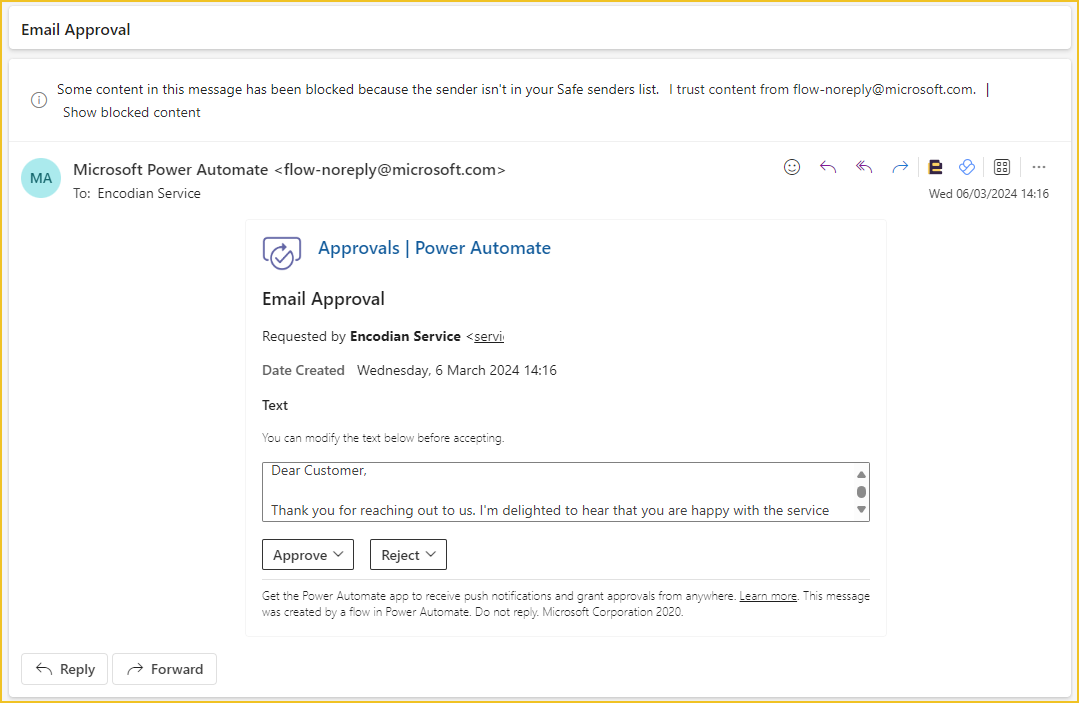
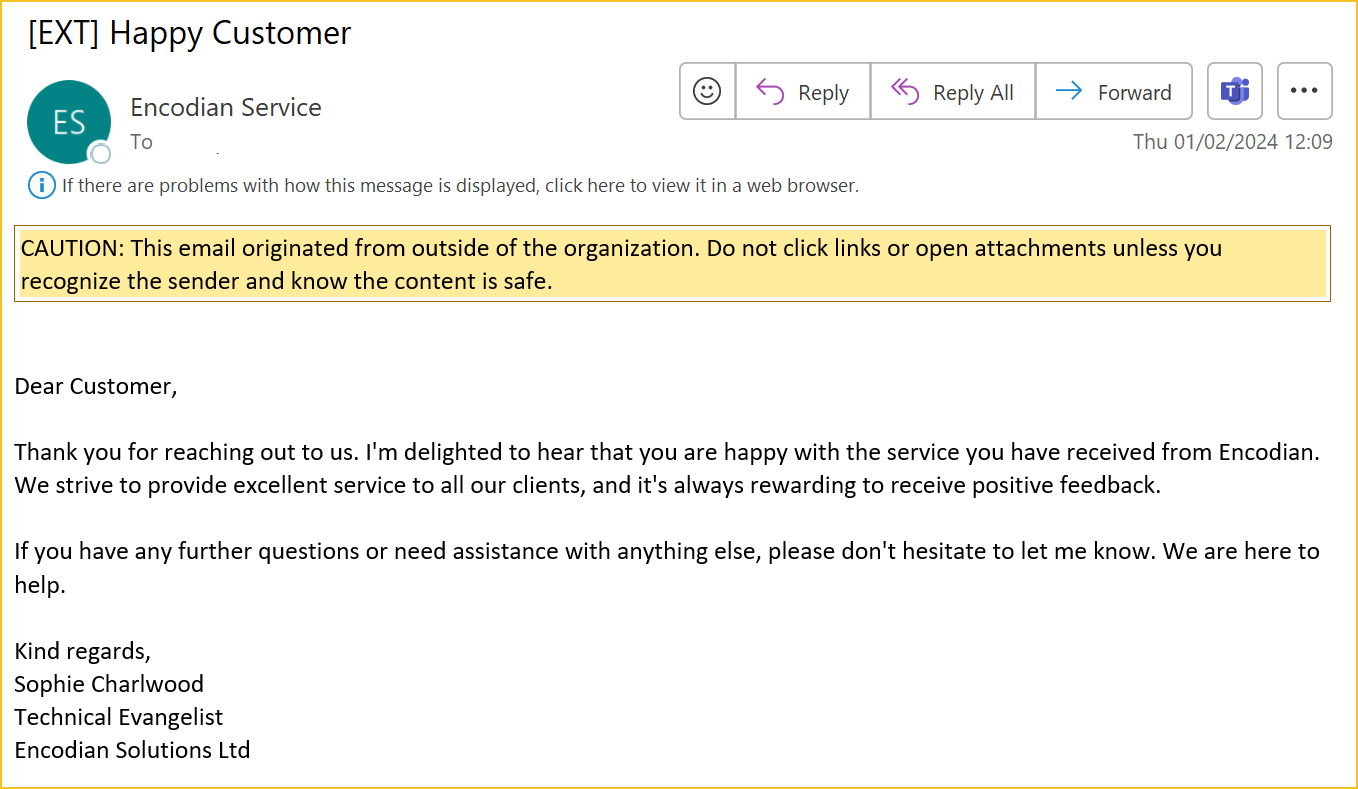
In the client email response example, the flow runs when an email is added to the ‘Client Emails’ folder within Outlook to label what emails are from clients. The prompt is then run, and the email response is emailed back to the user to approve. Upon approval, an automated email is then sent back to the client. If the email response is rejected, a task is added to the user’s to-do list to respond to the client’s email.

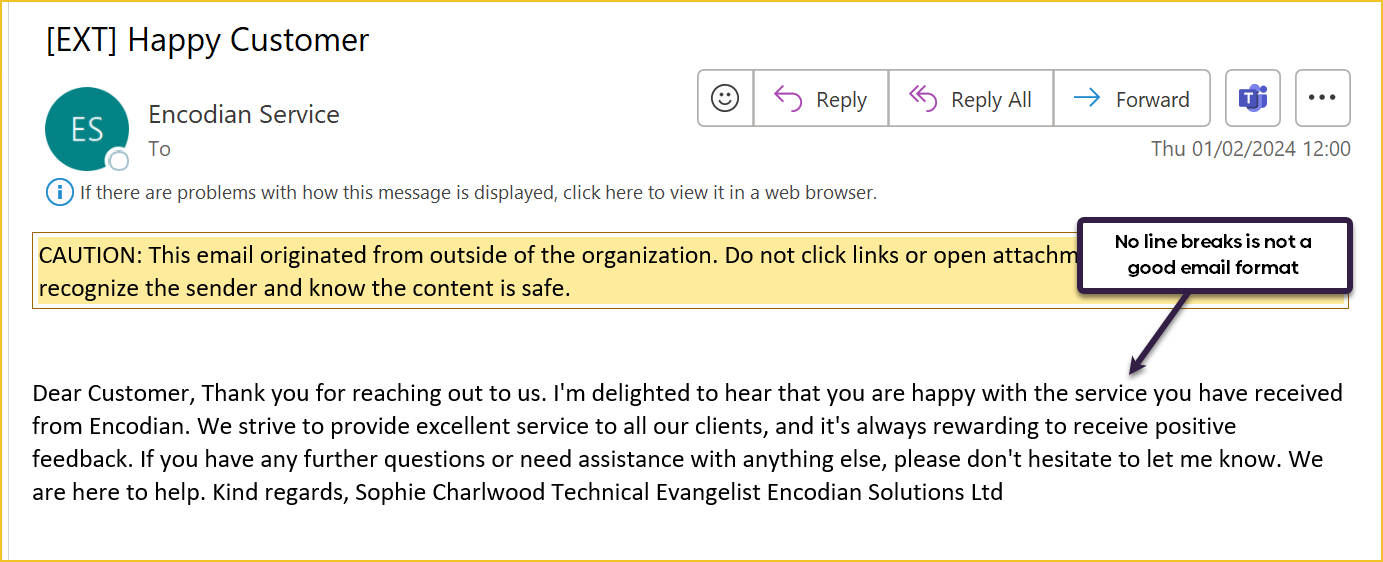
We need to initialise the newLine variable because we need to use this to replace ‘\n’ in the accepted response. We must use the variable in the replace expression rather than ‘\n’ because replace doesn’t always work when looking for special characters. If we don’t do this and just put the accepted text dynamic input, the email will have no line breaks:
As we use HTML within the email body, if you are utilising the new designer, you must switch back to the classic designer to use the HTML email body editor.
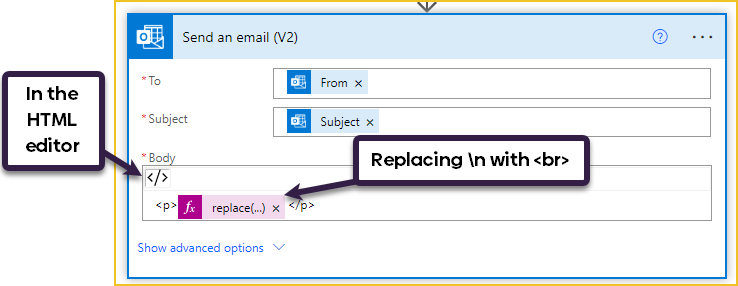
replace(outputs('Start_and_wait_for_an_approval_of_text')?['body/acceptedText'],variables('newLine'),'<br>')
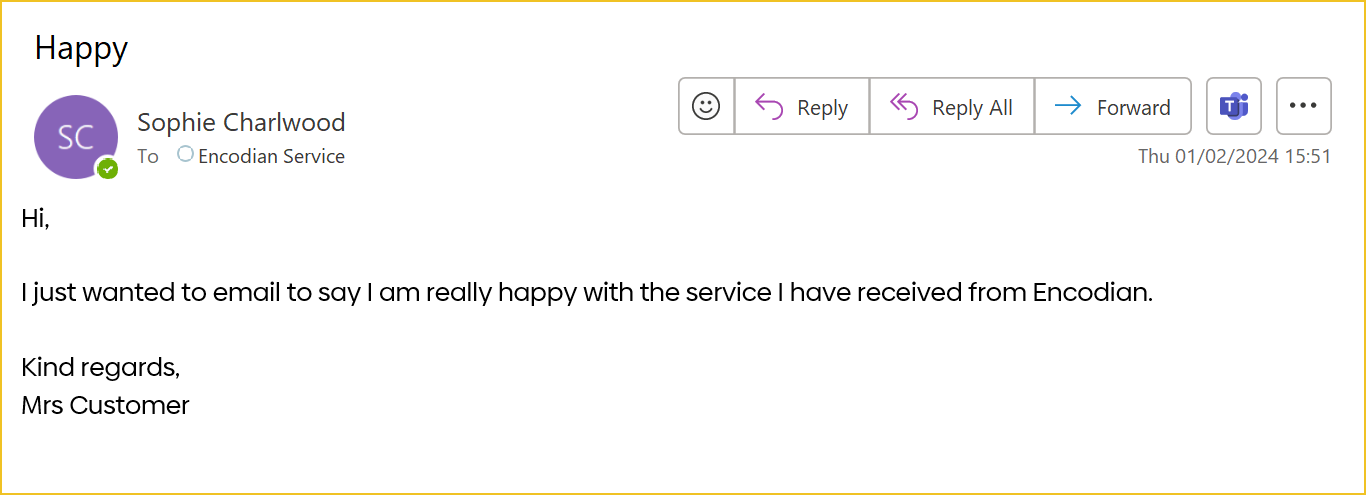
Email from the client:
The Email approval:
Email response:
We hope this blog will help you create custom AI prompts in Power Apps and Power Automate! If you have any questions, email support@encodian.com; they can help you with your query.
Looking to supercharge Power Automate? Why not take a look at Flowr?
The Ultimate Power Automate Connector!

The Ultimate Power Automate connectors
Technical Evangelist