So, you have created a Power Automate flow linked to a document library in SharePoint Online, and you now need to make this flow available across multiple SharePoint libraries.
We’ve all been here, and the options are limited. When you create a Power Automate flow linked to a document library in SharePoint Online, it is hard-coded to that document library. You’ll need to create a replicate flow for all other libraries you would like to use the flow… possible for a few libraries but not at scale, and it’s always a bad solution to create replicas!
For this post, we’re going to show you have you take your existing flow and re-configure it to be instantly available across all SharePoint Online document libraries using Encodian Trigr!
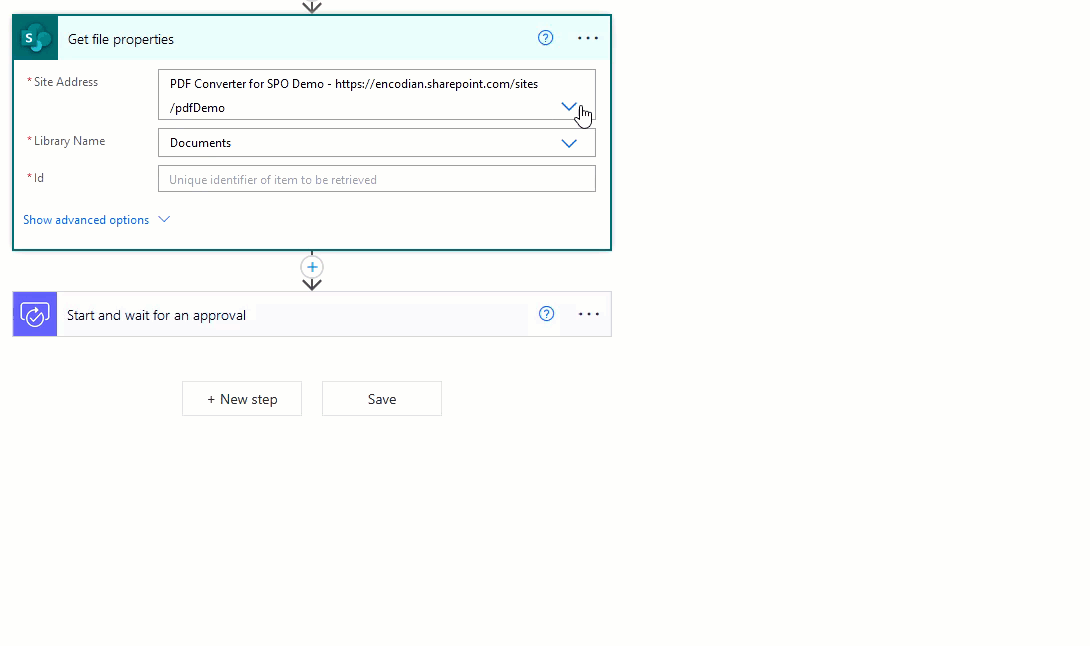
Consider this simple ‘Approval’ automation which can be launched from a single SharePoint document library:
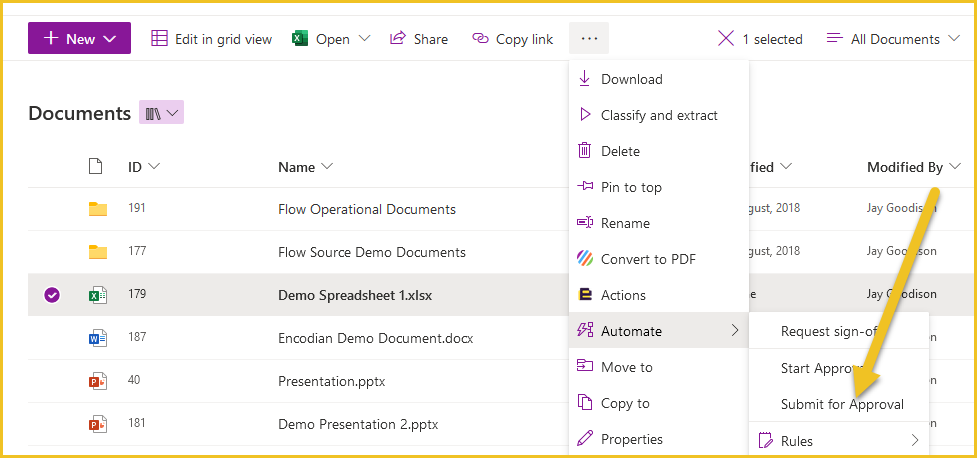
This ‘Submit for Approval’ automation is only available on this document library and is configured as follows:

As depicted, the simple limitation is that the SharePoint actions are hard-coded to a specific site and document library! Let’s fix this!
We will update this flow to use Encodian Trigr to make it available across all SharePoint Online document libraries.
If you haven’t already, you’ll need to set up Encodian Trigr takes five or so minutes to do, please check out this guide: Deploy a Power Automate Flow to multiple SharePoint libraries or lists
If you need to sign up for a trial, please visit: Sign up for a Trigr Trial
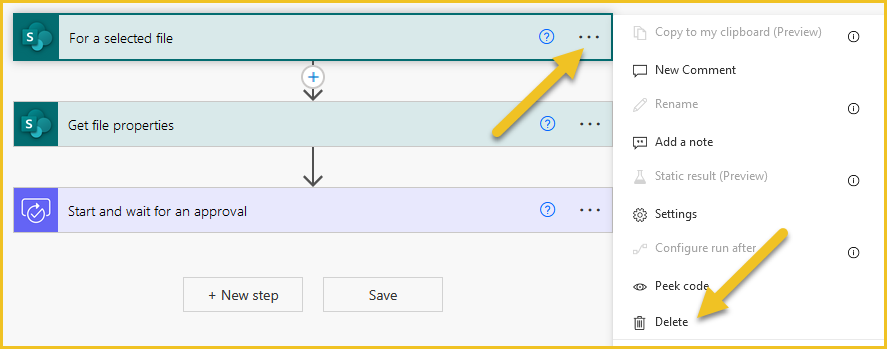
1. Delete the ‘For a selected file’ trigger action from your flow
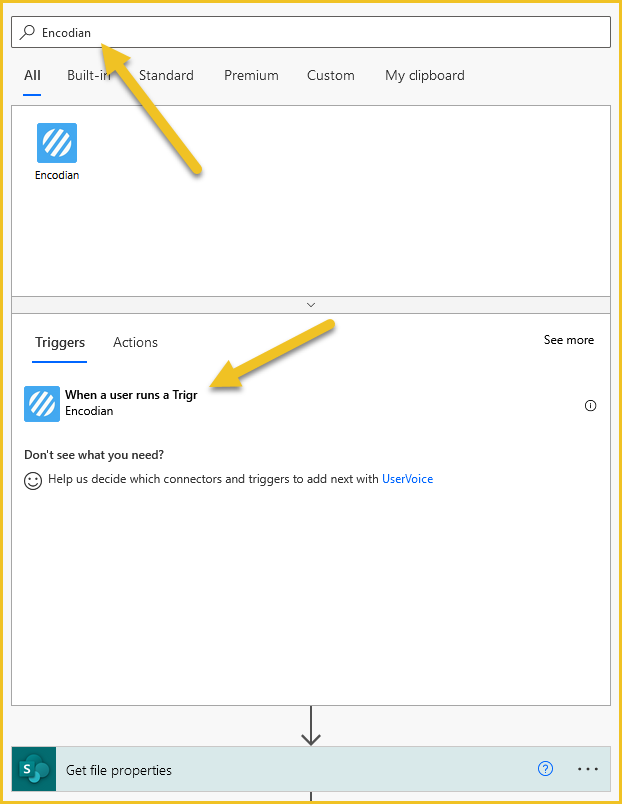
2. Enter ‘Encodian’ within the search box, select the ‘When a user runs a Trigr’ trigger action
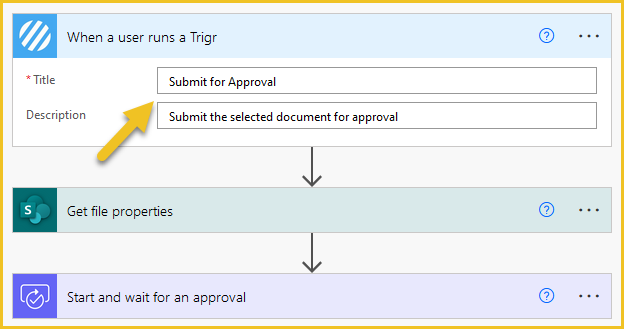
3. Set the ‘Title’ and ‘Description’ fields
4. We now need to update the values applied to the SharePoint ‘Get File Properties’ action
4.a. Site Address: Select the ‘Site Address’ property provided by the ‘When a user runs a Trigr’ trigger action
4.b. Library Name: Select the ‘Library/List Name’ property provided by the ‘When a user runs a Trigr’ trigger action
4.c. Id: Select the ‘Item’ property provided by the ‘When a user runs a Trigr’ trigger action
5. Save the changes to your flow
The flow configuration update is complete! We now need to configure Encodian Trigr to make this flow available across all document libraries within our SharePoint Online tenant.
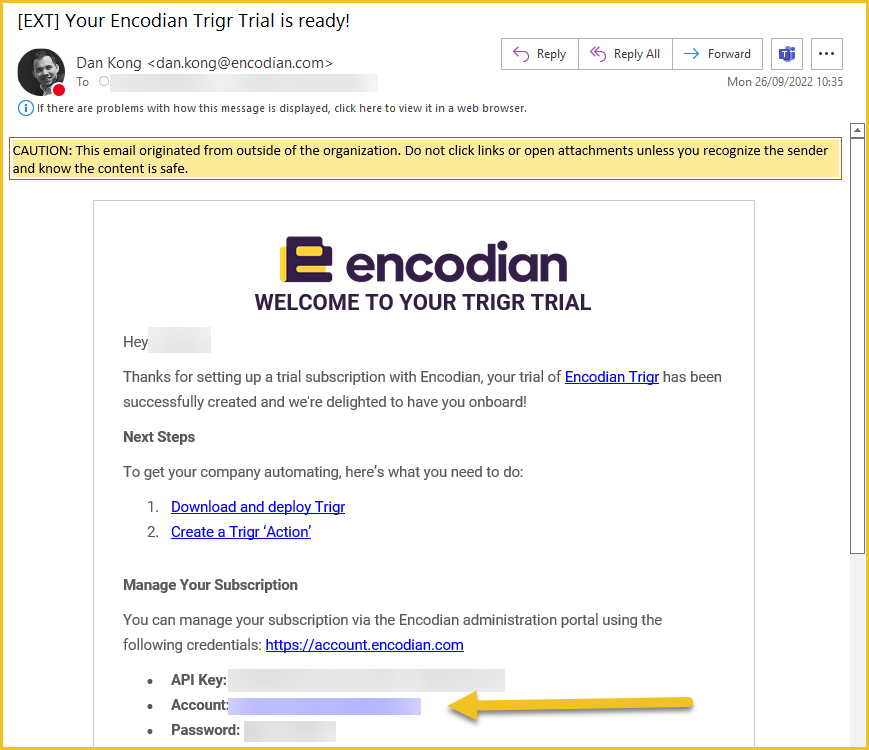
6. Navigate to your Encodian Account Portal
7. Login using the credentials supplied in the ‘Your Encodian Trigr Trial is ready!’ email
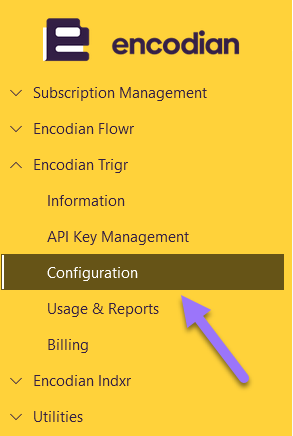
8. Select ‘Encodian Trigr’ > ‘Configuration’
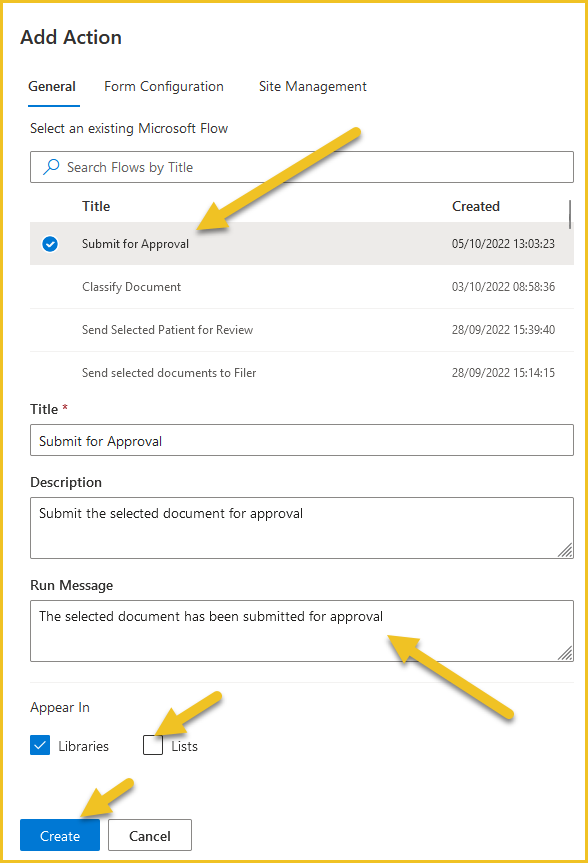
9. Click ‘Add Action.’
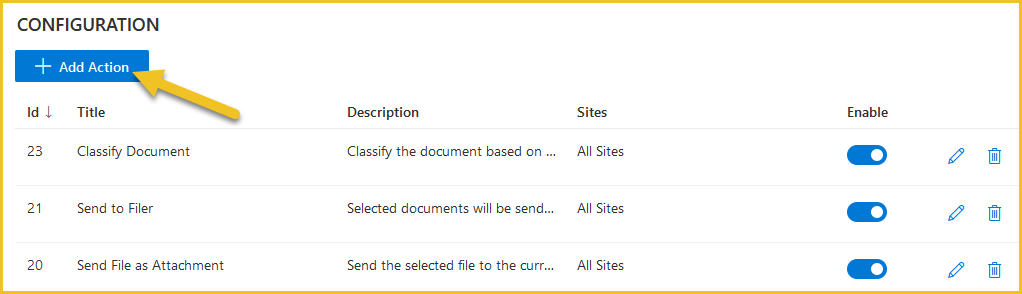
10. On the ‘Add Action’ form
10.a. Select your Microsoft Flow.
10.b. Update the ‘Title’ and ‘Description’ fields if required
10.c. Add a ‘Run Message’ which will be displayed to the user after the flow has been triggered
10.d. Del-select the ‘Lists’ checkbox in the ‘Appear in’ section. Our flow is document library-specific, so we do not want the action to appear within lists.
10.e. Click ‘Create.’
11. Your ‘Action’ has now been created and will be available across all SharePoint sites
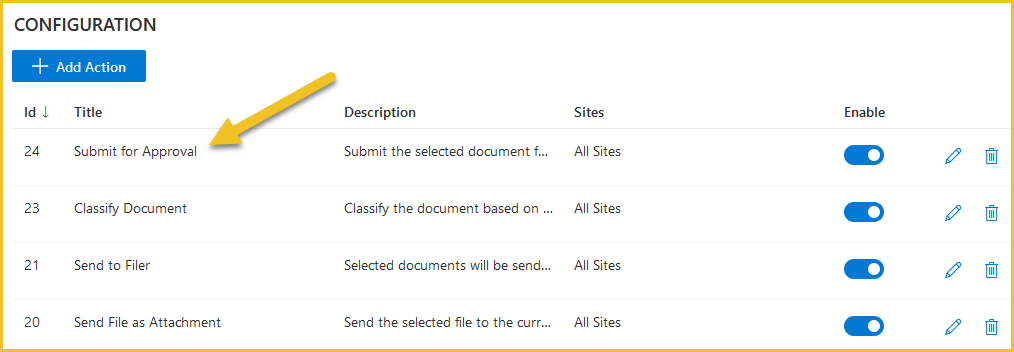
The action can be found via the Encodian Trigr App as below:
Hopefully, this post provides a detailed guide on how you can migrate your current Power Automate flows from a single document library, making them available across your entire SharePoint Online tenant with Encodian’ Trigr.’
We hope you’ve found this guide useful; please share any feedback or comments. All are welcome!
Managing Director

