For this post, we’ll explore how to add a collection of images (sometimes called an array of images) to a Word document using Encodian Flowr‘s Populate Word Power Automate action.
I have created a ‘Site Inspection’ Power App. During a site inspection, an inspector will use the app to take one or more images. Upon completion, a document containing details of the inspection and all the images with their respective comments will be created automatically.
This is just a scenario I created for this post, but it can apply to any situation where you collect multiple images and need to add them to a template document.
For ease of readability, I’ve split the post into the following sections:
The solution uses two Dataverse tables for data storage.
The first table is the ‘Inspections’ table which is used to store data about the inspection.
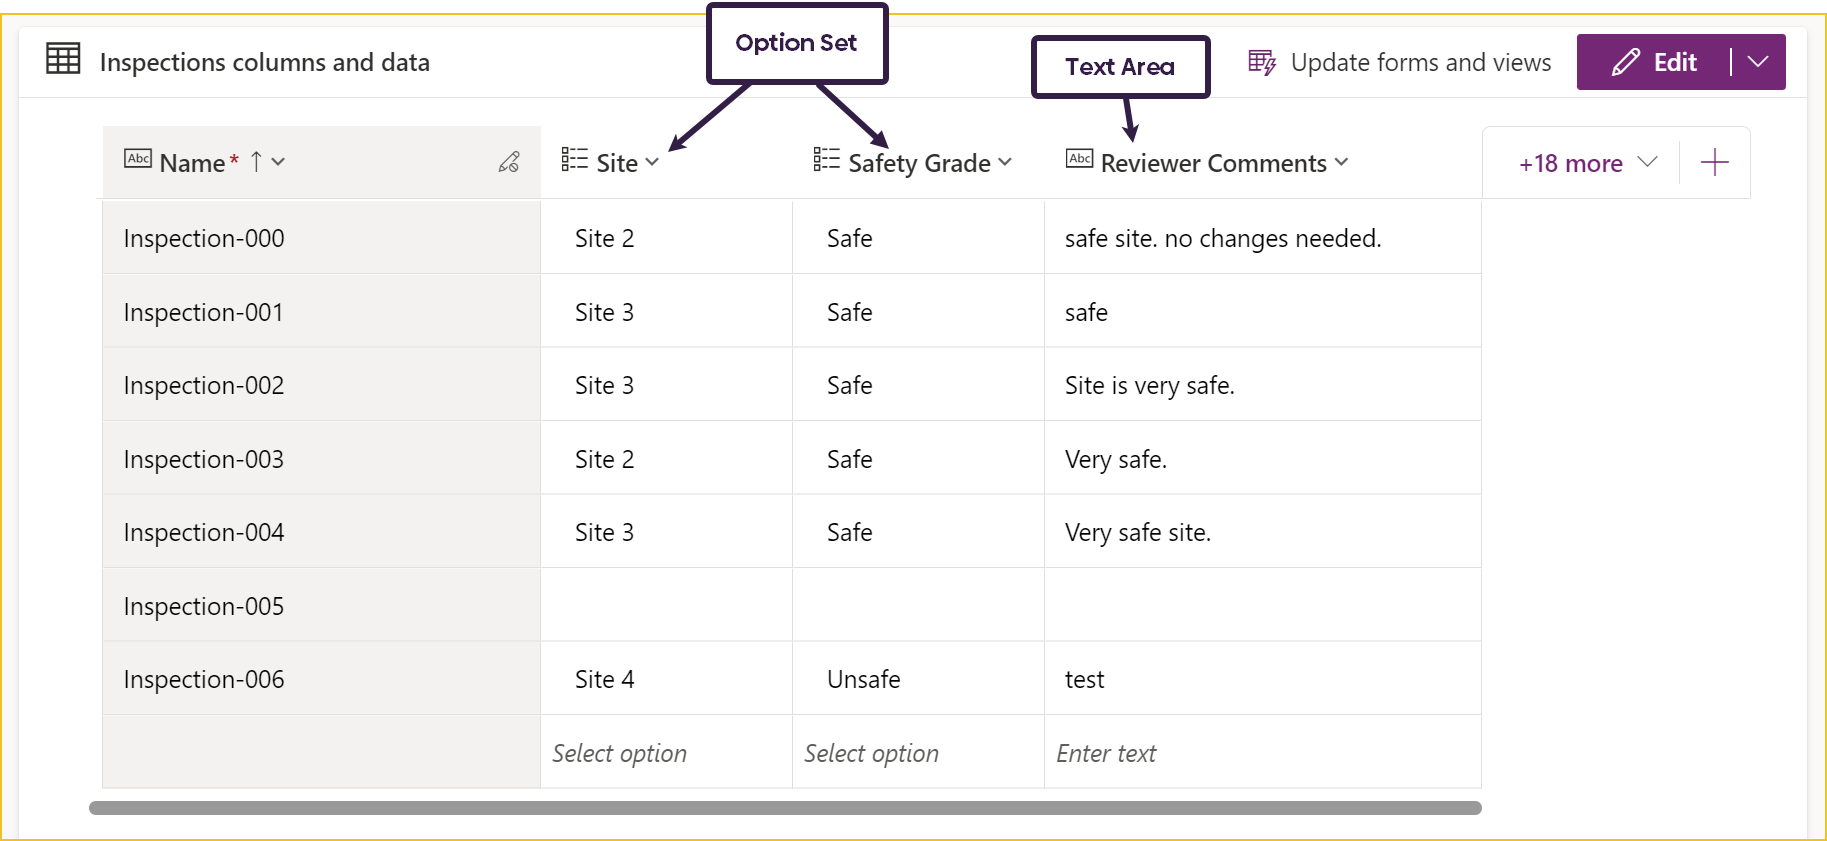
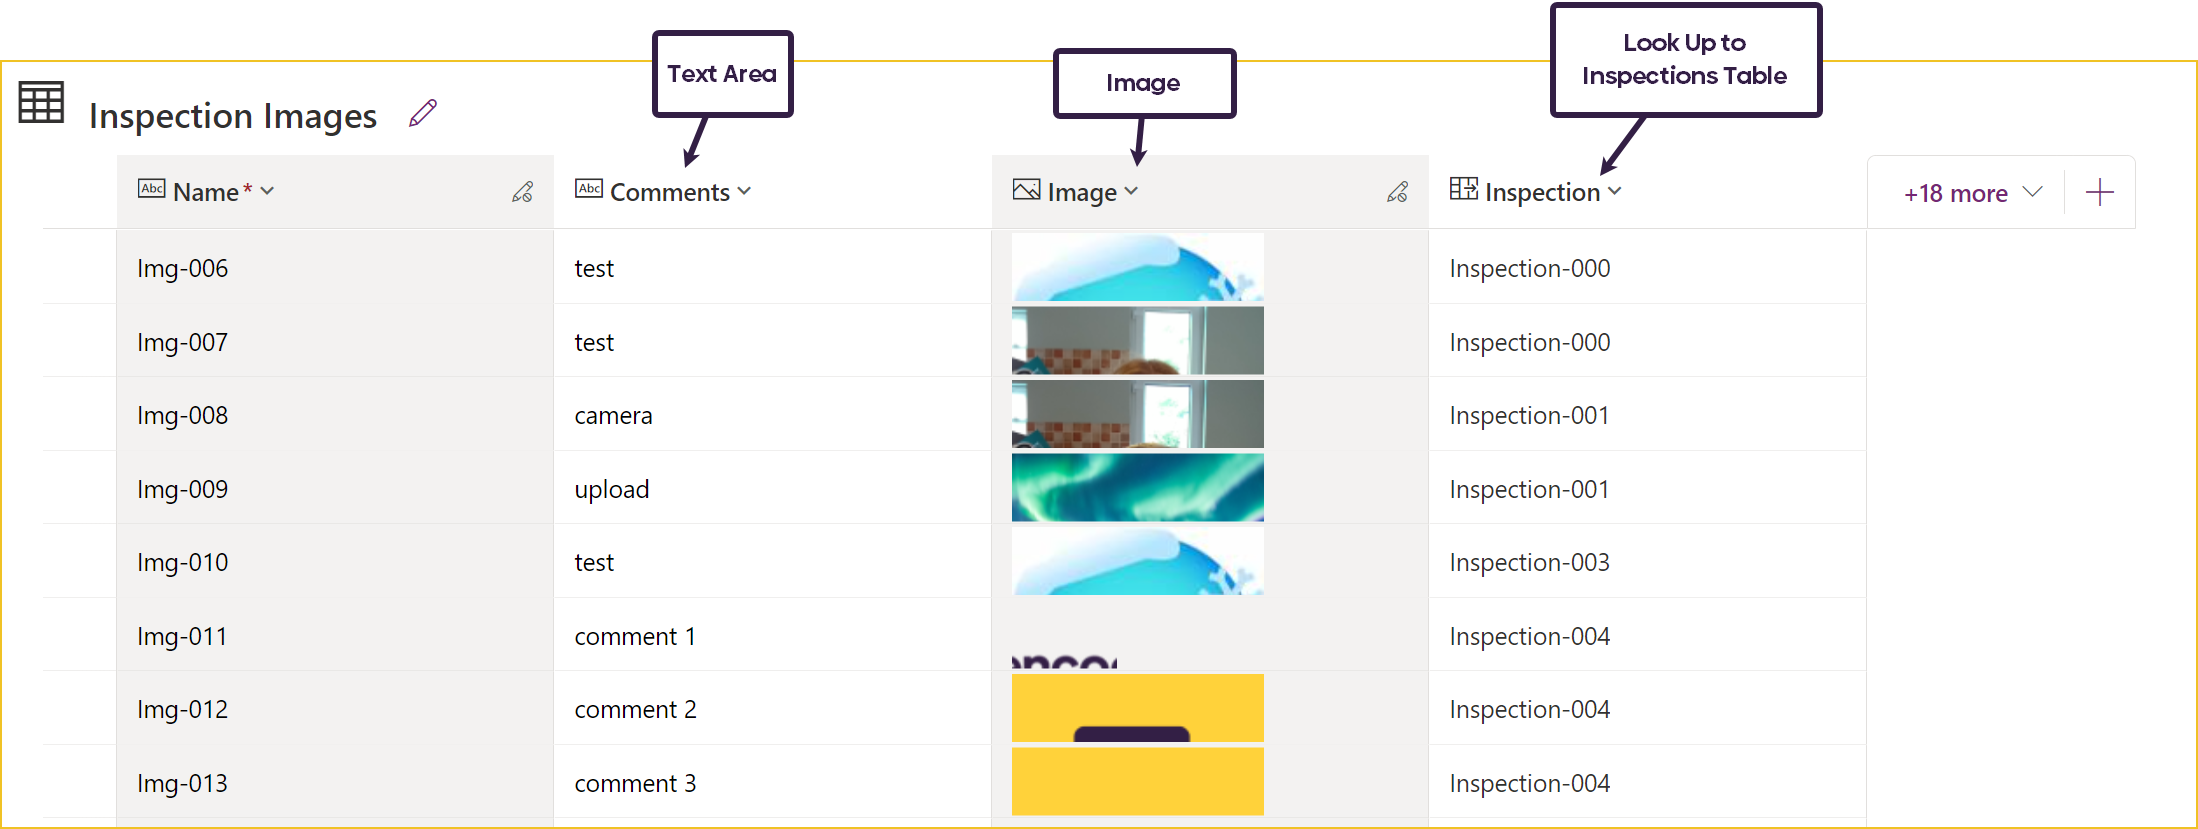
The second table is called ‘Inspection Images’ which will store all images created during an inspection. The images are saved in a separate table because there could be multiple images for one inspection. Each image is linked to its inspection through a look up field back to the ‘Inspections’ table.
The home screen contains a gallery showing listing existing site inspections and a button to add a new site inspection. Adding a new inspection takes you to a new page called ‘newInspectionScreen’.

The ‘newInspectionScreen’ page contains an edit form that links back to the ‘Inspections’ Dataverse table.
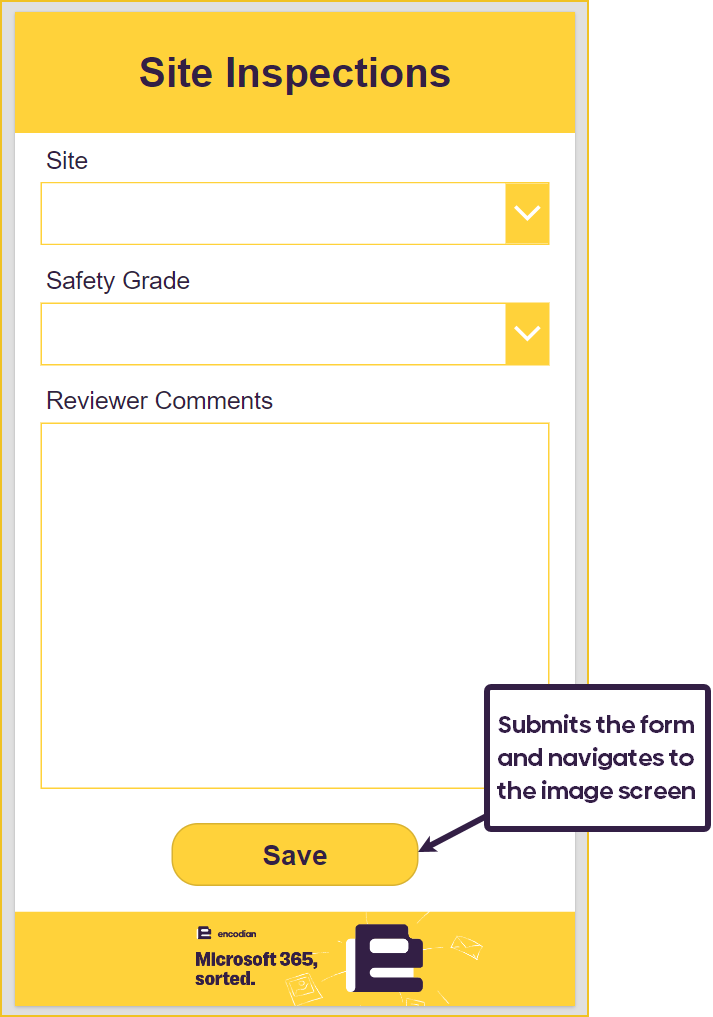
The ‘OnSelect’ property of the save button:
SubmitForm(newInspectionForm);
Navigate(imageScreen)
Upon opening the ‘imageScreen’ page two buttons are rendered enabling the user to either upload an image or take a new image:
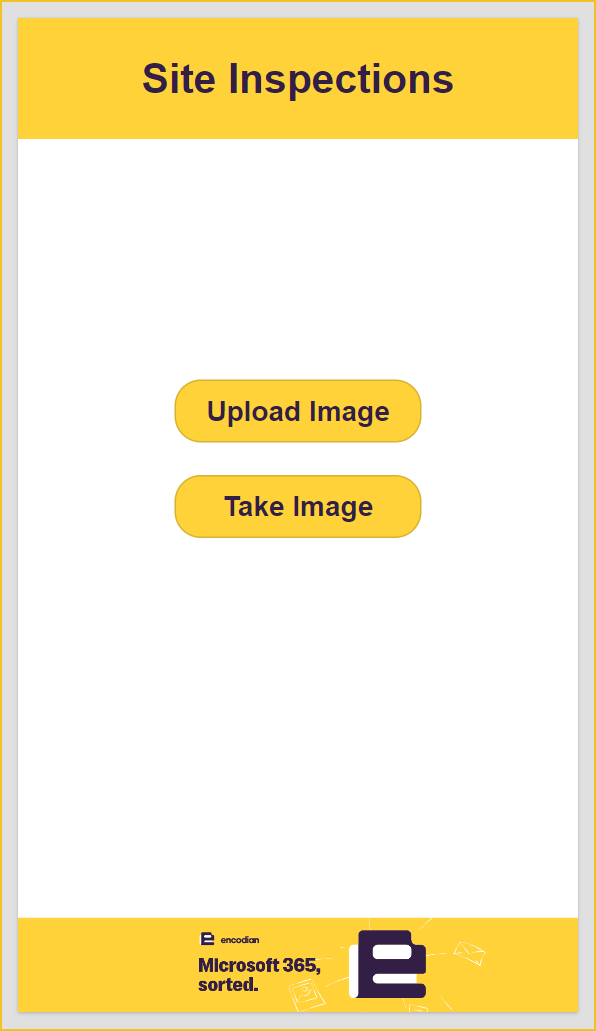
When clicked, the buttons update two variables:
Both buttons use the same visibility formula because if any of the buttons are pressed, their respective containers become visibile so we need to hide the buttons.
If(varTakeImage || varUploadImage, false, true)
The OnSelect property of the Take Image button:
 Set(varTakeImage, false);
 Set(varUploadImage, true)
The Visible property of the takeImgContainer is varTakeImage
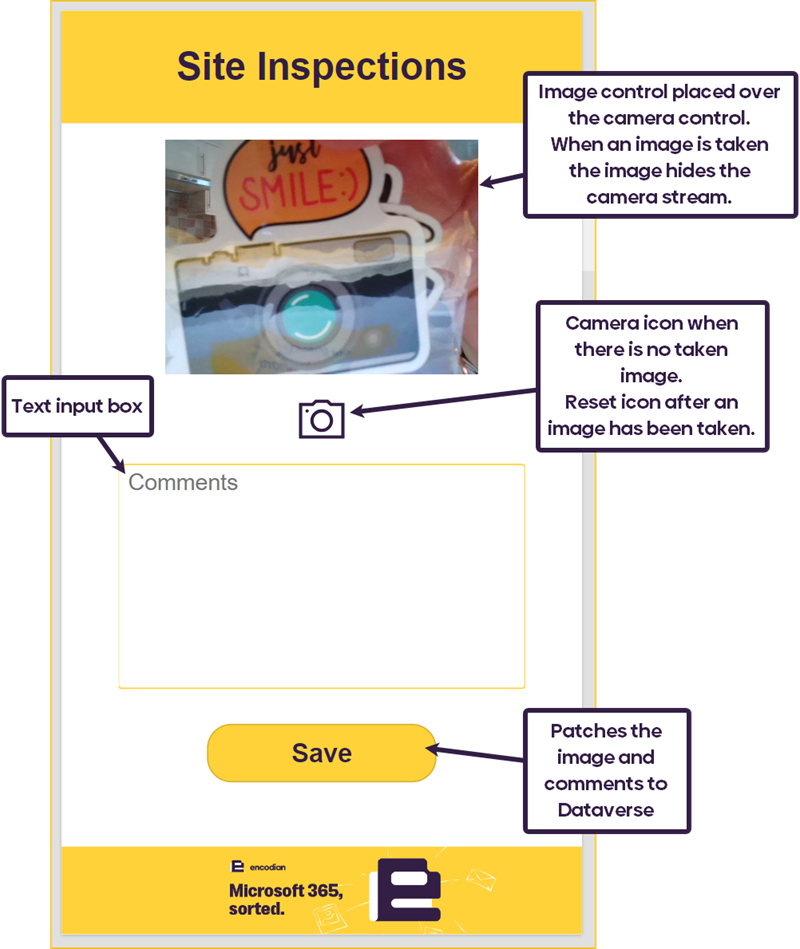
The camera control ‘StreamRate’value is set to ‘100’, which is required because Camera.Stream is used when taking an image using an icon/button. There is an image control placed on top of the camera control, the image is being set by ‘varPicture’. The OnSelect property of the camera icon is:
 If(
    Self.Icon = Icon.Camera,
    UpdateContext({varPicture: Camera.Stream}),
    UpdateContext({varPicture: Blank()})
)
This will set varPicture to the current stream coming through the camera. ‘varPicture’ is also used to control the Icon property of the camera icon:
If(IsBlank(varPicture), Icon.Camera, Icon.Reset)
If ‘varPicture’ is not blank, the reset icon will be shown instead of the camera icon. If the reset icon is pressed, it sets ‘varPicture’ to blank, erasing the taken image and setting the icon back to the camera icon.
The ‘Save’ button patches the image and the comments back to the ‘Inspection Images’ table in Dataverse. It uses newInspectionForm.LastSubmit to link the row to the ‘Inspection’ via the lookup field. After the patch, ‘varTakeImage’ and ‘varUploadImage’ are set back to false to hide the takeImgCointainer and reshow the ‘Take Image’ and ‘Upload Image’ buttons. ‘varPicture’ is set to blank, and the comments box is reset.
Patch('Inspection Images',
Defaults('Inspection Images'),
{
    Image:varPicture,
    Inspection:newInspectionForm.LastSubmit,
    Comments:captureComments.Text
}
);
Set(varTakeImage, false);
Set(varUploadImage, false);
UpdateContext({varPicture: Blank()});
Reset(captureComments)
Now, when the buttons reshow, there is a third button.

The ‘Visible’ property of this button is set to:
If(!IsBlank(LookUp('Inspection Images', Inspection.Inspections = newInspectionForm.LastSubmit.Inspections)) && !uploadImgContainer.Visible && !takeImgContainer.Visible, true, false)
This means an inspection can only be completed once at least one image has to be provided.
The ‘OnSelect’ property of the ‘Upload Image’ button:
 Set(varTakeImage, false);
 Set(varUploadImage, true)
The ‘Visible’ property of the ‘uploadImgContainer’ is controlled by ‘varUploadImage’. The container looks the same as the ‘takeImgContainer’; however, there is an upload image control rather than a camera control.
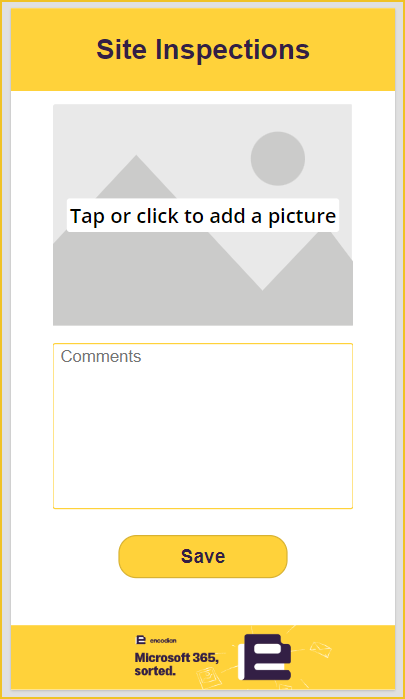
The ‘OnSelect’ property of the ‘Save’ button is also similar:
Patch('Inspection Images',
Defaults('Inspection Images'),
{
    Image:UploadedImage1.Image,
    Inspection:newInspectionForm.LastSubmit,
    Comments:uploadImgComments.Text
    }
);
Set(varTakeImage, false);
Set(varUploadImage, false);
Reset(AddMediaButton1);
Reset(uploadImgComments);
Once all the images have been uploaded, the inspection can be completed by pressing the ‘Complete Inspection’ button. The ‘OnSelect’ property of this button is:
Navigate(homeScreen);
CreateInspectionDocument.Run(newInspectionForm.LastSubmit.Inspections)
This will trigger the ‘Create Inspection Document’ Power Automate Flow to create the inspection document. We can use newInspectionForm.LastSubmit.Inspections to get the GUID of the ‘Inspection’ row added to the ‘Inspections’ table and send this value to the Power Automate trigger action.
The Power Automate Flow uses the data collected by the Power App to populate a word template, creating the ‘Site Inspection’ document.
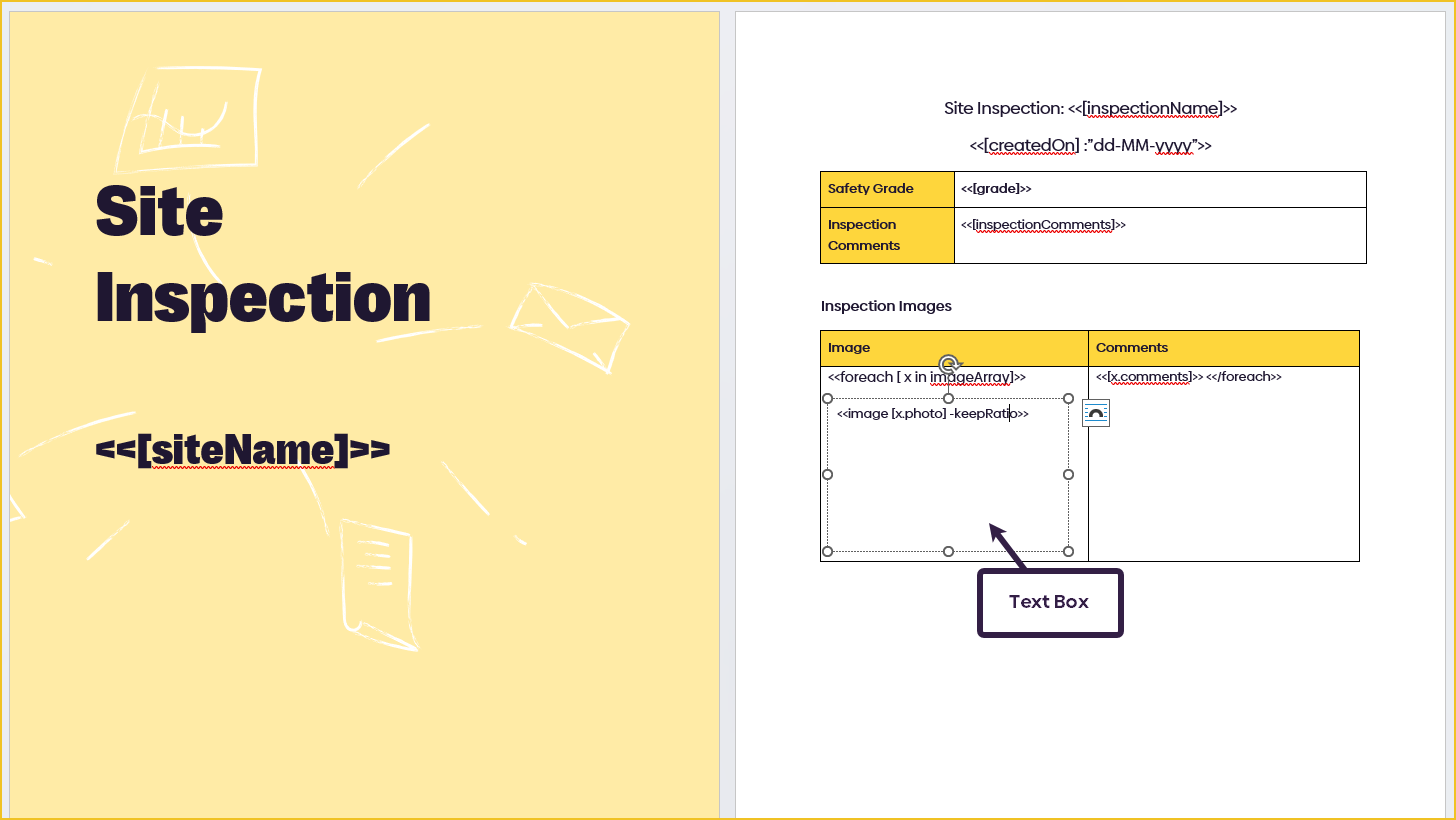
The image tag must always be inside of a text box (I have just removed the border).
The full syntax documentation for populating a Word document can be found below:
Repeating content syntax (used to add rows to the table):
Image syntax (how to add images to your templates):
Date formatting syntax (so you can change the date format from the template document):
The Power Automate Flow is manually triggered from Power Apps.
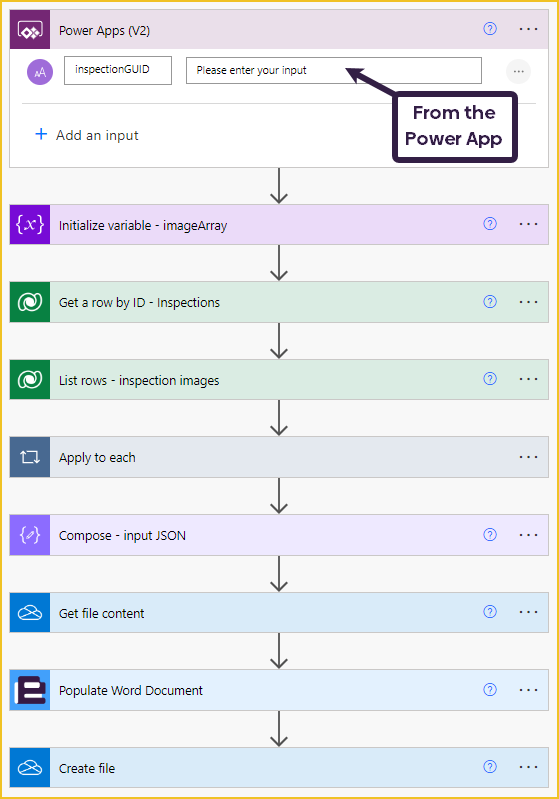
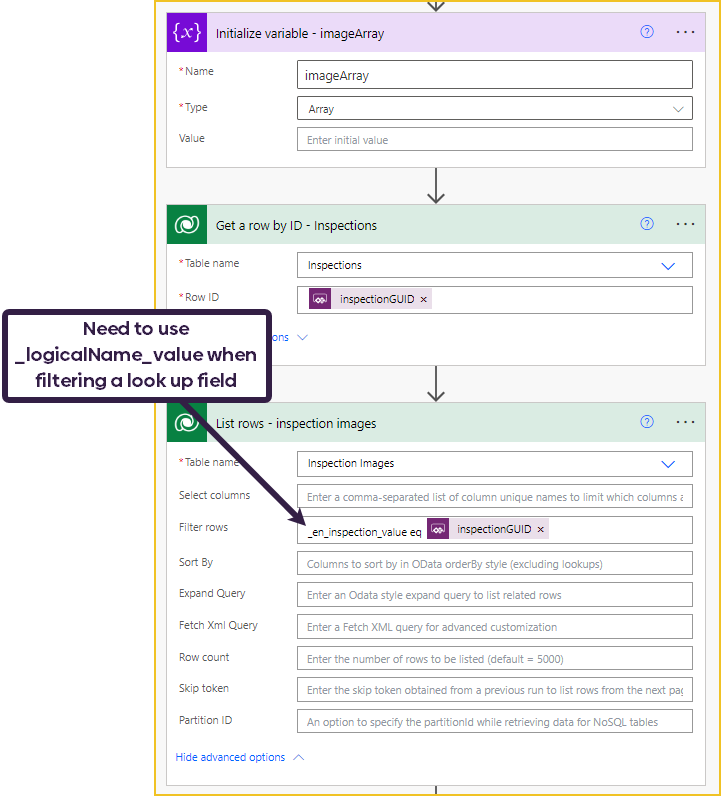
The first action in the flow initialises an array variable called ‘imageArray’. This variable will store all uploaded images and comments prior to being populated into the Word template.
Next, I am using the ‘inspectionGUID’ property provided from the Power App trigger action to get the correct row from the ‘Inspections’ table. I am also using ‘inspectionGUID’ property in the ‘List rows’ action to obtain all related images for the current inspection from the ‘Inspection Images’ table.
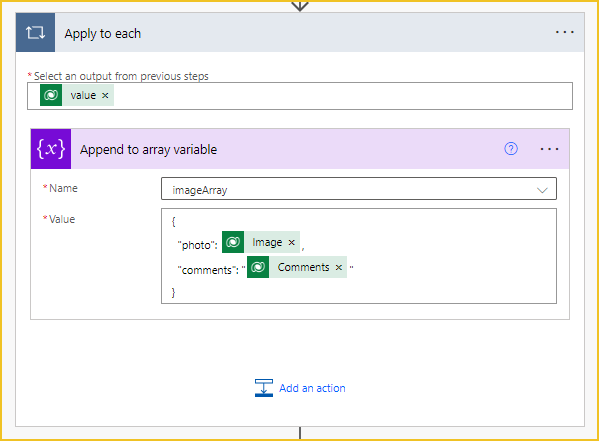
After retrieving the images, we can loop through them and append each image and associated comments to the ‘imageArray’ variable.
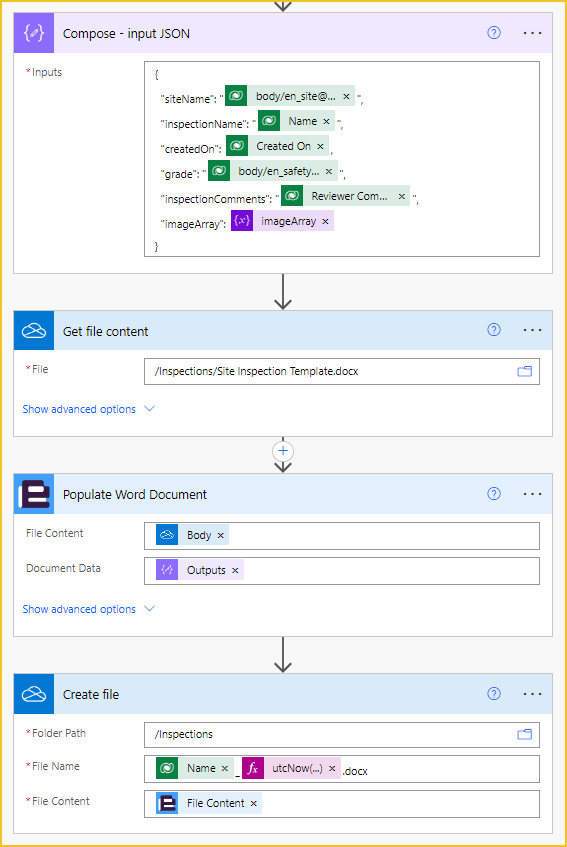
Now, we can compose our JSON dataset, which will be passed to the ‘Populate Word Document’ action! The main thing to remember here is that the JSON key values have to match the tags used in the Word template. This includes the JSON keys used in the ‘imageArray’ variable.
To populate the Word template, first, you need to get the template file content. I am using OneDrive for the solution today. Once you have the file content, you can use it in the ‘Populate Word Document’ action alongside the JSON you have just composed. Lastly, you need to create a new file with the outputs of the ‘Populate Word Document’ action to save the populated document.
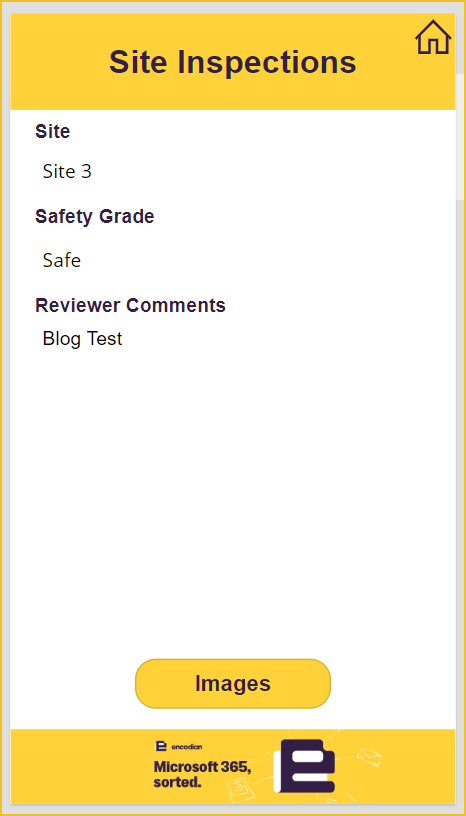

As we can see from the image, the template has been populated with the inspection data, including all 3 related images.
If you have any questions about how to add an image collection to a Word document, reach out to our support team!
Save time with 200+ actions across 9 connectors
Sign up for your free 30-day trial; no cards, catches, or contracts.
Don’t struggle! Try out our Premium Support packages today.
UPDATE: We’re excited to announce some significant updates to Flowr for Power Automate! As of October 2024, we’ve improved by updating action names and splitting Flowr’s central Power Automate connector into nine specialized connectors. These changes will make your workflow faster, smoother, and more efficient. The new action names are more precise and intuitive, saving you time, while the focused connectors enhance performance and flexibility. This update also helps future-proof the platform for even more powerful features. Check out our updated action names blog.
Technical Evangelist