In this Automate Excel series blog, we will look at deleting rows from Microsoft Excel and CSV files using the Encodian Flowr ‘Excel – Delete Rows‘ (previously named Delete Rows from Excel) action. Your data doesn’t need to be in table format to use this action; it works with structured and unstructured data!
Consider the following scenario: An ‘Accounts’ Excel file contains account information for different software packages and services used across the company. When a software package or service is no longer used, the file needs to be updated to remove relevant entries, thus keeping the ‘Accounts’ Excel file up to date.
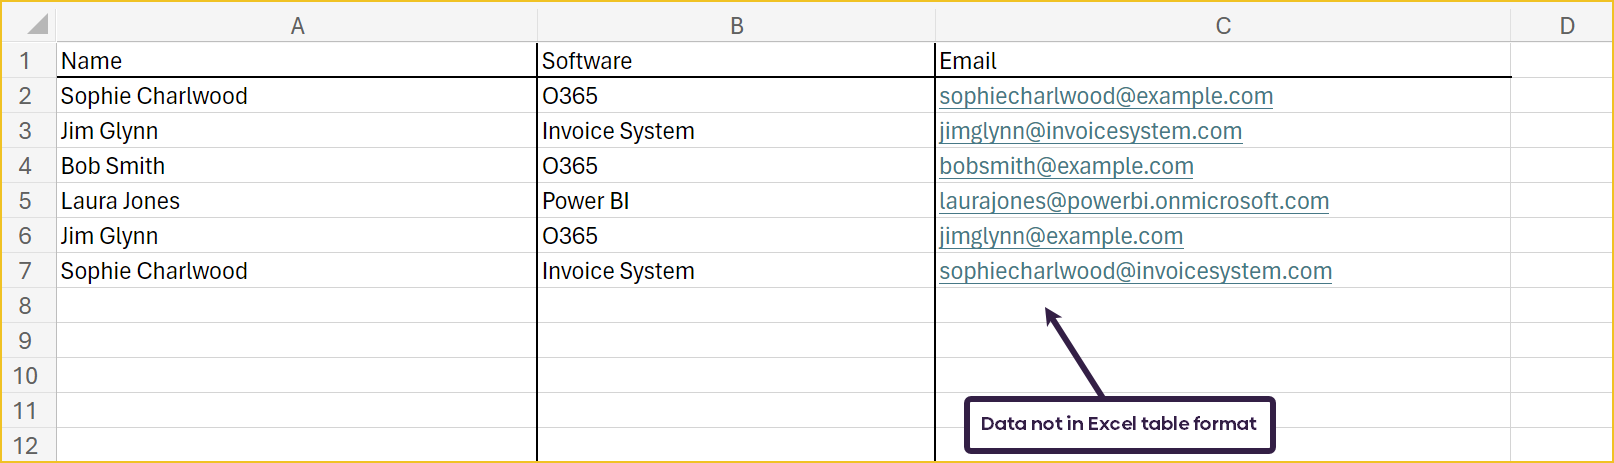
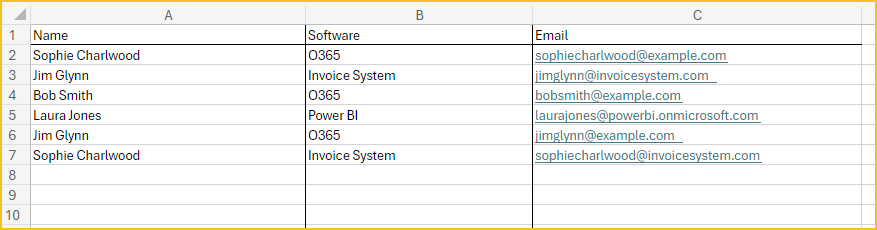
This is the ‘Accounts’ Excel file:
I’ve created a manually triggered flow with a single input variable called ‘deletedSoftware’;
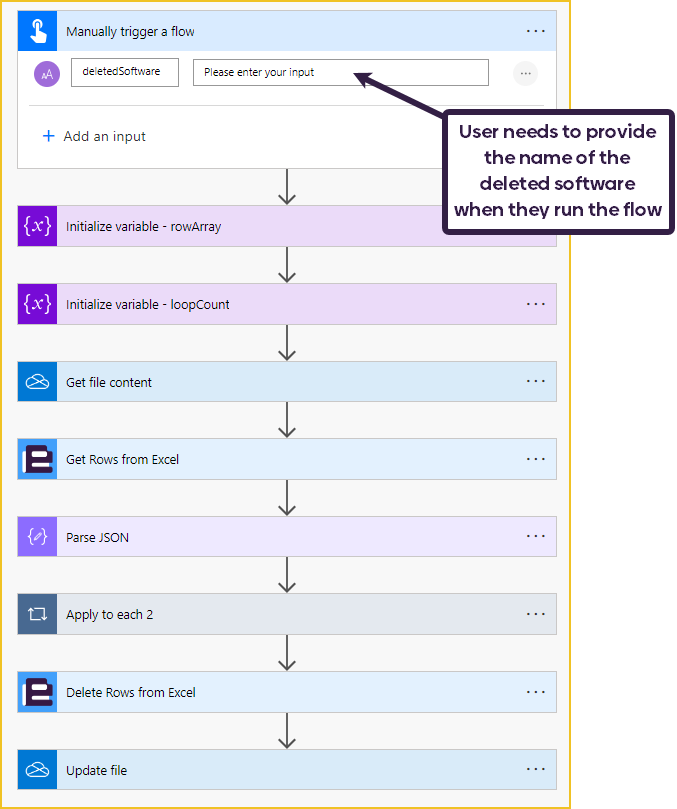
At the start of the flow, two variables are initialised:
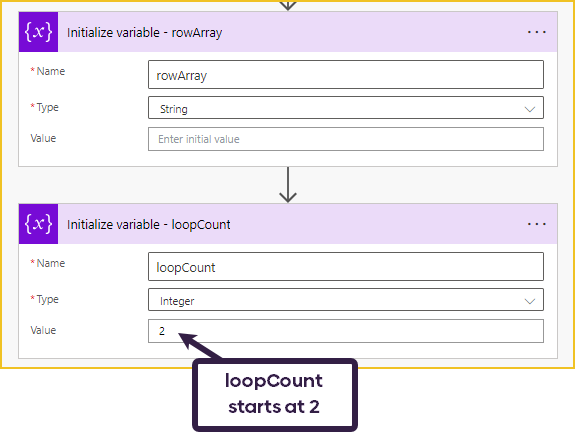
The loopCount variable starts at 2 because the data starts in the ‘Accounts’ Excel file on row 2 because row 1 is the header row.
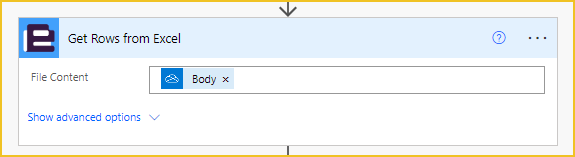
OneDrive is the data source being used, so we can use ‘Get file content’ to retrieve the ‘Accounts’ Excel file.
Next, we will be using another one of Flowr’s Excel actions called ‘Excel – Extract Rows‘ (previously named Get Rows from Excel).
We won’t be focussing on the ‘Excel – Extract Rows‘ (previously Get Rows from Excel) action in this blog post, however if you want to learn more there is another blog post that focusses on this action.
We need to loop through each row in the Excel file to find the rows of data related to the software item(s) to delete, to do this we can loop through the outputs of the ‘Excel – Extract Rows‘ action (previously called Get Rows from Excel). Row data from an Excel file is returned as JSON, so we can parse this using the ‘Parse JSON’ action before processing each row of data:
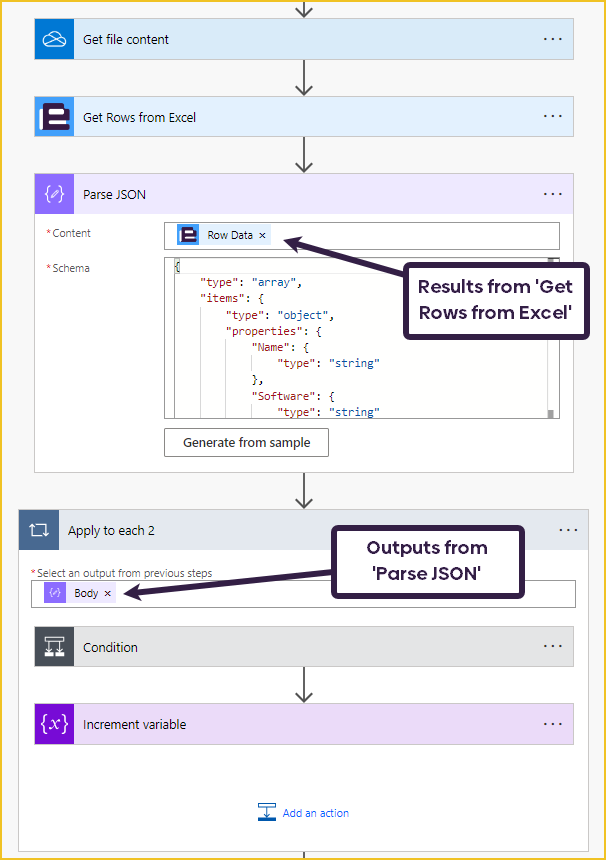
Because we have used ‘Parse JSON’, we can easily access the variables in the data. We will use this in a condition to check if the software is equal to the ‘deletedSoftware’ variable the user provided when initialising the flow. When a match is found, we’ll append the current row to the rowArray string variable.
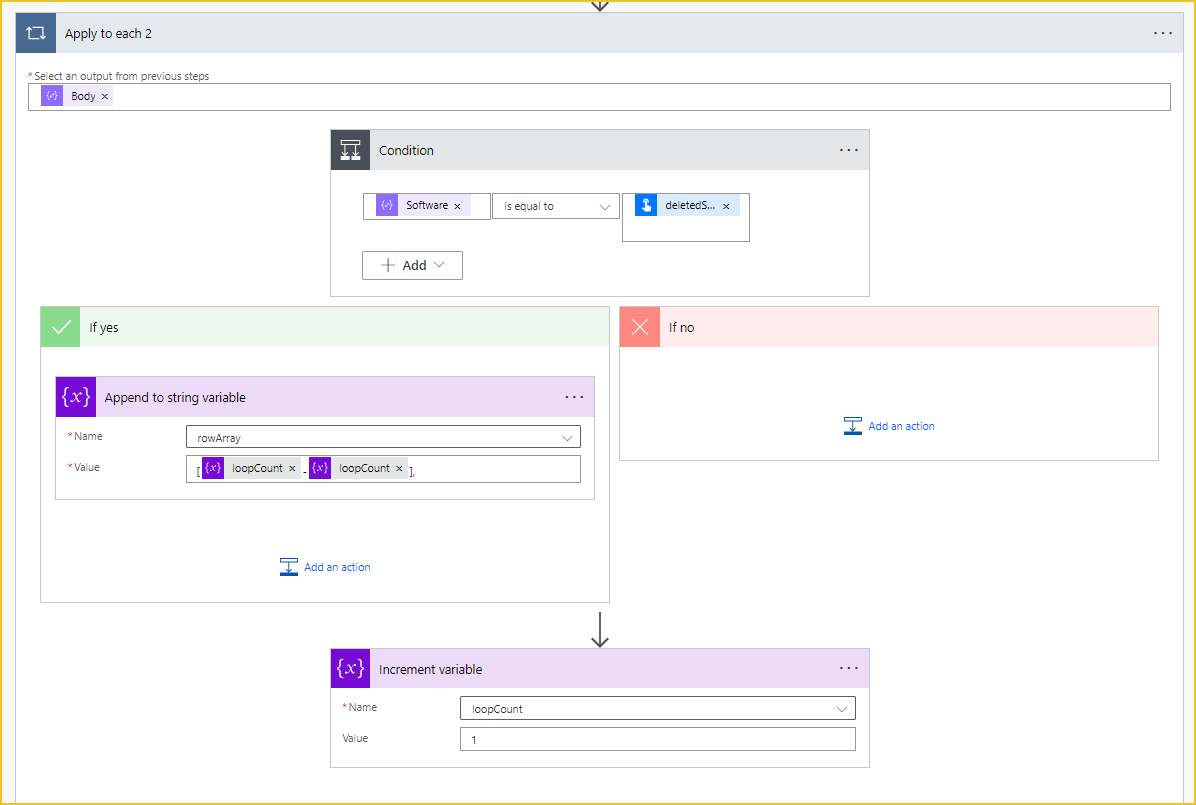
We are deleting a single row at a time, but we aren’t deleting consecutive rows. This means we need to append the current row to the rowArray like this:
[rowNumber - rowNumber]
As this is the format the Excel – Delete Rows action (previously called Delete Rows from Excel) expects when using an array input. If you were deleting rows 2-6 and 8-10, your input would be:
[2-6],[8-10]
Because we are only deleting one row, the deletion starts at that row and ends at that row. We will be using the loopCount variable as this determines the current row number in Excel.
The last step in the loop is to increment the loopCount variable.
Now, we can use the Excel – Delete Rows (previously called Delete Rows from Excel) step!
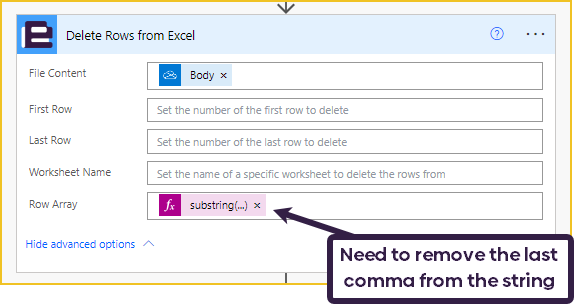
When we are appending to the rowArray string variable, we are adding a comma each time, which means the final result will look something like this:
[2-2],[8-8],
If we don’t remove the last comma, we will get an error. The comma can be removed using the following expression:
substring(variables('rowArray'),0,sub(length(variables('rowArray')),1))
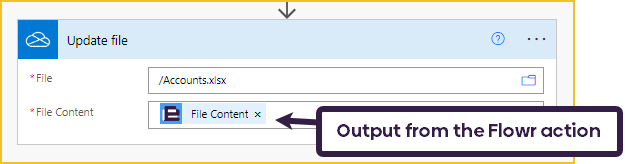
Lastly, we must update the original Excel file to delete the rows.
Let’s look at the results! I am going to be deleting any accounts for the Invoice System.
The Excel before:
The Excel after:
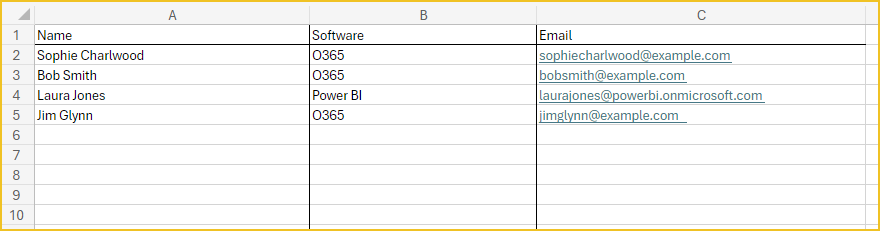
As we can see, there are no more accounts for the Invoice System software and we now only have 4 rows in the table, so 2 were deleted.
Watch Sophie’s companion video
Search 200+ Actions to see how Flowr can save you time
Sign up for your free 30-day trial; no cards, catches, or contracts.
No job is too big or too small for our Professional Services team!
UPDATE: We’re excited to announce some significant updates to Flowr for Power Automate! As of October 2024, we’ve improved by updating action names and splitting Flowr’s central Power Automate connector into nine specialized connectors. These changes will make your workflow faster, smoother, and more efficient. The new action names are more precise and intuitive, saving you time, while the focused connectors enhance performance and flexibility. This update also helps future-proof the platform for even more powerful features. Check out our updated action names blog.
Technical Evangalist

