For this post, let’s explore how you can add business data (or any data) to Excel files using Encodian Flowr’s ‘Excel – Populate‘ action (previously known as ‘Populate Excel’). This action works very similar to the ‘Word – Populate‘ (previously, ‘Populate Word’) and ‘PowerPoint – Populate‘ (previously, ‘Populate PowerPoint’). actions, using the same syntax tags.
This post is based on the following scenario: The sales team uses a ‘Sales’ model-driven PowerApp to record new sales. On completion of a sale, the user can generate an invoice using the data collected within the PowerApp before automatically emailing this to the customer.
The solution uses three Dataverse tables:
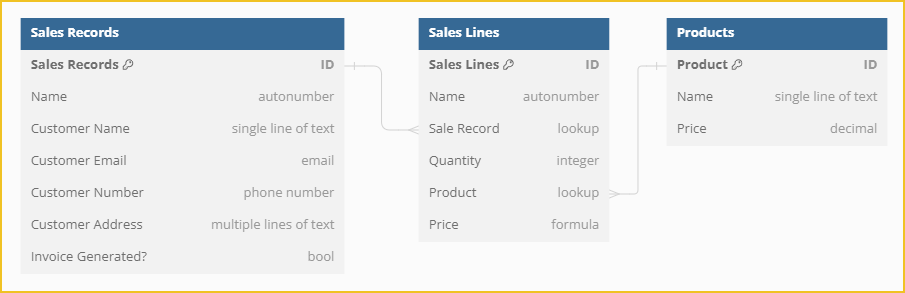
Each new sale is represented by a single ‘Sales Record’. Each ‘Sales Record’ can contain multiple ‘Sales Lines’. The ‘Price’ field in the ‘Sales Lines’ table is a formula field that multiplies the chosen product’s price by the quantity of items:
Product.Price * Quantity
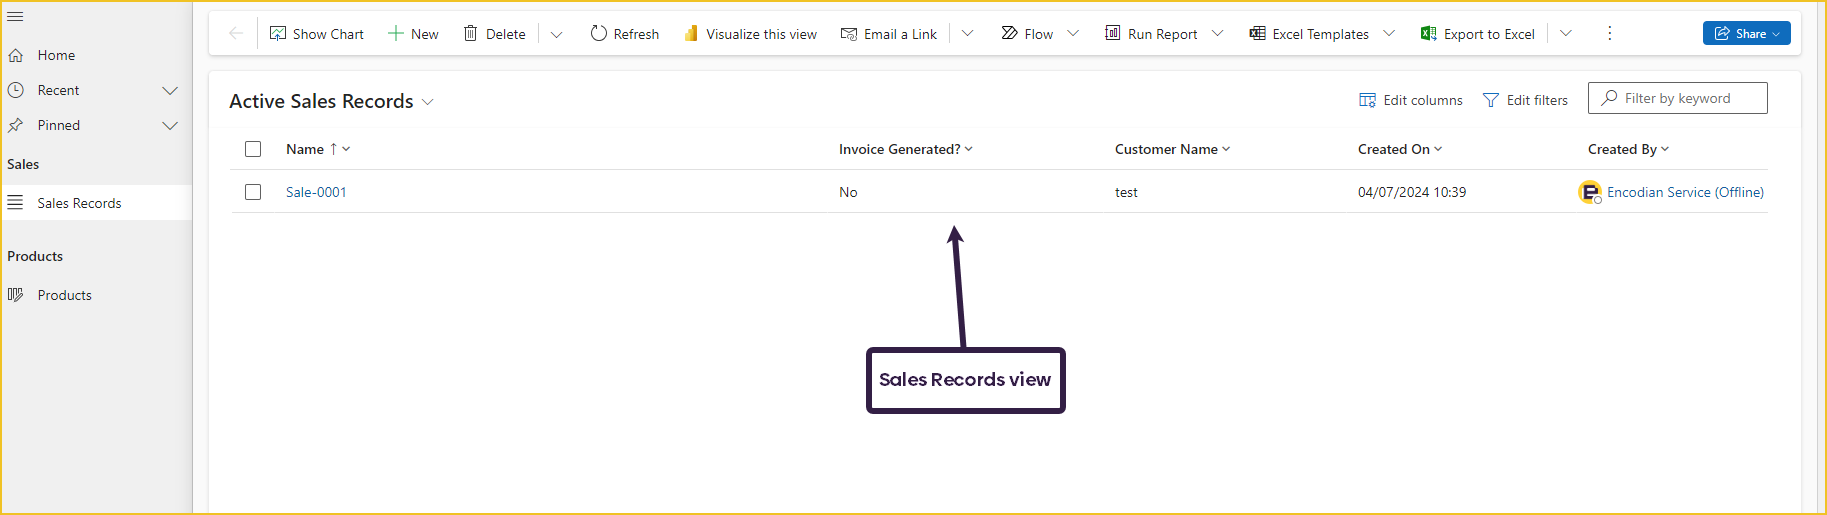
These tables have been used to create a simple Model Driven App.
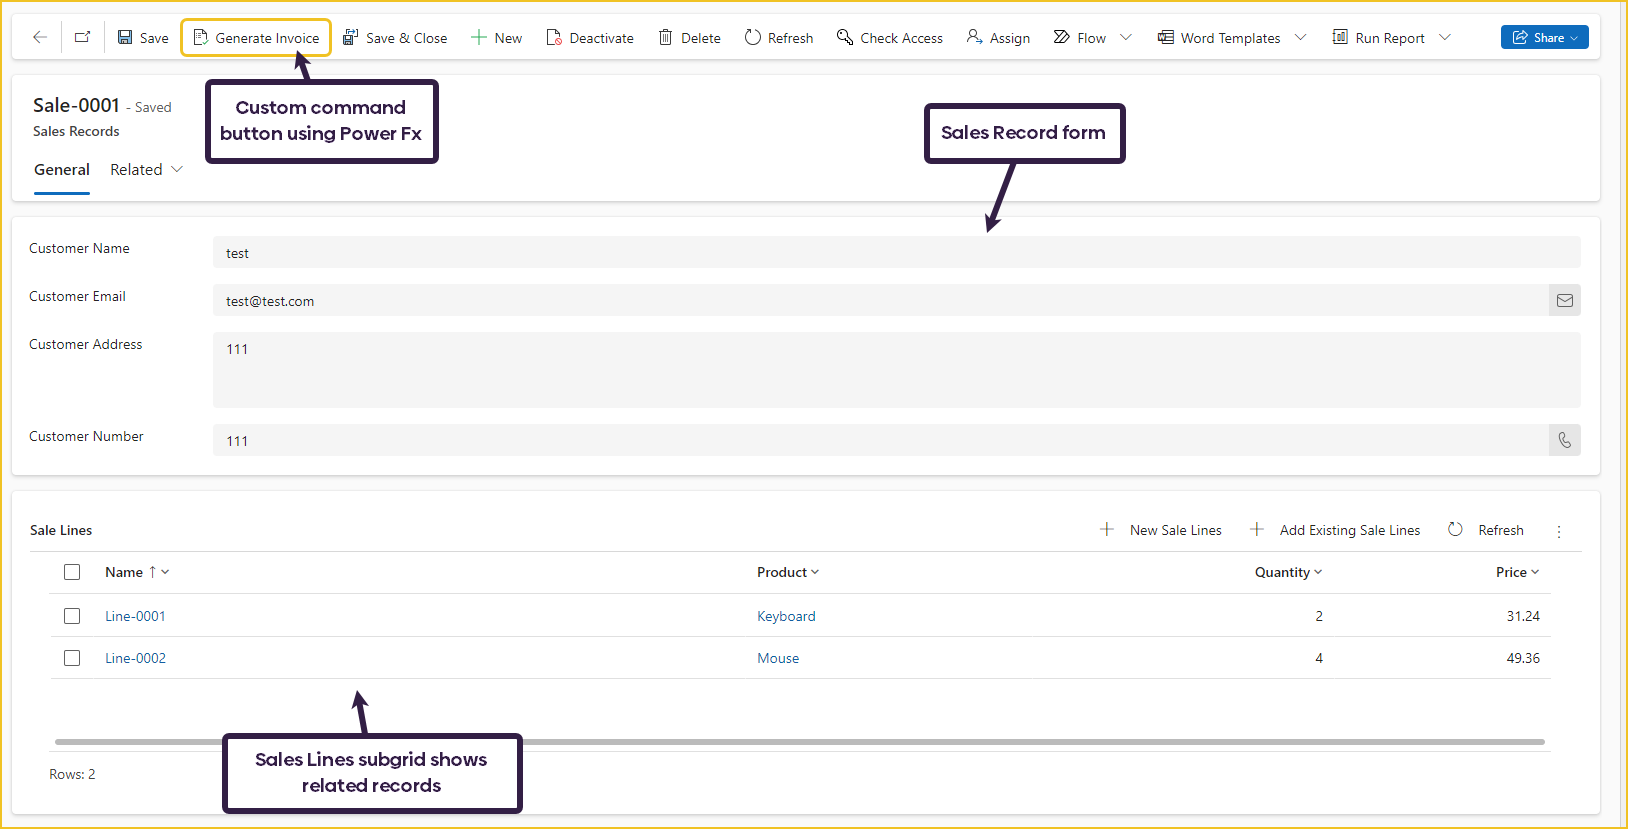
Upon completing the ‘Sales Record’, the user can press the ‘Generate Invoice’ command button. This is a custom command button that uses Power Fx. Unfortunately, when this blog was written you can’t trigger Power Automate flows directly from custom commands, however, you can patch a data source to update a field in a Dataverse table. This in turn can trigger a flow. When this button is pressed, it changes the ‘Invoice Generated?’ field on the Sales Record table from false to true using the following formula:
Patch('Sales Records', Self.Selected.Item, {'Invoice Generated?': true});
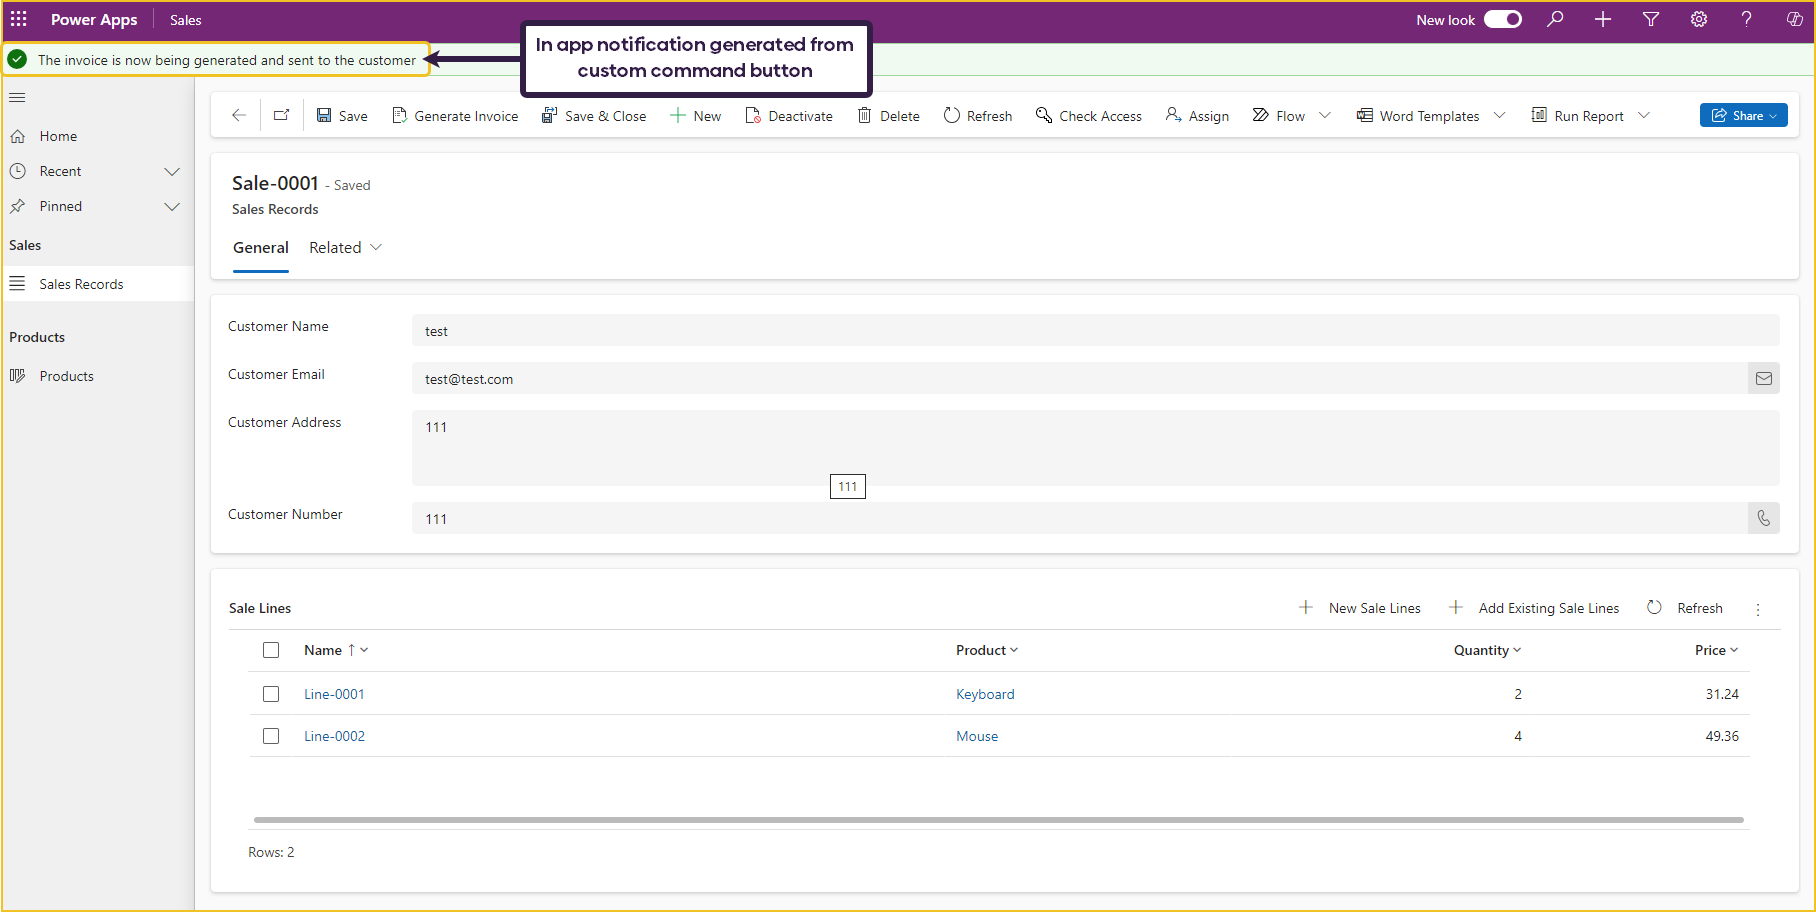
Notify("The invoice is now being generated and sent to the customer", NotificationType.Success)
After the patch is complete, the app will notify the user that the invoice is now being generated.
To learn more about custom command bar buttons, please look at the following Microsoft Learn link:
Fredrik Engseth has also written a great Power Fx command bar cheat sheet:
Flowr’s ‘Excel – Populate’ action works by populating an Excel template with the JSON data provided. This means you need to design the template file and save it in a location accessible by Power Automate.
It is easy to add the syntax tags to your Excel file, you just need to type them in where you want to add the data! There is already full documentation on the syntax you need to use for populating Excel available.
The action doesn’t just limit you to adding in text, numbers and dates you can also:
The invoice template being used for this solution looks like this:
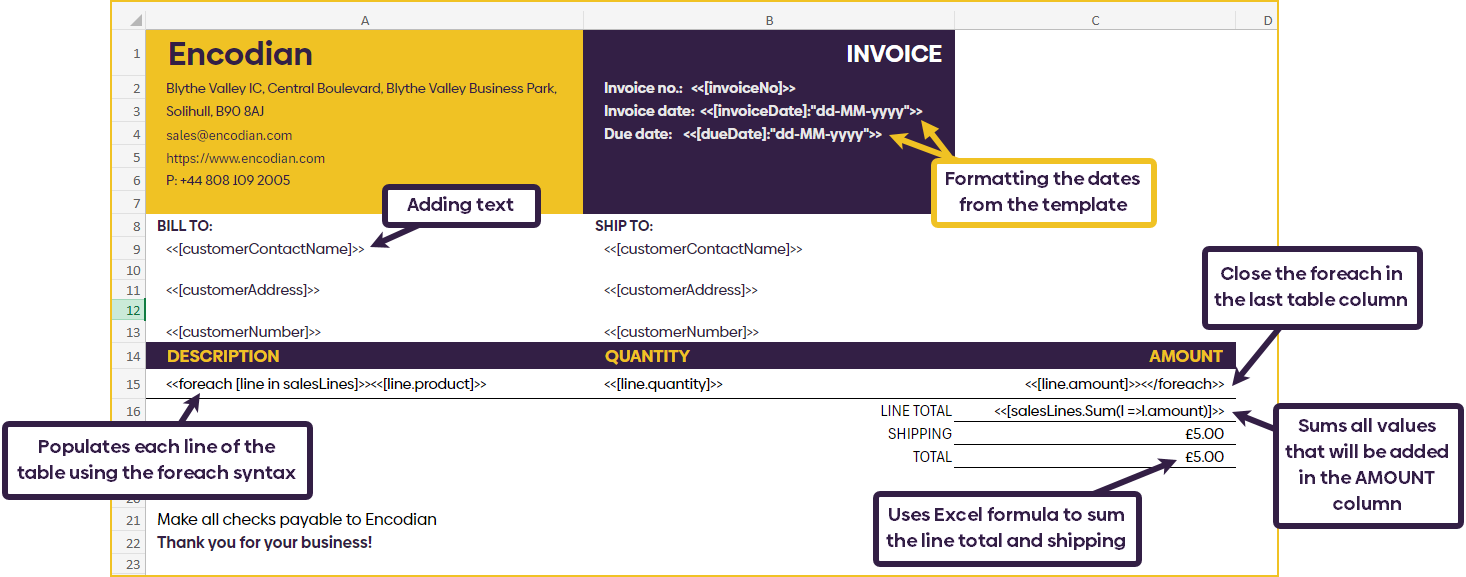
As we will see later in the blog, ‘salesLines’ are added as an array to the input data JSON for the ‘Populate Excel’ action. This means we can loop it through in the template document to add the details line by line to the table.
The table in the template document is unstructured data and hasn’t been converted to an Excel table, but this syntax will work for both structured and unstructured formats.
The Power Automate Flow is triggered by the ‘When a row is added, modified, or deleted’ trigger action, which is set to run only when the row is modified. We want the flow to run when the ‘Generate Invoice’ command button changes the field ‘Invoice Generated?’ from false to true. This means we can use the column name in the ‘Select columns’ input, too.
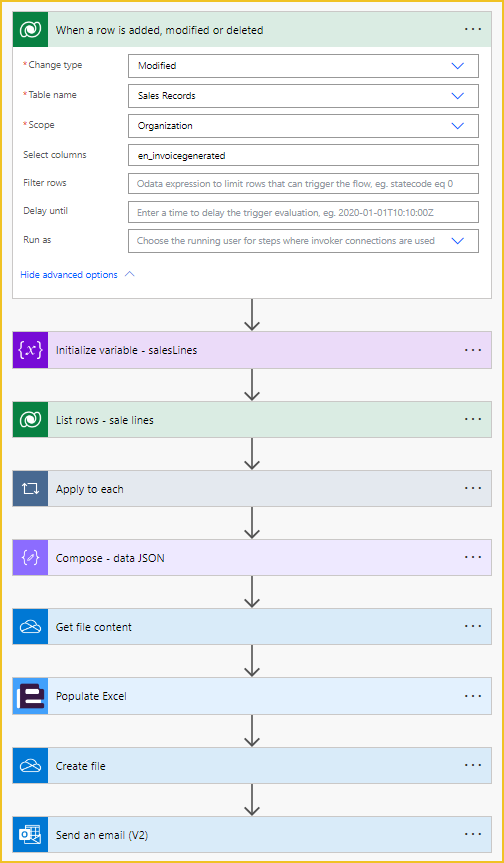
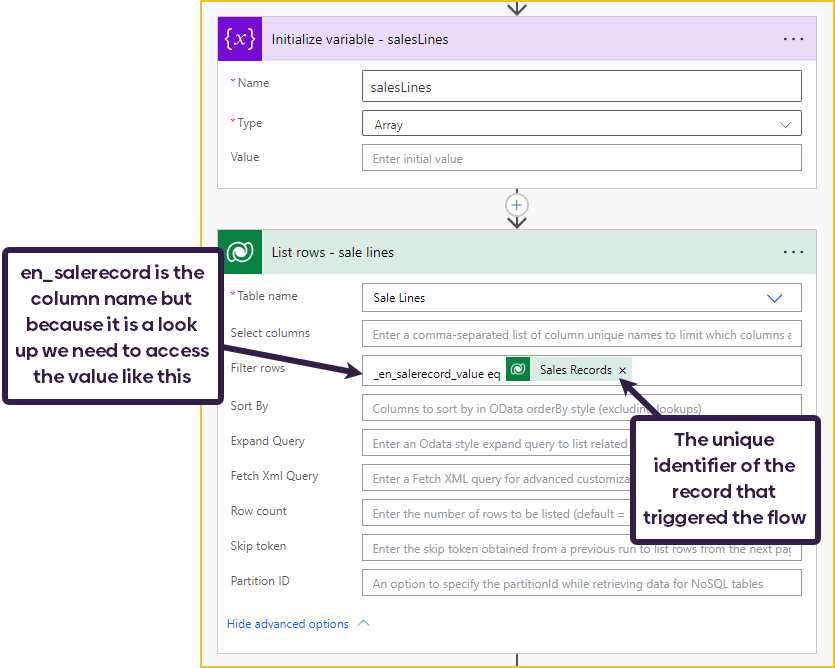
The first action is to initialise an array variable called ‘salesLines’. We will be appending data to this array as we loop over any ‘Sales Lines’ records related to the parent ‘Sales Record’ (the record that has triggered the flow). To get these related records, we can use the Dataverse ‘List rows’ action with a filter query filtering _en_salerecord_value.
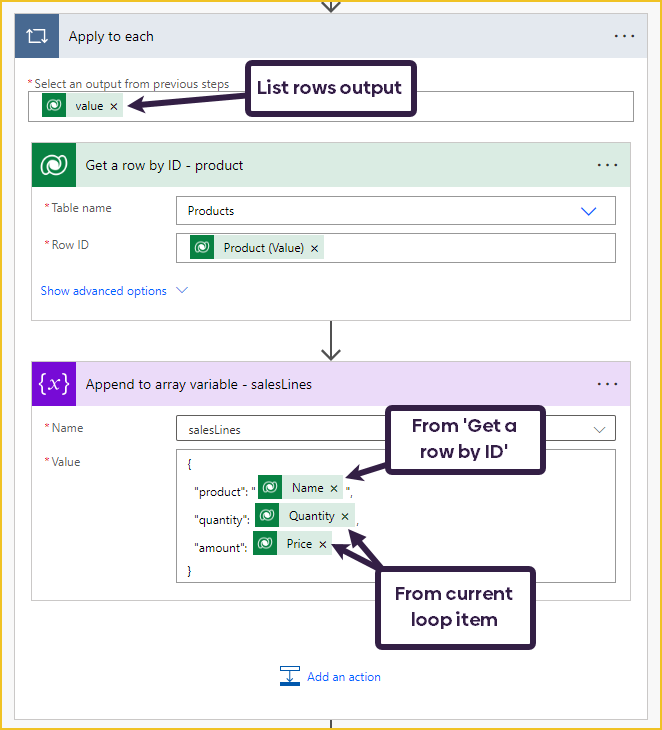
Now we can loop through all the related records in an ‘Apply to each’. For each record, we need to use the Dataverse ‘Get a row by ID’ action to find the product related to the sales line. Once we have the product, we can then append a JSON to the ‘salesLine’ array variable:
{
"product": "@{outputs('Get_a_row_by_ID_-_product')?['body/en_name']}",
"quantity": @{items('Apply_to_each')?['en_quantity']},
"amount": @{items('Apply_to_each')?['en_price']}
}
The ‘salesLines’ array has now been populated! Now, we can compose the input data JSON for the ‘Excel – Populate’ (you can see in the screenshot, the previous name, Populate Excel) action. The JSON key values must match the syntax tags used in the Excel template, or the action will not input the data correctly! I have added an image of the template again to reference the syntax tags used.
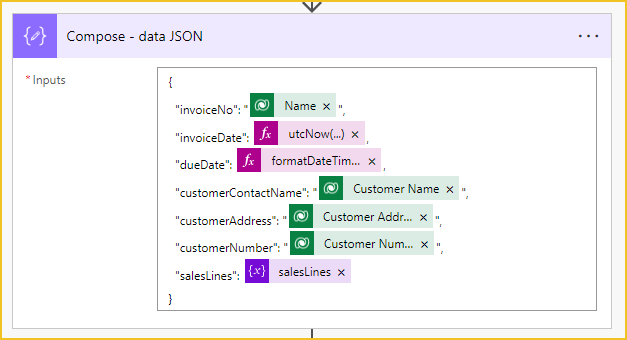
invoiceDate: utcNow('dd-MM-yyyy')
dueDate: formatDateTime(addDays(utcNow(),14),'dd-MM-yyyy')
The Excel template is stored in OneDrive, so I am using the OneDrive ‘Get file content’ action. Once we have the template file content, we can use the ‘Populate Excel’ action.
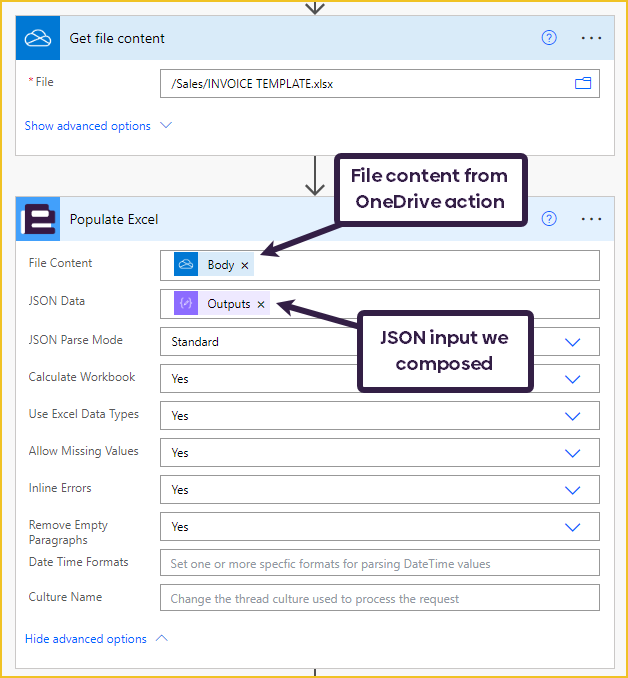
The output from the ‘Excel – Populate’ (previously ‘Populate Excel’) file is a new file, a copy of the given template file populated with the data supplied to the action. We can save this as a new file in OneDrive and email the invoice to the customer.

This is the sales record in the app:

This is the email the customer recieved with the populated invoice:
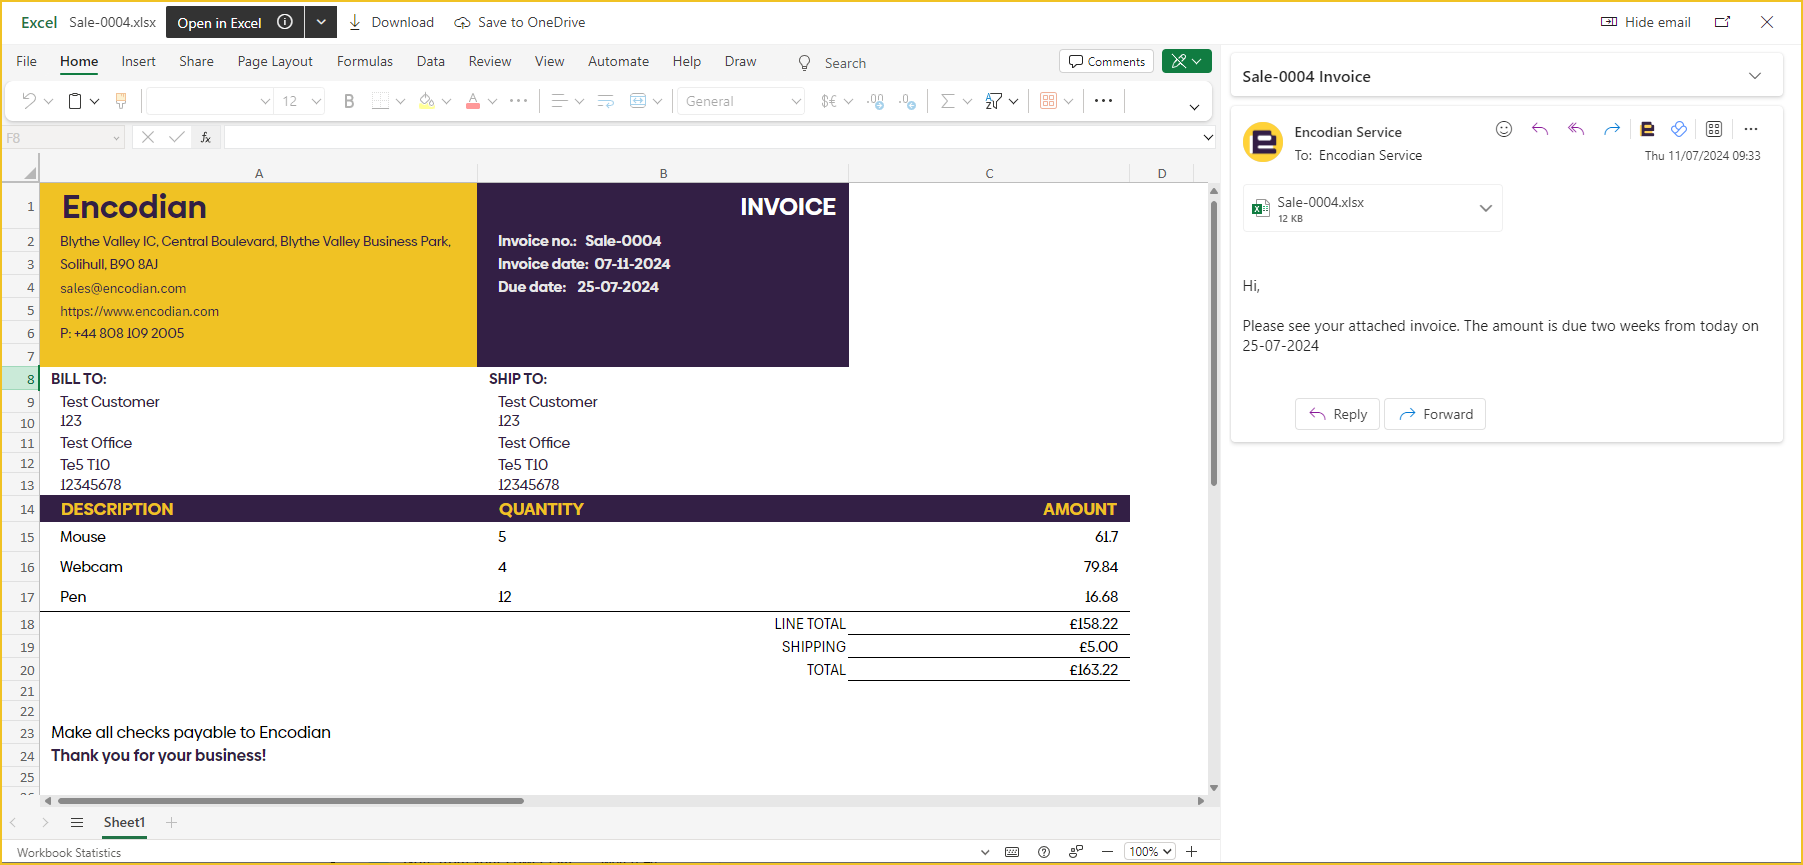
As we can see from the image, the template has been populated correctly with all the details for this sale.
You could also add an extra step to the Power Automate to convert the Excel file to a PDF before sending it to the customer.
Search 200+ Actions to see how Flowr can save you time
Sign up for your free 30-day trial; no cards, catches, or contracts.
No job is too big or too small for our Professional Services team!
UPDATE: We’re excited to announce some significant updates to Flowr for Power Automate! As of October 2024, we’ve improved by updating action names and splitting Flowr’s central Power Automate connector into nine specialized connectors. These changes will make your workflow faster, smoother, and more efficient. The new action names are more precise and intuitive, saving you time, while the focused connectors enhance performance and flexibility. This update also helps future-proof the platform for even more powerful features. Check out our updated action names blog.
Technical Evangelist

